How to Add Shopify Sections to Your Store?
In the competitive world of eCommerce, having a visually appealing and well-structured online store is crucial to attract and engage customers. Shopify, a renowned eCommerce platform, offers a powerful feature called Shopify sections that enables merchants to effortlessly customize and design their storefronts.
Whether you're a seasoned Shopify user or new to the platform, this step-by-step guide will walk you through the process of adding Shopify sections to your store. Discover how to enhance your store's visual appeal, optimize the user experience, and create a unique brand identity with the help of Shopify sections.
Let's dive in!
What are Shopify sections?
Shopify sections are Liquid-coded content block designed for Shopify themes. They give you the option to personalize your store and present stuff in novel and inventive ways.
An excellent method to improve your store without starting a huge design revamp is by adding a new section to your website. You can quickly add a content block template that will improve the appearance of your website and communicate your message to visitors in a straightforward, attractive, and effective manner with the use of our customized Shopify Liquid section blocks.
There are sections that are static and dynamic. The layout files for a theme contain static portions in addition to the header and footer regions. Your pages can include dynamic sections using the Theme Editor. Consider them as the many components of your page's structure.
How to add custom sections in Shopify?
The ability to customize Shopify sections in the theme editor is their biggest draw.
We are going into great detail on this subject in our guide to customizing Shopify themes, but we'll just briefly touch on it here.
Customize sections and blocks
Once everything is in its proper position, you should customize the sections and blocks to make sure they best reflect your vision for the website.
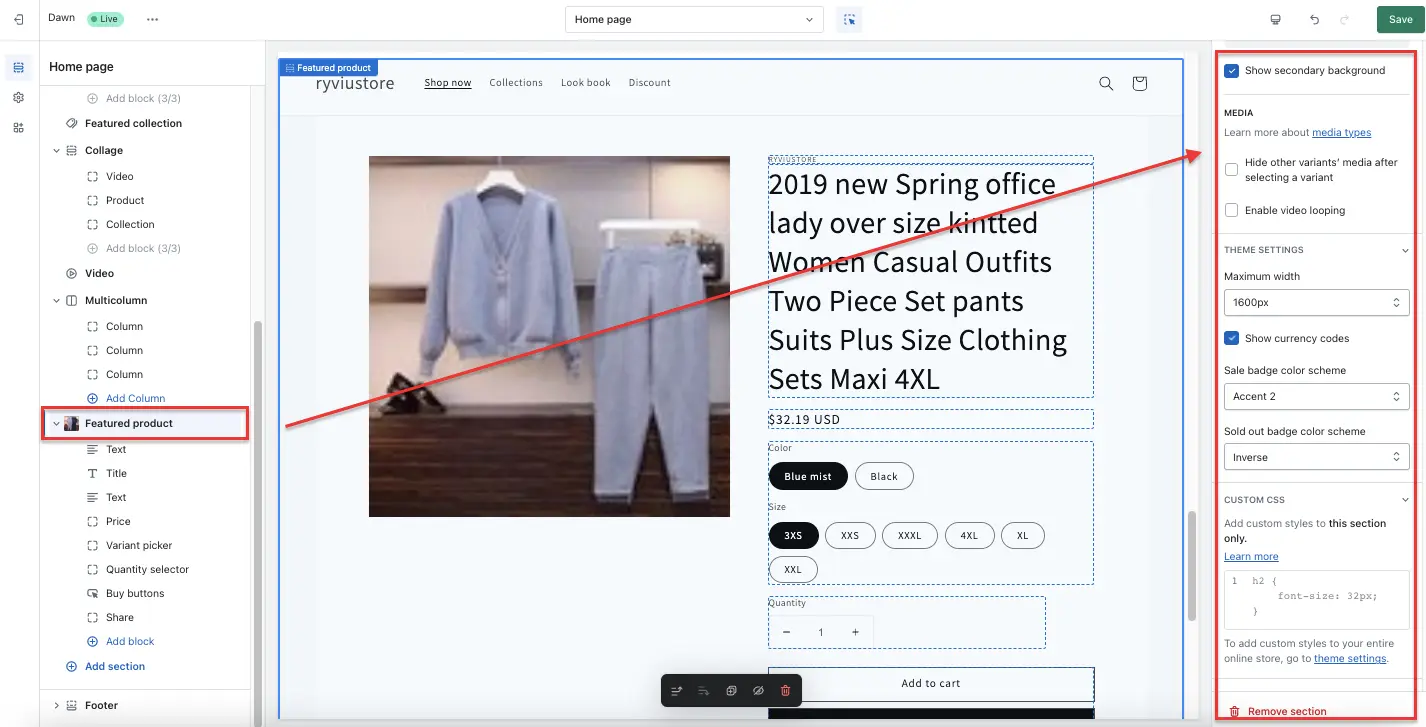
The customization menu will appear on the right side of the screen when you click the section or block.
The theme determines the customization possibilities for each section and block.
Things like headline text, picture displays, alignment, colors, padding, and margins can all be changed. There will be a wide range of alternatives in certain sections and a small number in others.
How to add custom sections in Shopify code editor?
If you have a section that was specially written for your Shopify theme, adding it using the code editor is rather easy.
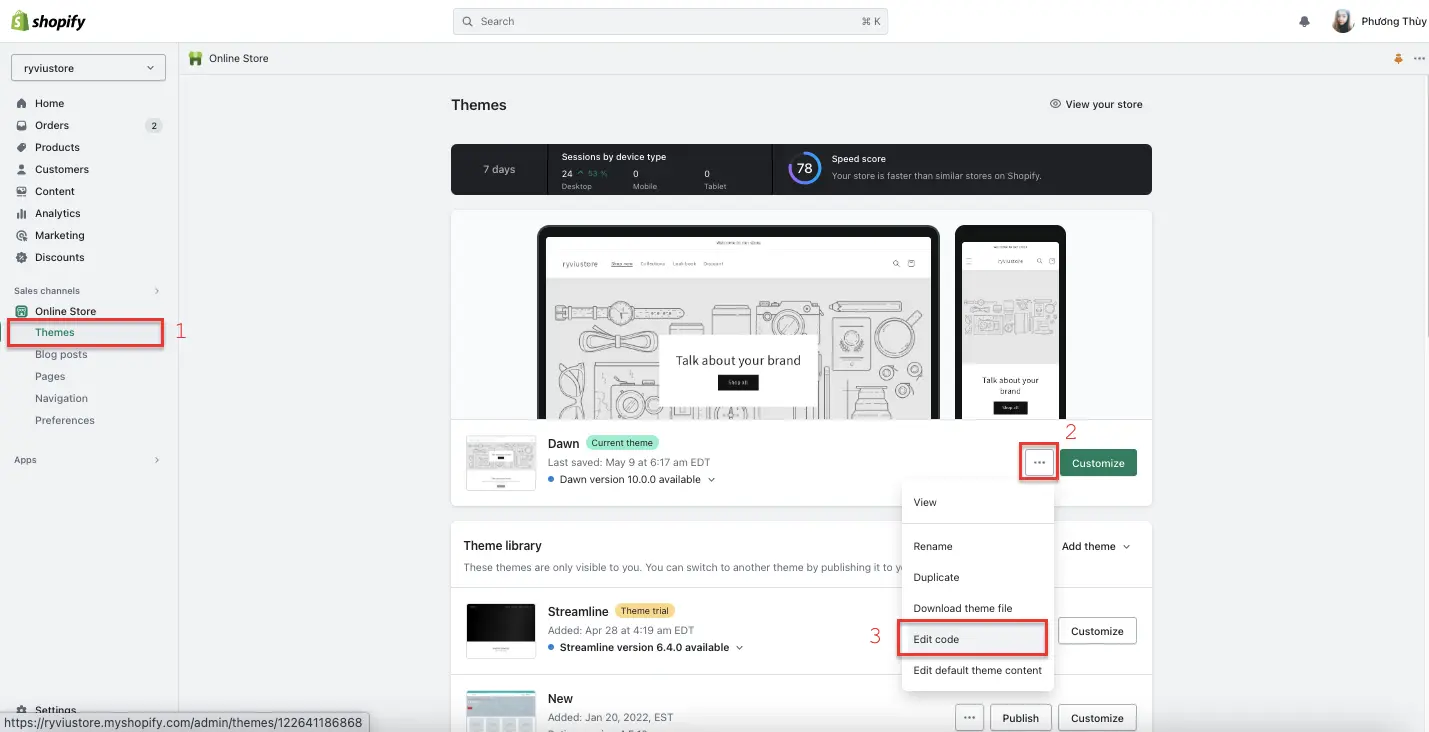
Experienced developers are advised to complete this work. Despite being a user-friendly scripting language, Liquid, simple formatting mistakes can easily ruin your theme.
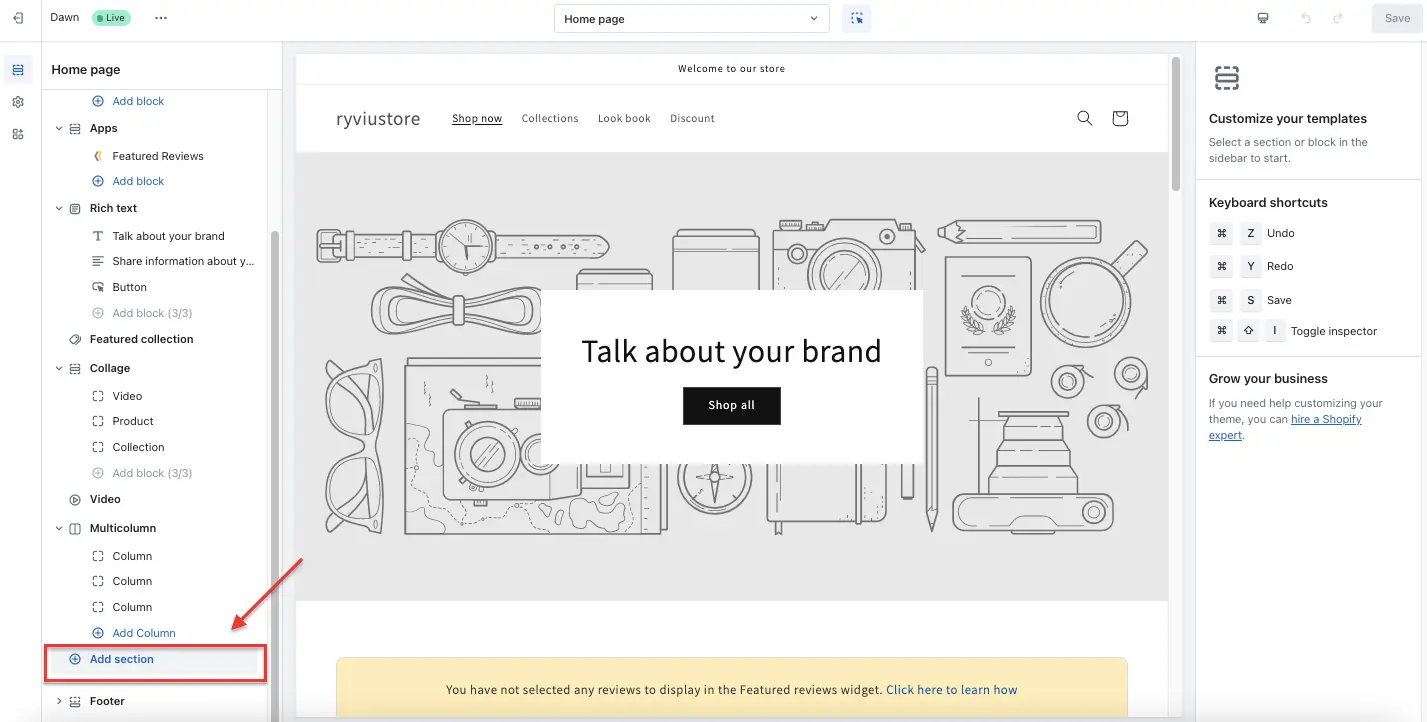
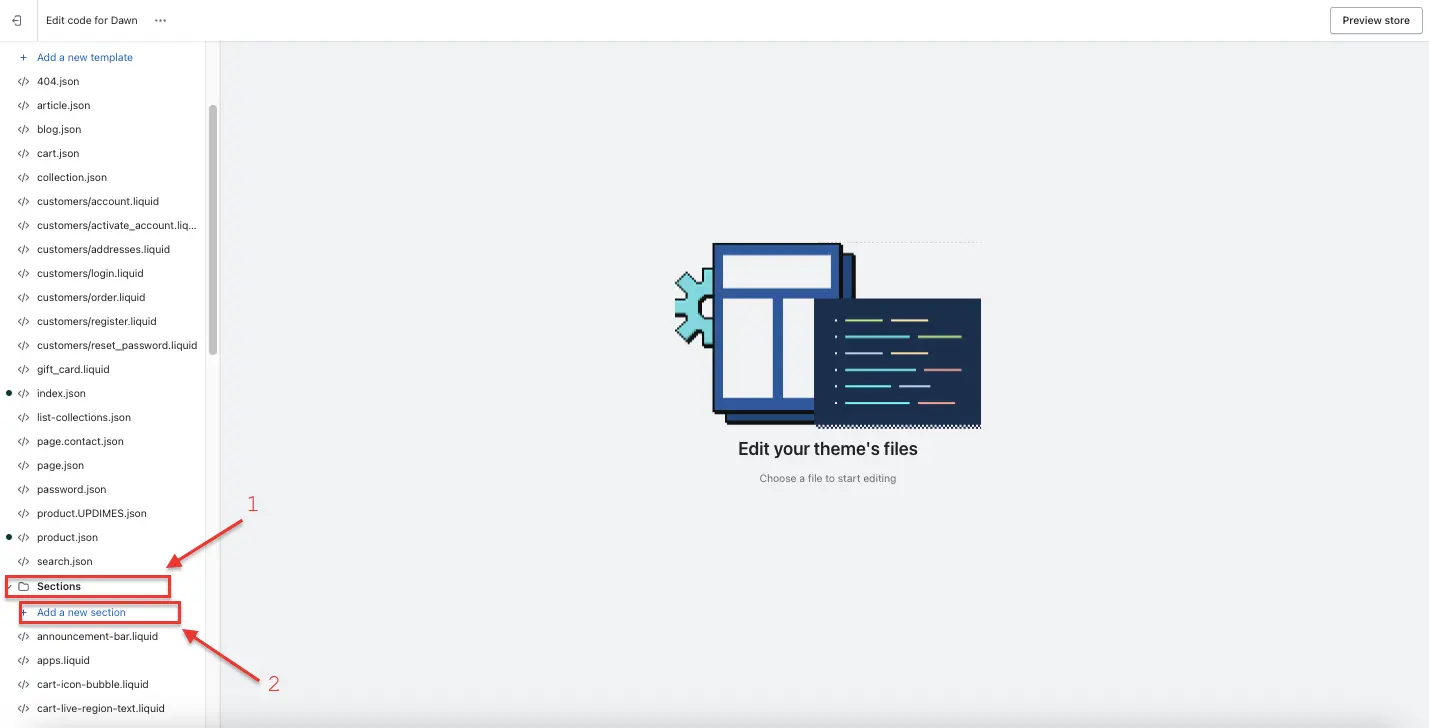
Step 1: Go to Sections in the code editor
- In the code editor for your theme, scroll down to the Sections folder.
- To add a new section, click.
Step 2: Name your new section
- Assign a name to your new section, using dashes between words, while adhering to naming rules, such as using the term "banner" in banner sections.
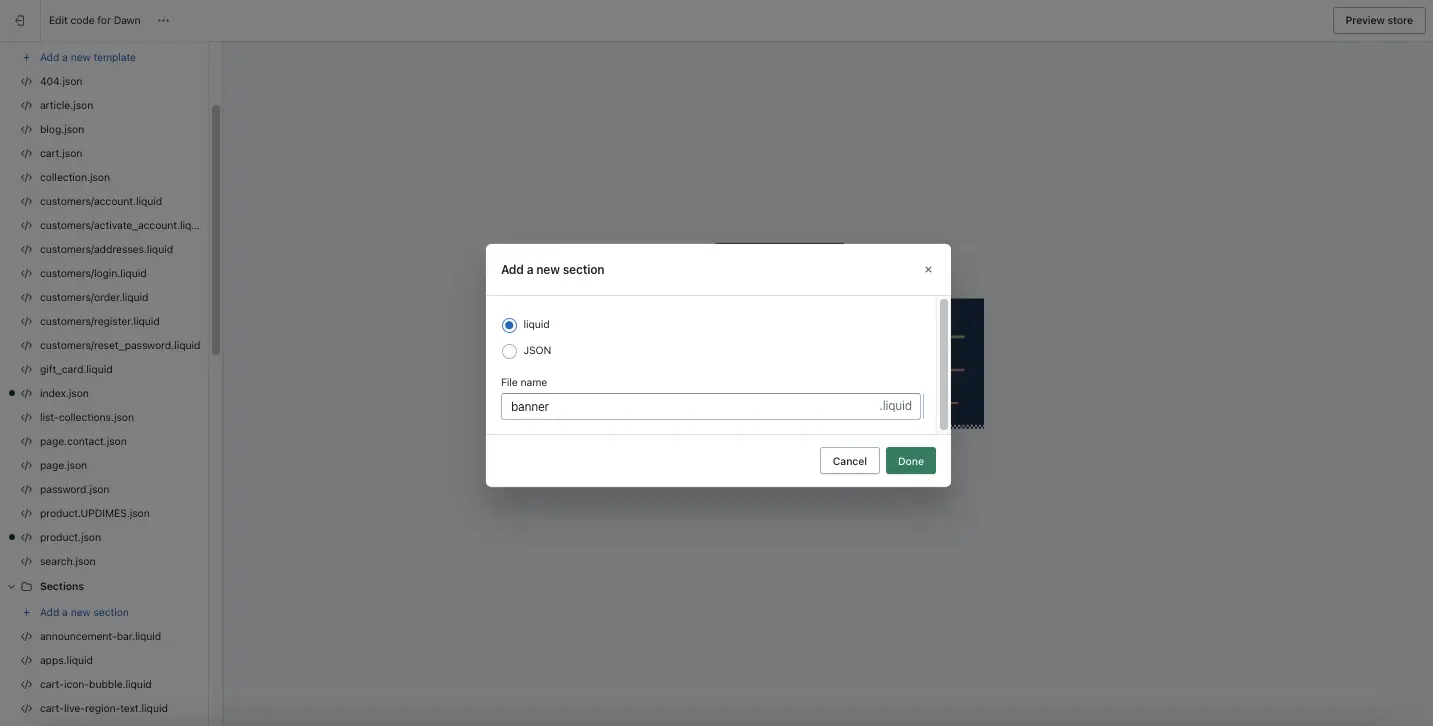
- Click Done when ready.
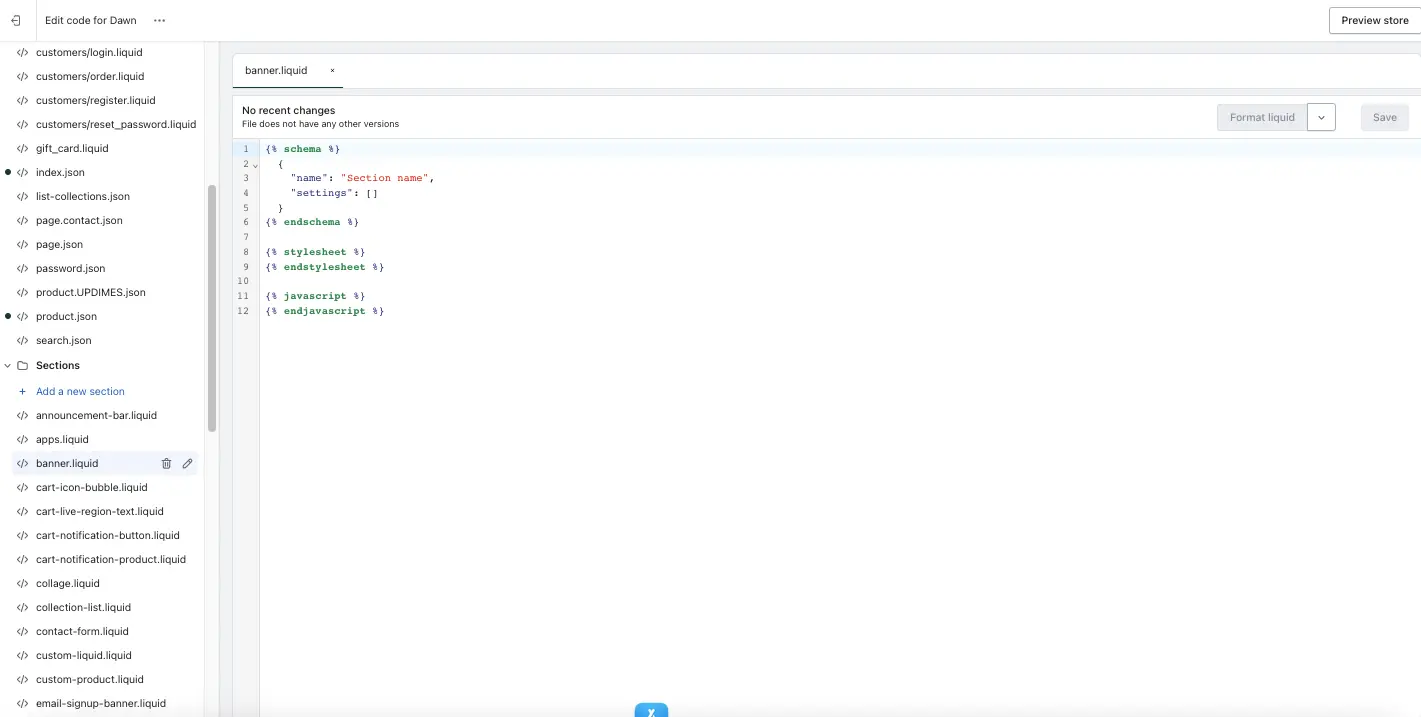
Step 3: Add in your custom Liquid code
- Your new section file will be created with a straightforward structure that has spaces for your section schema, CSS stylesheet assets, and JavaScript.
Step 4: Add your custom section to page templates
- Your new section will be accessible to add using the Shopify theme editor if your custom code incorporates the proper data from the presets.
Its usage might be restricted to certain pages or made open to all page templates.
Imagine that this editor would support your new custom section natively. Nevertheless, developing sections using custom code isn't simple.
To take your idea and turn it into a reality, a developer is needed, which frequently turns into a game of telephone. Sometimes the outcome falls short of what you had hoped for, at which point further development is needed.
Ideally, you wouldn't have to work with code at all and could just make a unique Shopify section yourself.
How can I add custom Shopify sections without using code?
As with any other native theme section, Shopify Sections enables retailers to design their own unique sections for usage in the Shopify theme editor.
The process of making a new section will resemble that of making a new page for any seasoned Page Builder users.
In the tutorial below, we will use the PageFly Landing Page Builder to add custom Shopify sections.
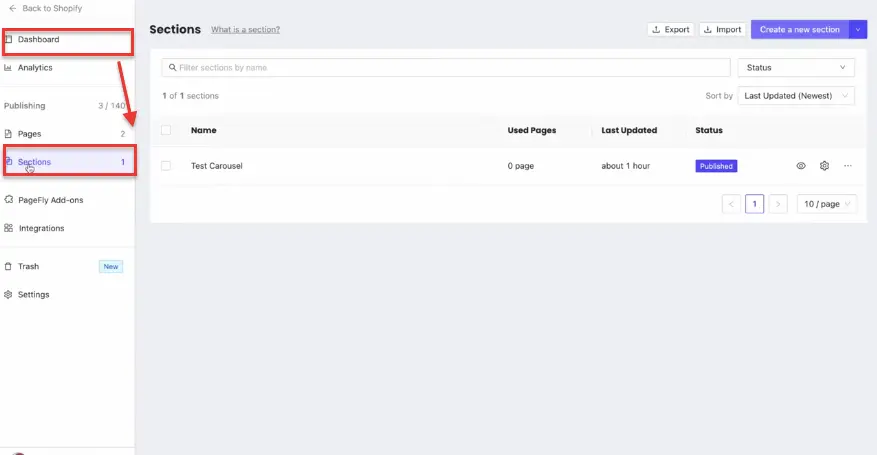
Step 1: Navigate to the Sections tab in the Page Builder dashboard
- To access your custom sections, from your dashboard > select the Sections tab. It will start out as a clean slate.
Step 2: Click Create button to start building a new section
- You can either click on a section you are currently working on or click Create to start a new one on the Sections page.
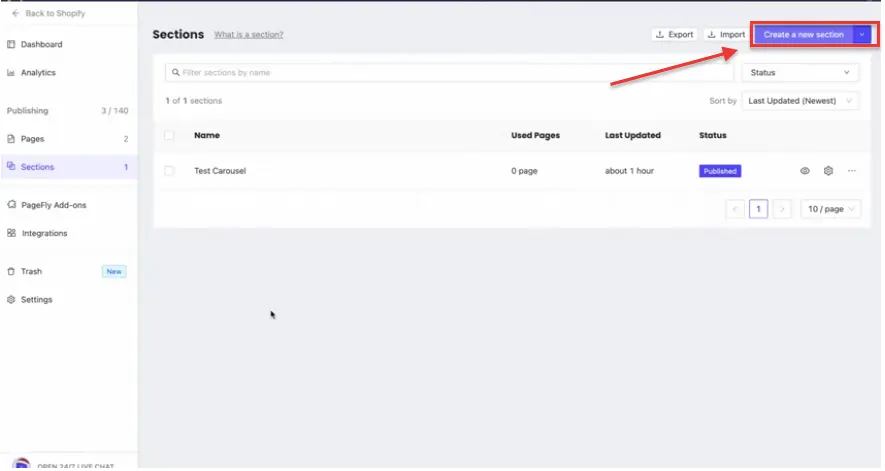
- Give the area a name so that you can recognize it in the Shopify theme editor.
Step 3: Start building and customizing custom section
- With Page Builder Sections, you can put together and configure a custom section in the same way that you would drag and drop elements to create a new page on Page Builder.
- The graphic editor is the same. You can concentrate only on that one module while creating a segment rather than an entire page.
Step 4: In the Shopify theme editor, add a section to the desired page
- Back in Shopify’s theme editor, find the page template you wish to add your new section, click Add section, and then select your unique section.
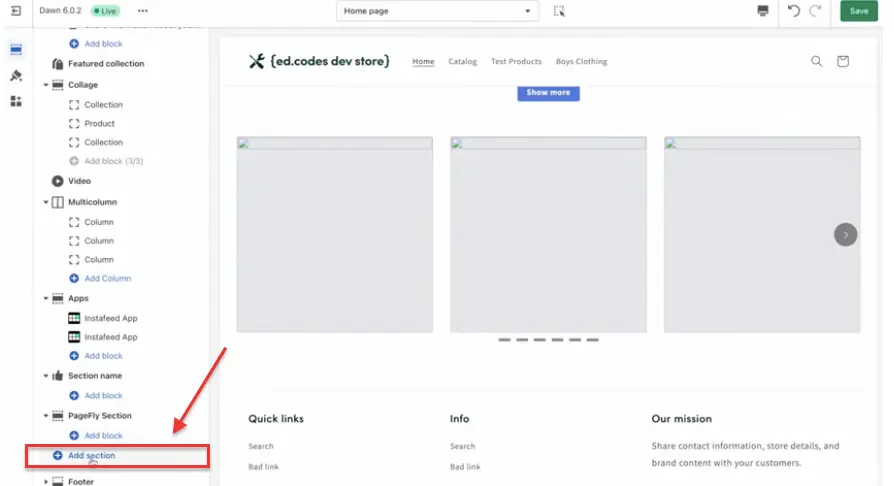
- You'll see that it says you can change the part in Page Builder, where there are often customization options on the right side of the page.
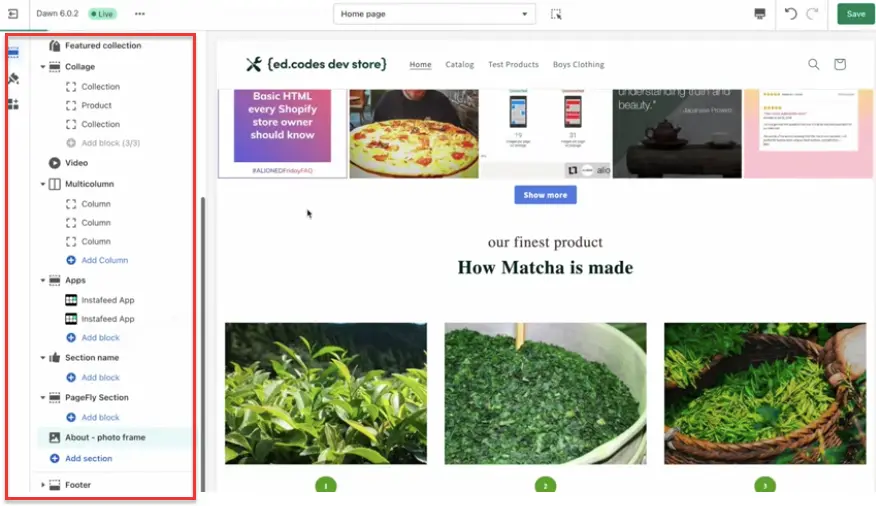
- When you hit Save after making changes to a specific area in Page Builder, those changes will appear anywhere you've put the section on your store.
This makes it quite simple to immediately make all of your modifications universally available.
Shopify Sections: Conclusion
Shopify sections provide an incredible opportunity for merchants to take control of their online store's design and create a captivating shopping experience for customers. By following the step-by-step guide outlined in this article, you have gained the knowledge and skills to add and customize Shopify sections effectively.
Remember to leverage the flexibility and versatility of sections to align your storefront with your brand identity, enhance visual appeal, and optimize user experience. Continually experiment, iterate, and refine your design to keep your store fresh and engaging. With Shopify sections, you have the power to transform your online store into a visually stunning and highly functional platform that leaves a lasting impression on your customers. Happy designing!

![]()