How to Do Proper WooCommerce Shipping Setup?
Although shipping has a direct impact on your store's conversion rates and profit margins, we've found that many WooCommerce beginners have trouble setting up shipping in their stores.
And for that reason, Updimes developed this blog. We want to walk you through the process of WooCommerce shipping setup correctly.
Let’s dive right in!
WooCommerce Shipping Options
Let's look at the 3 standard shipping options that are built-in to WooCommerce's sales features before we get started with the WooCommerce shipping setup guide:
#1. Flat rate
No matter the weight or number of things ordered, you can only charge a fixed amount for delivery with this option. Based on shipping zones, such as local, national, or worldwide, you can establish various flat prices. This option is simple to set up and perfect for retailers selling items of comparable sizes and weights.
#2. Free shipping
Setting up free shipping can significantly increase your store's conversion rate if customers frequently leave their carts empty owing to hefty shipping prices. However, we advise offering of free shipping only to particular items or orders that reach a minimum. Otherwise, you risk damaging your profit margin.
#3. Local pickup
If you have a physical store and the majority of your customers live nearby, you may also offer local pickup options for clients who would rather pick up their goods in person and delegate the responsibility of local shipping to them.
Especially for companies with large product catalogs or client bases, the default WooCommerce shipping options can be constrained. We have thus reviewed and evaluated the top 5+ cool WooCommerce shipping plugins below.
Keep scrolling!
How to Do Proper WooCommerce Shipping Setup?
Are you curious about setting up WooCommerce shipping?
We've chosen to divide the WooCommerce shipping setup procedure into 4 simple steps, as indicated, to make it simple for you to catch up:
Step 1: Create new shipping zones
Configuring shipping zones is the first step in the WooCommerce shipping setup process. WooCommerce's "shipping zones" let you customize distinct delivery choices for users from various geolocations.
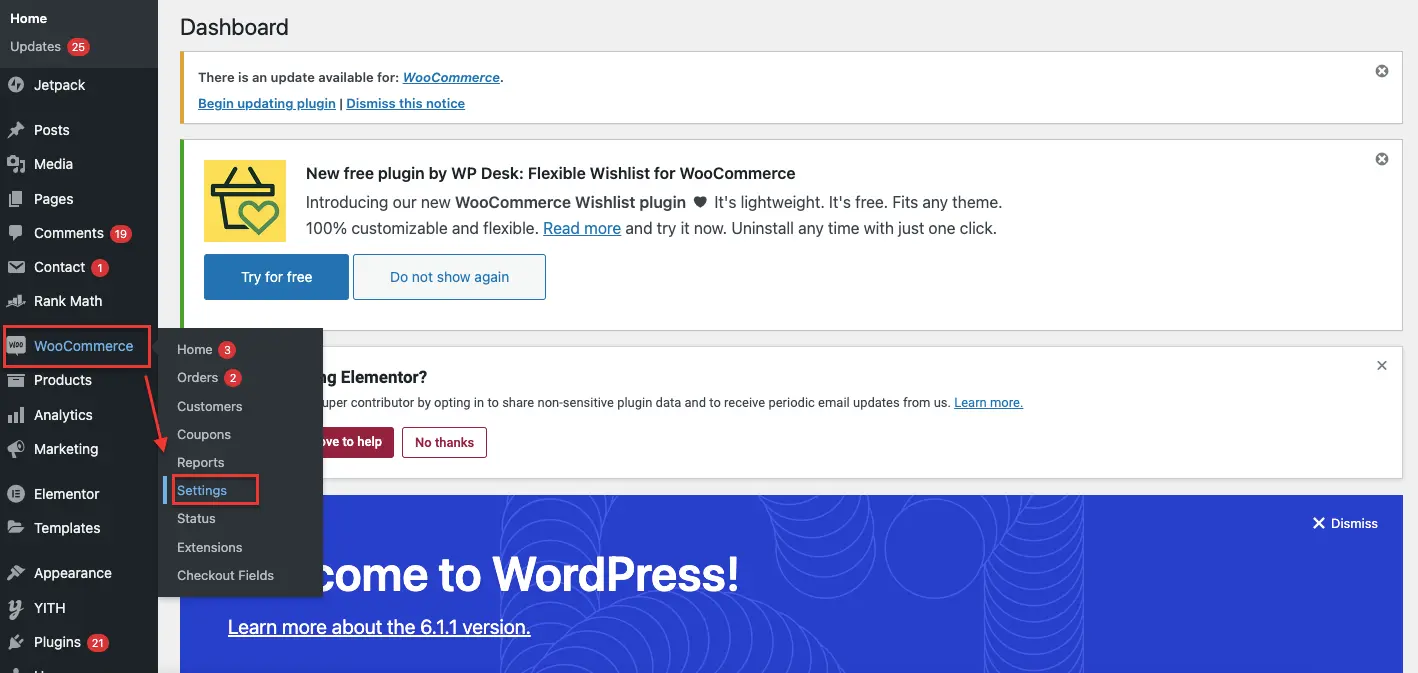
- Click WooCommerce > Settings to add a new WooCommerce shipping zone.
- Then, go to the Shipping > Click Add shipping zone.
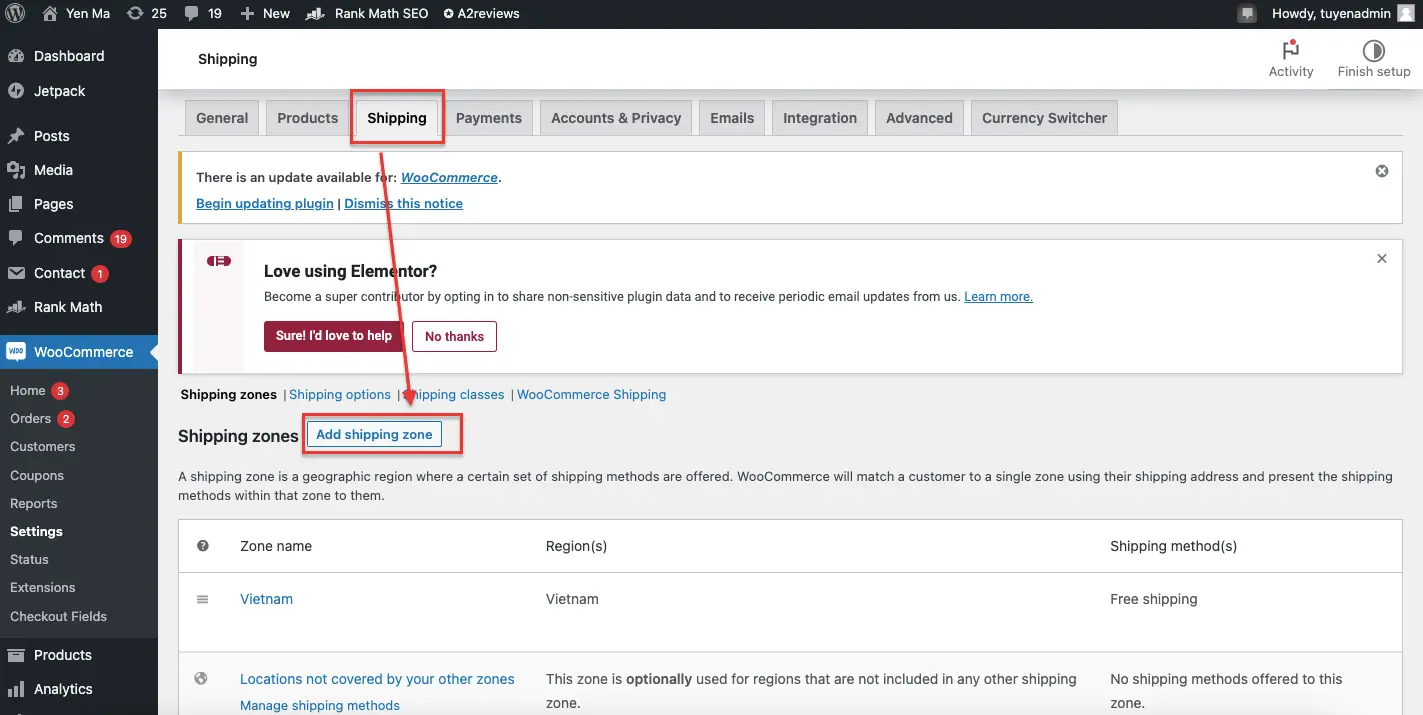
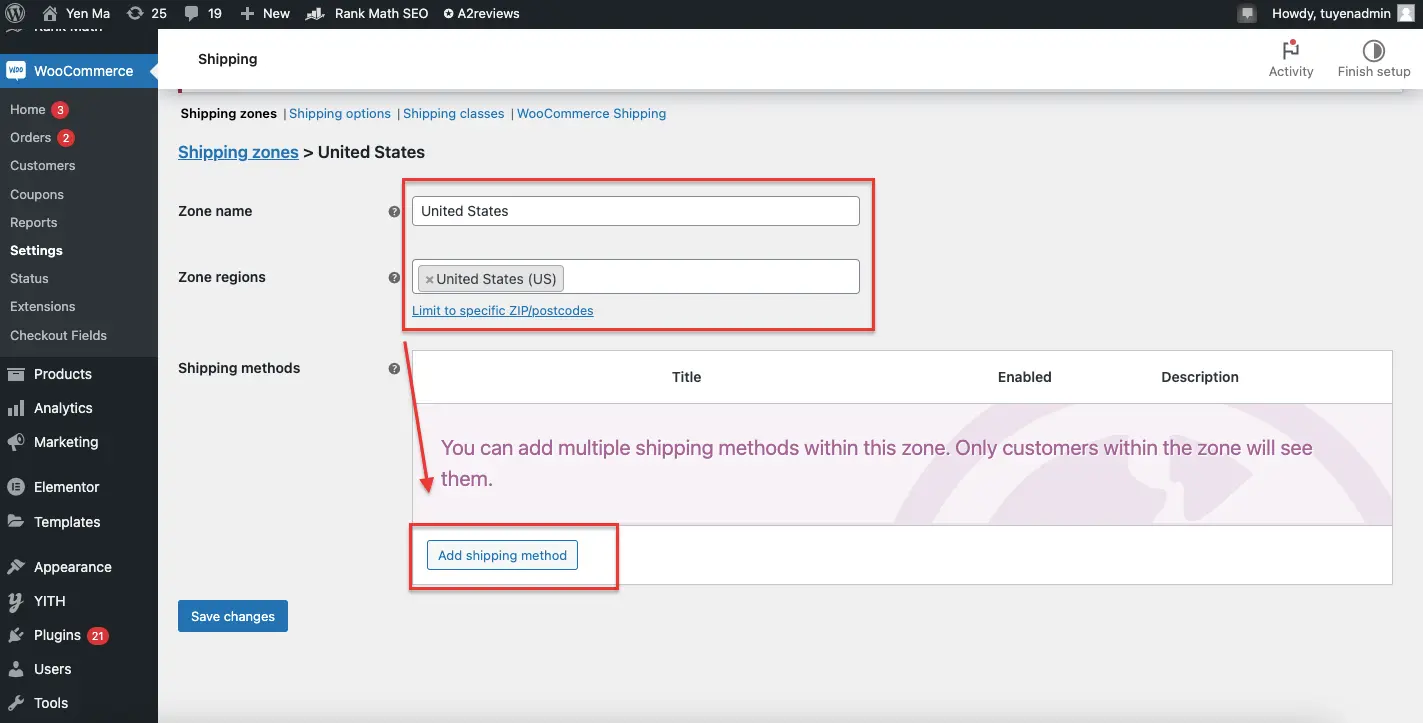
- Fill the Zone name and chose Zone regions.
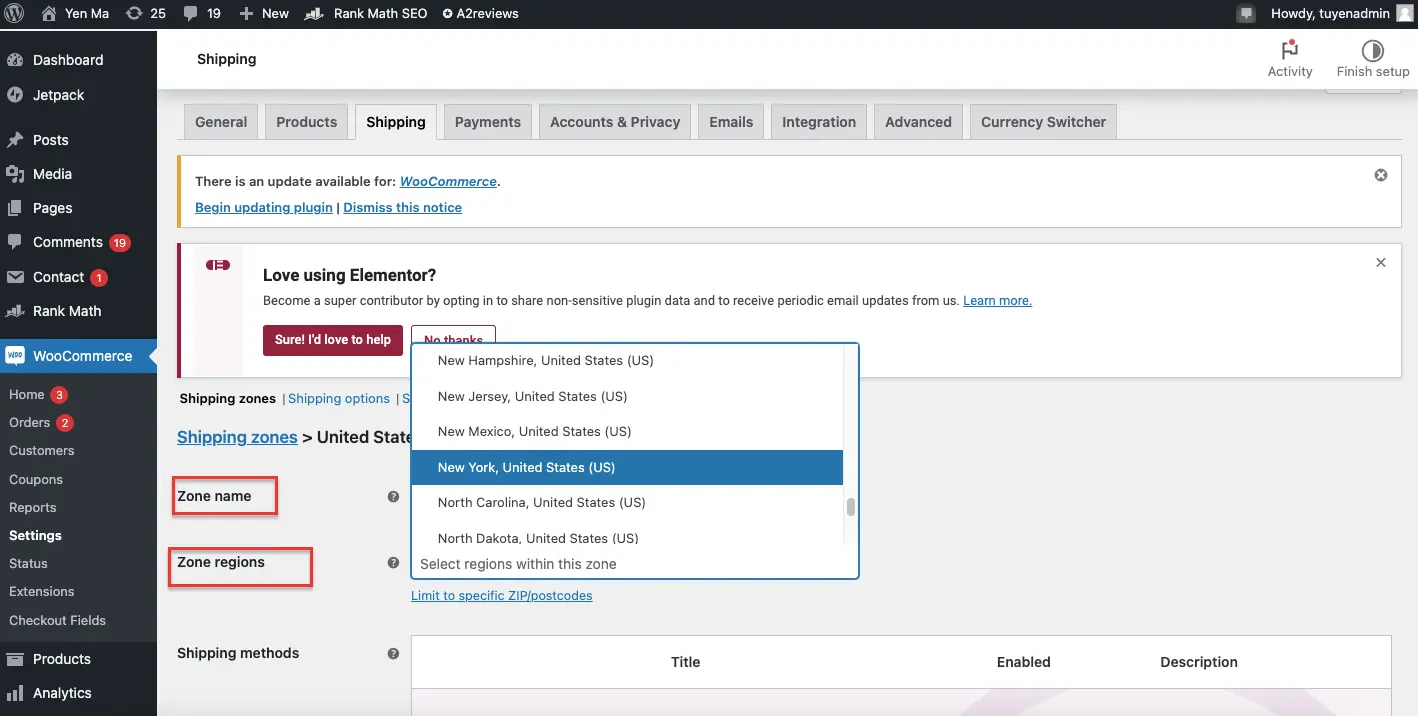
- Next, click Add shipping method
- Select the method you want to add when the popup box below appears> Select your shipping method. For example, flat rate > Add shipping method.
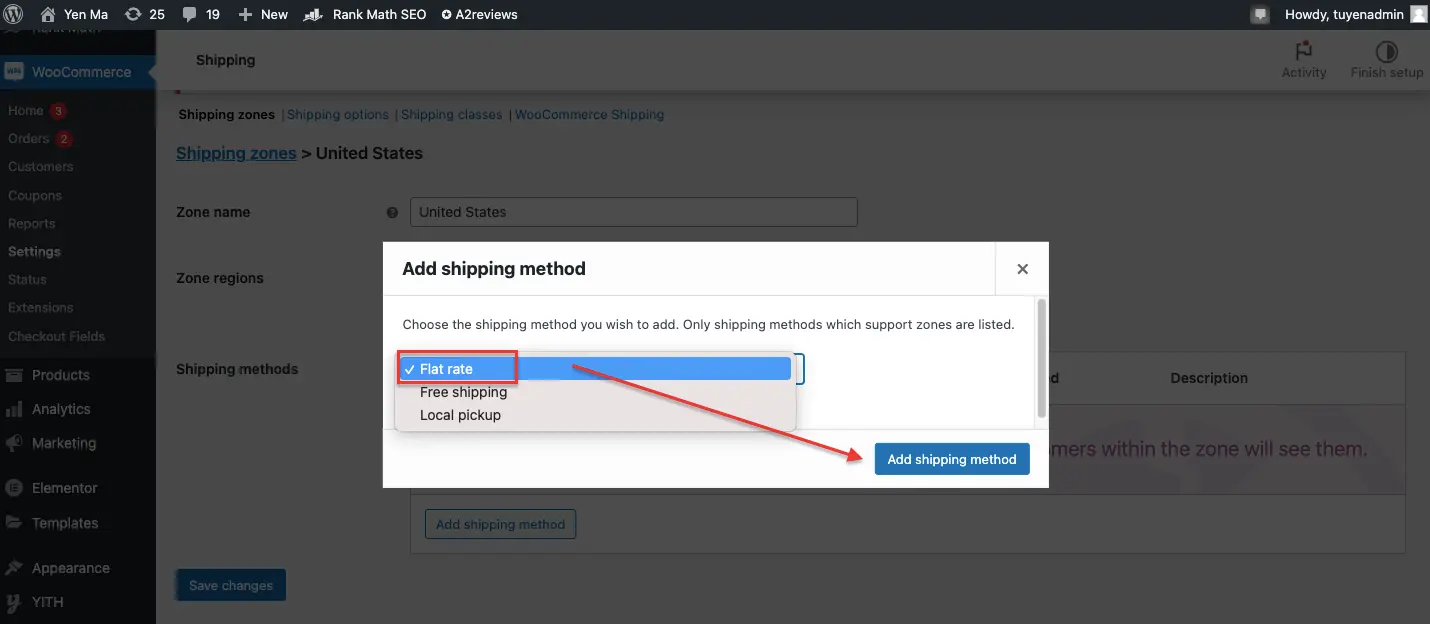
Depending on the shipping options you want to provide your customers, you can add various shipping methods for a specific shipping zone.
- To configure shipping details, Navigate to the Shipping method list > Click Edit
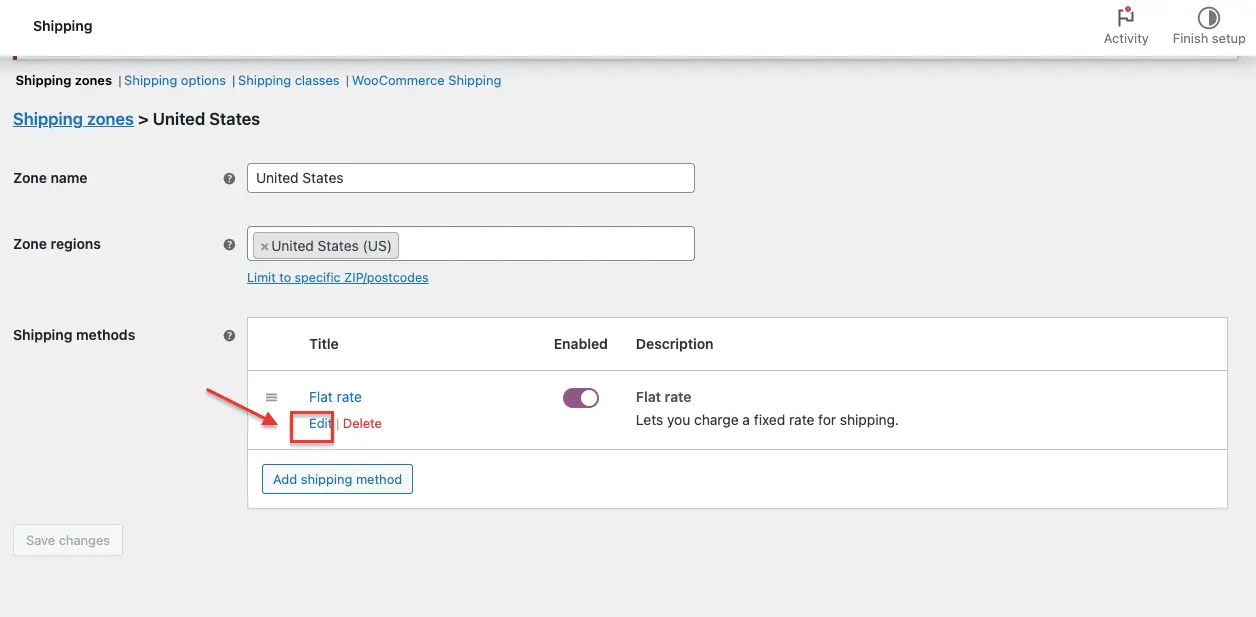
There are specific setups for each shipping method. We used flat-rate and free shipping in the examples below. We'll now show how to edit the two shipping methods.
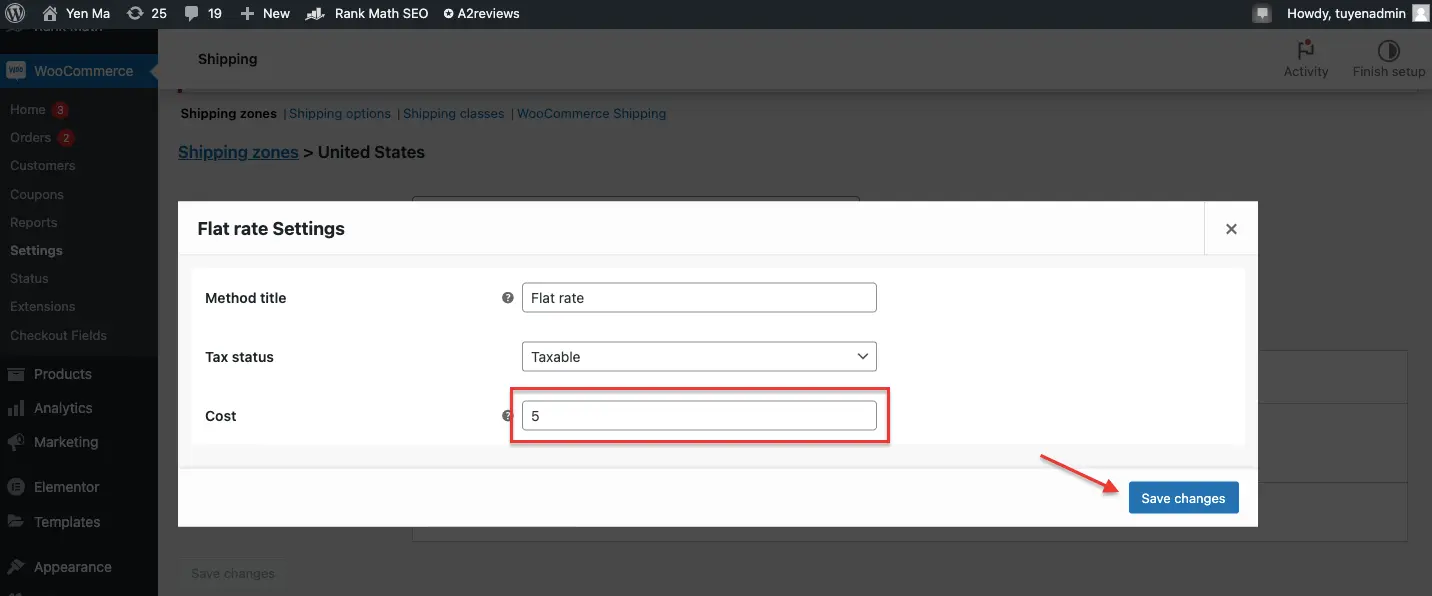
Modify the flat rate settings: For instance, you may select the taxed option and set the flat rate as $5. By following the instructions from the question mark icon, you can also generate shipping charges that are based on quantities or percentages.
For instance, 5 + (1 * [qty]) says that the standard shipping fee is $5 and that an additional $1 is charged for each item that is added to the cart. Alternatively, 5 + [fee percent="5" min_fee="3"] means a base shipping cost of $5 plus 5% of the order total, which equals at least $3.
- Upon completion, click Save changes.
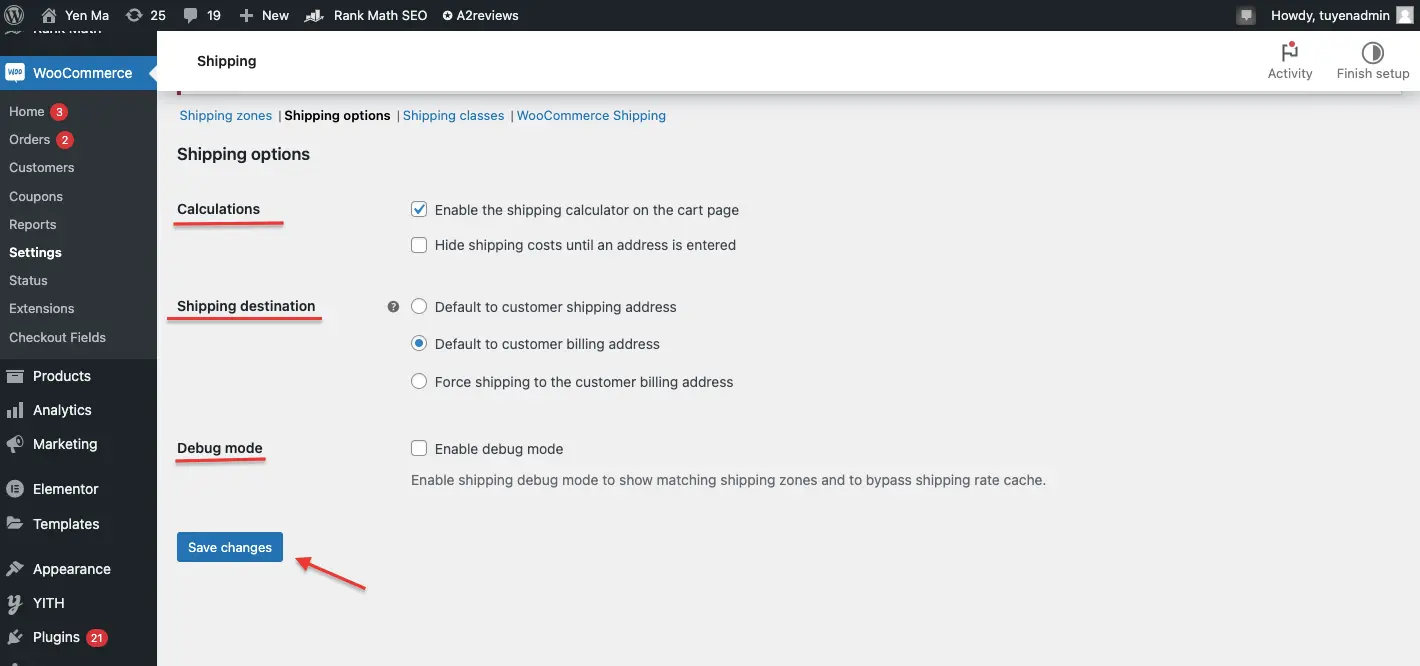
You've nearly completed this step. Select Shipping options by scrolling up and clicking.
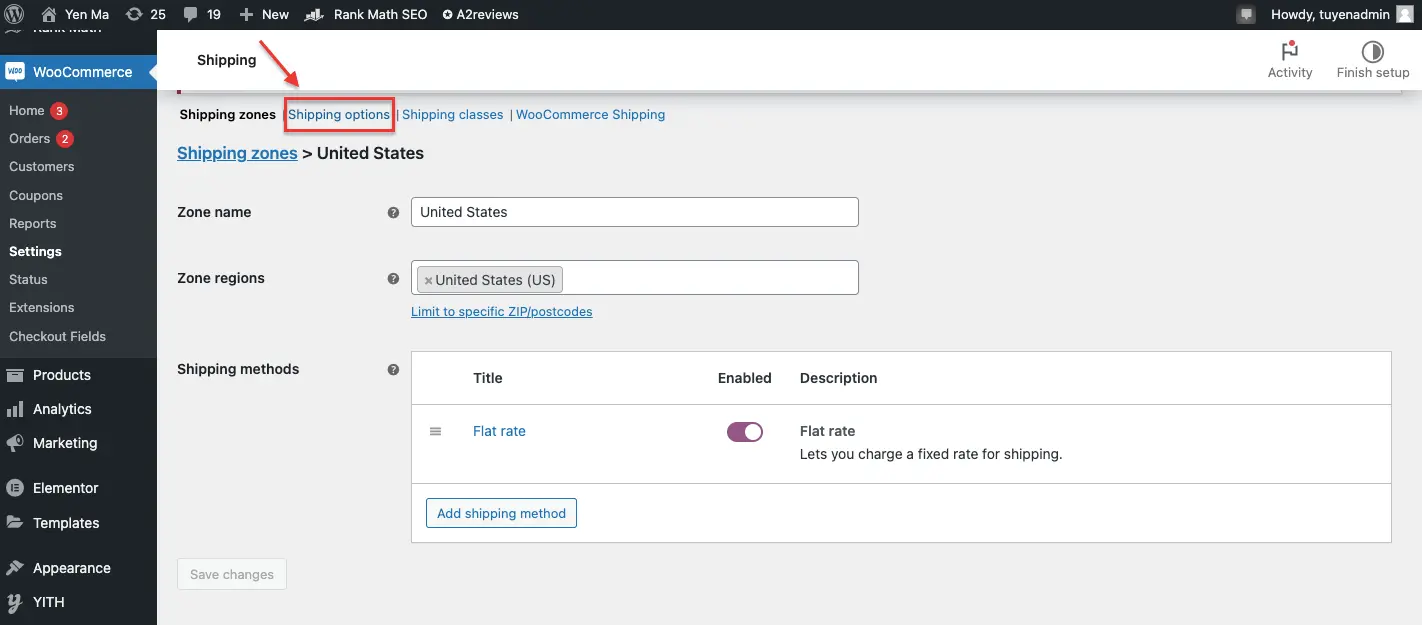
You can choose whether to enable shipping calculators, destinations, and other options. Remember to click Save changes to finish.
Step 2: Configure WooCommerce shipping classes
As a crucial part of the WooCommerce shipping setup, let us now demonstrate how to build shipping classes. Similar product types can be grouped together using shipping classes, and each group can choose from the same shipping options.
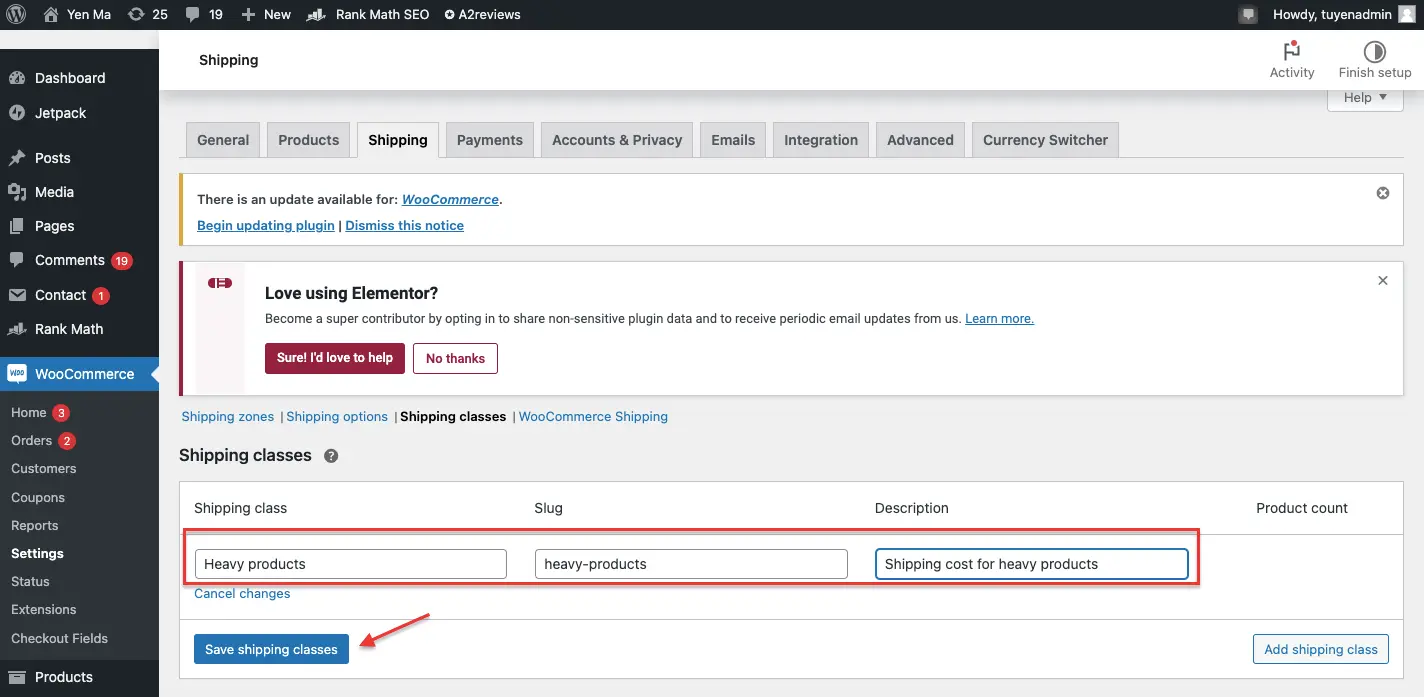
- Next to the Shipping options tab, click the Shipping classes tab> Click Add shipping class.
- Click the Shipping classes tab next to the Shipping options tab > Add shipping class.

- For your shipping class, enter a name, URL slug, and a description. Once finished, select Save shipping classes.
The shipping class must then be assign with a shipping zone. This will assist WooCommerce in determining the precise shipping options and rates to show to your consumer when they make a purchase.
- Select the Shipping zones tab> Go to the shipping method you want to change> Click Edit. You can now see the part on Shipping class costs that was just updated for you.
The rule is quite simple for shipping class costs, as we discussed in the flat rate settings.
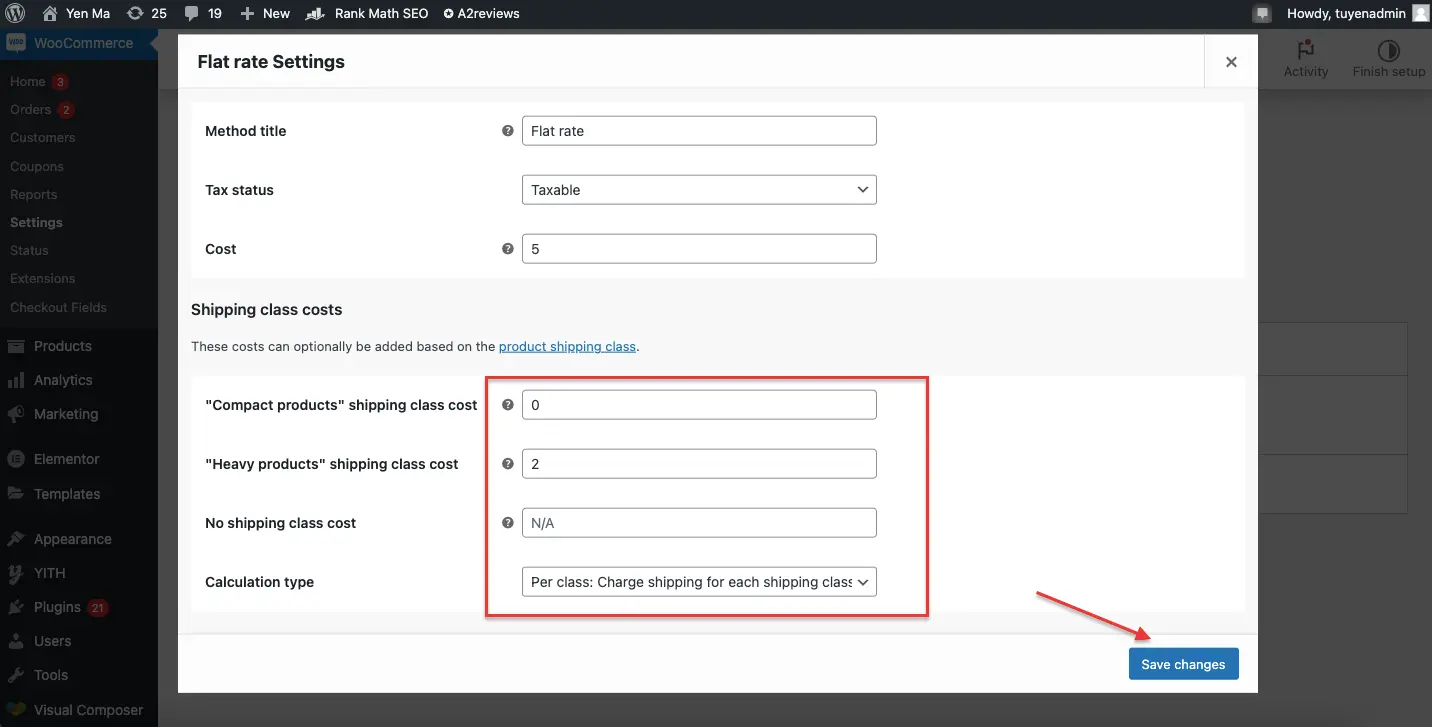
In the above illustration, using the settings we chose, a buyer purchasing a hefty item will be charged a delivery fee of $5 + $2 = $7. In the meanwhile, if customers purchase a compact product, shipping will cost them $5.
- Don’t forget to hit Save changes.
Step 3: Assign shipping classes to products
Now that you’ve created your WooCommerce shipping setup, let’s assign them to your products. This is going to be just a breeze.
- Go to Products on menu > All products
- Choose the items you wish to asign the shipping classes
- Click Edit.

4. Select your shipping class.
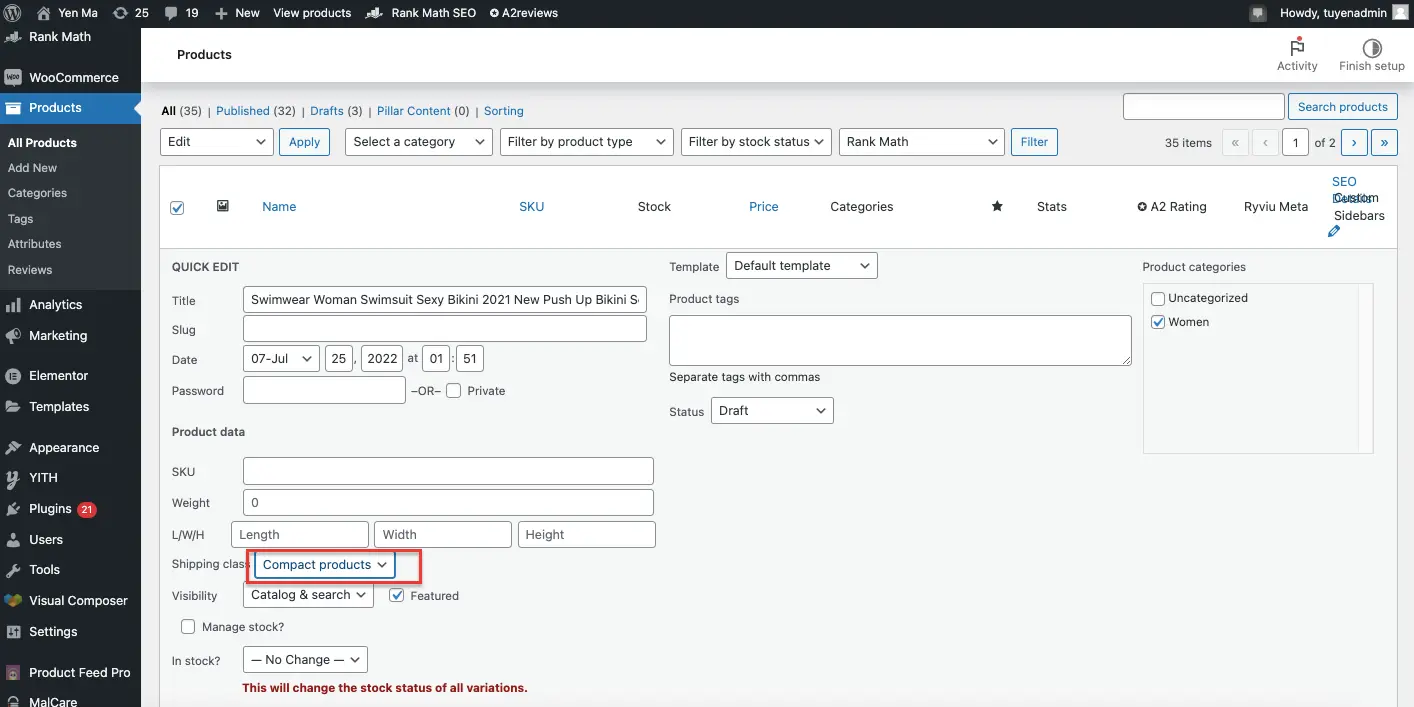
5. To save your changes, don't forget to click Update.
Conclusion
Overall, a correctly designed WooCommerce shipping setup is critical because shipping is one of the key elements that influence whether customers choose to purchase from you. The WooCommerce shipping guide is intended to assist you in effectively configuring your shipping as a result, so please read it carefully.

![]()