How to Add Custom Font to Shopify? [A Complete Guide]

By default, most Shopify themes come with multiple fonts built-in. Depending on the currently active theme, you can easily find and change fonts on your Shopify store and experiment with different styles and combinations.
However, one thing that is not entirely clear. How exactly can you add a custom font to Shopify stores?
If you also have such a question, then do not worry! In this article, we will teach you how to do so with little coding knowledge.
Without further ado, let’s dive right in!
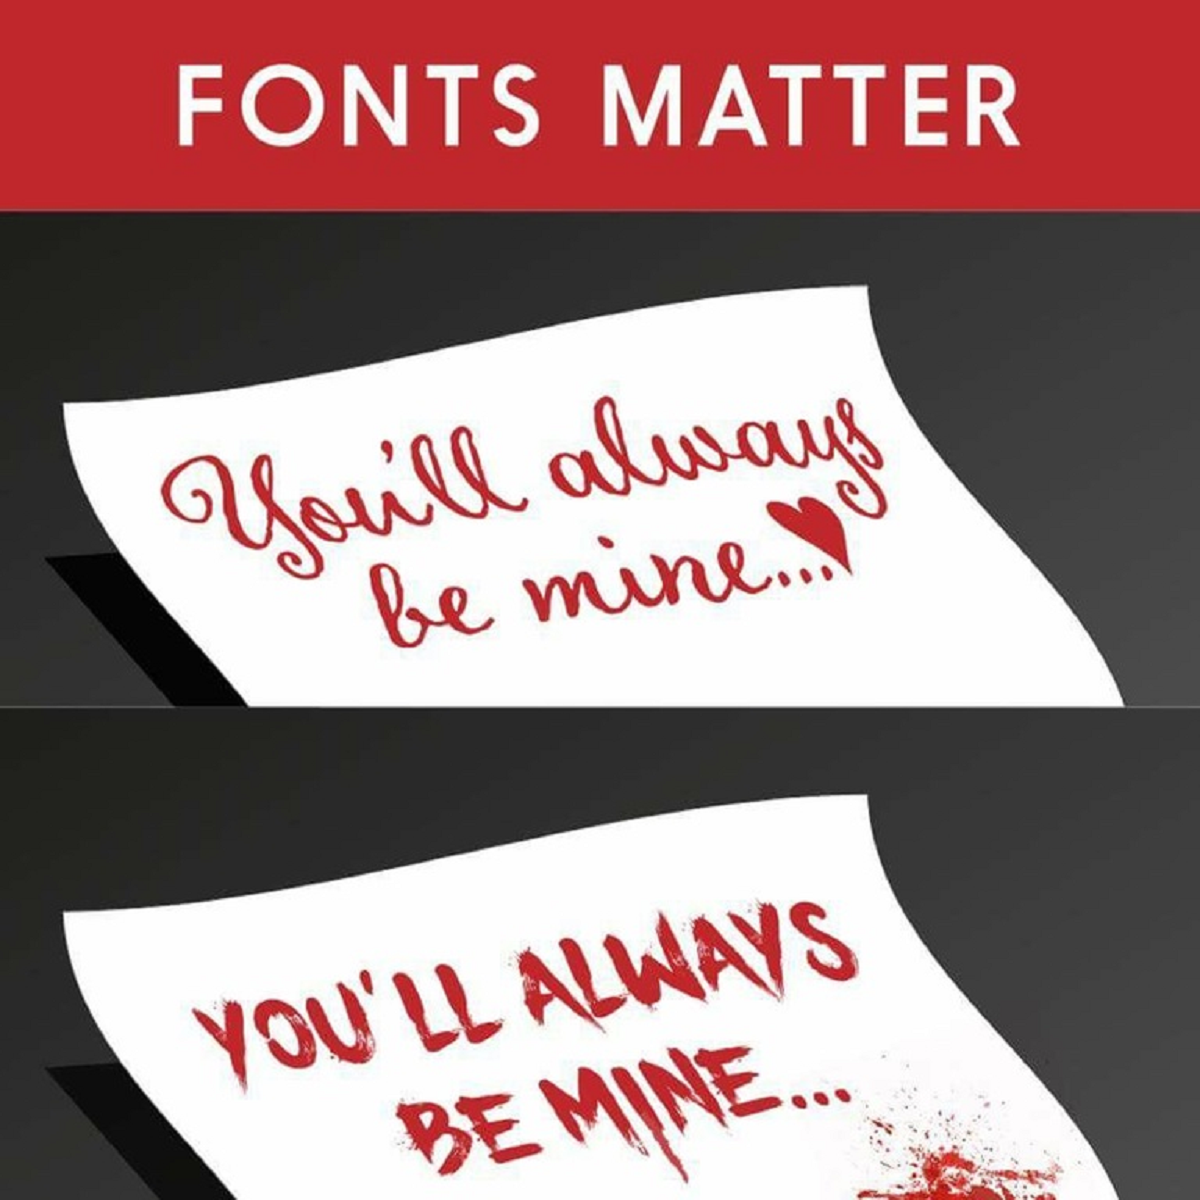
The Importance of Fonts on Shopify Stores

Fonts are crucial in any Shopify store, since getting somebody to read your content is not an easy task. On average, users only read about 28% of the words on a web page.
Using an engaging font can keep users on your website longer and hopefully guide them through the purchase process successfully.
In addition, using the right font can minimize your interaction costs by making your web pages clear and beautiful. You can save a lot of money if the content on your Shopify store looks pleasing enough.
Not only that, when used appropriately, fonts can direct the visitors’ from one place to another in the order you want. Using ad headlines and banners with eye-catching fonts can draw attention to what you want to advertise.
The flip side of the eye-catching aspect is that your font should not contradict the rest of your Shopify store. It also should not draw attention in any tacky way, as this will draw focus away from other critical aspects of your website.
Why Should You Use Custom Fonts on Your Shopify Store?
Below are the three main advantages of using custom fonts on your Shopify store:
- Reflect your brand: You can build brand awareness and stand out from the crowd just by using unique fonts on your Shopify store.
- Allow shoppers to emotionally connect with the content: When they see a specific font, it can cause them to experience a particular feeling or mood.
- Make your Shopify store eye-catching: It can add aesthetic appeal to your online store with carefully selected fonts.
2 Factors to Consider When Choosing a Custom Font for Your Shopify Store
Choose the Right Font for Your Online Store
You want to make sure that the custom font you choose reflects who you are and what your business is.
Do not use fonts that are aesthetically pleasing but difficult to read, as it will take all the value out of your content. It is best to use fonts that are a bit simpler and easier to read.
Avoid using more than three or four different fonts throughout your Shopify store. Too many fonts will give it a cluttered, confusing feel.
Also, you want the fonts you choose to work well together, even if they are on different pages. In other words, do not pick fonts markedly different from each other. Instead, select ones that complement each other.
Use Unique Fonts to Draw Attention to Important Sections
Want to advertise a sale? New product introduction? You can use custom fonts to highlight these things to your customers.
By using the right fonts on your Shopify store to draw your shoppers' attention, you can guide them to what is noteworthy without much hassle.

5 Easy Steps to Add Custom Fonts to Your Shopify Store
Before adding custom fonts to your Shopify store, make sure you have backed it up first. So you can quickly revert if you encounter any issues.
Download a Custom Font
There are many websites where you can find and download a custom font for your Shopify store, like Adobe Fonts and Google Fonts. For this tutorial, we will download a free one from DaFont.
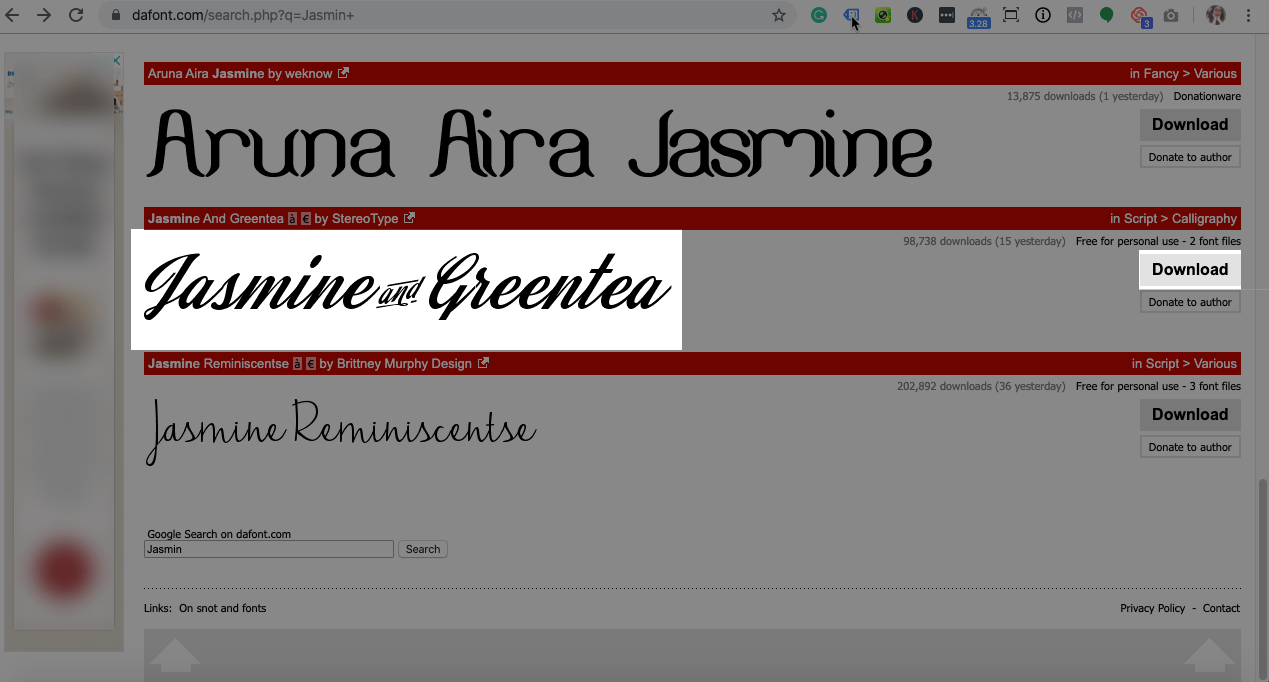
After downloading a custom font, you will see the following files in a zipped folder.

Convert a Custom Font to a Suitable Format
Font files are the ones with the following extensions: .ttf, .woff, .woff2, .eot, .svg, or .otf. Different browsers support different files. Specifically:
- Internet Explorer: .eot
- Microsoft Edge: .woff
- Safari (3.2+): .ttf/.otf
- Google Chrome: .svg/.ttf/.otf
- Firefox (3.5+): .ttf/.otf/.woff
- Opera (10+): .ttf/.otf
Therefore, make sure you upload all different custom font file types to your Shopify store if possible.
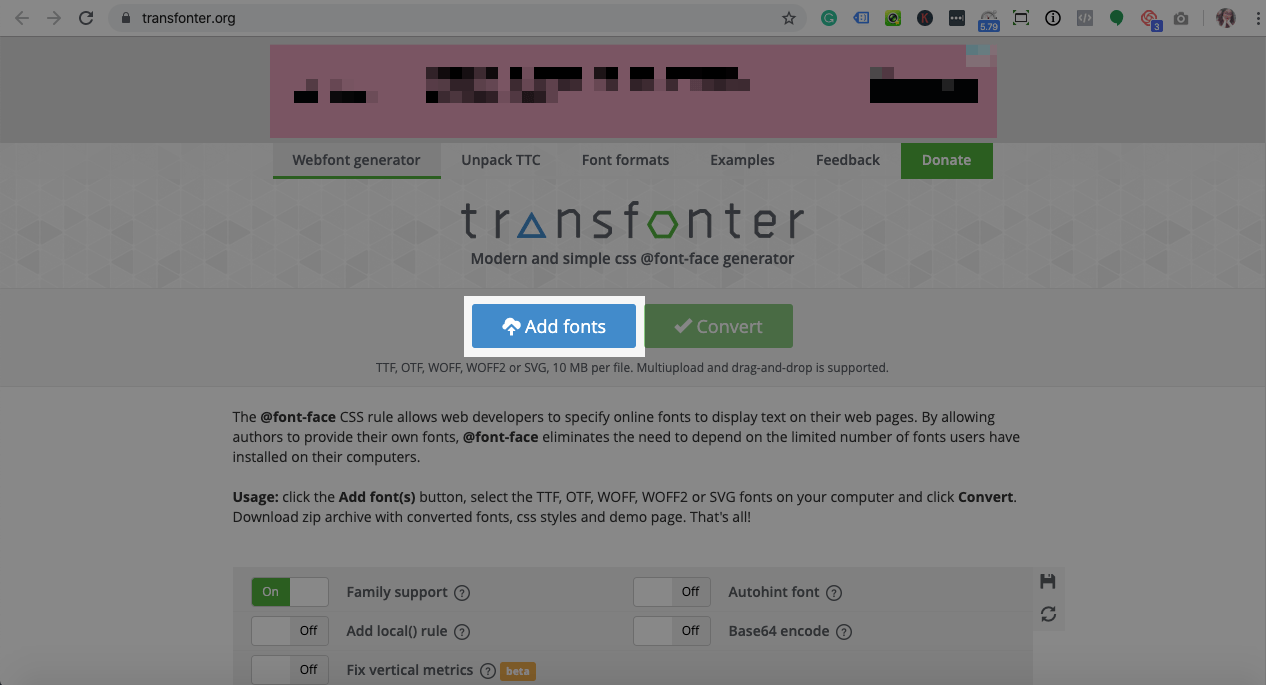
For your font to work on Shopify, you need to include at least a .woff or .woff2 file type. And since we only have the .otf and .ttf files, we will need to convert them to .woff and/or .woff2 ones. In this tutorial, we will use the transfonter site to achieve this.
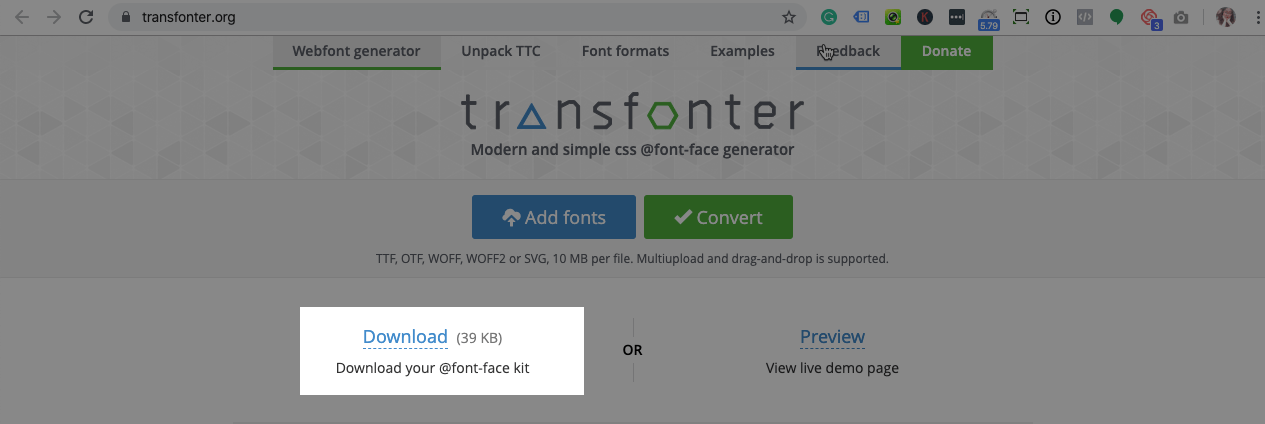
- Click the Add font button. Then upload the two font files.
2. Tick the “WOFF” and/or “WOFF2” checkbox. You can also choose other formats besides these two.
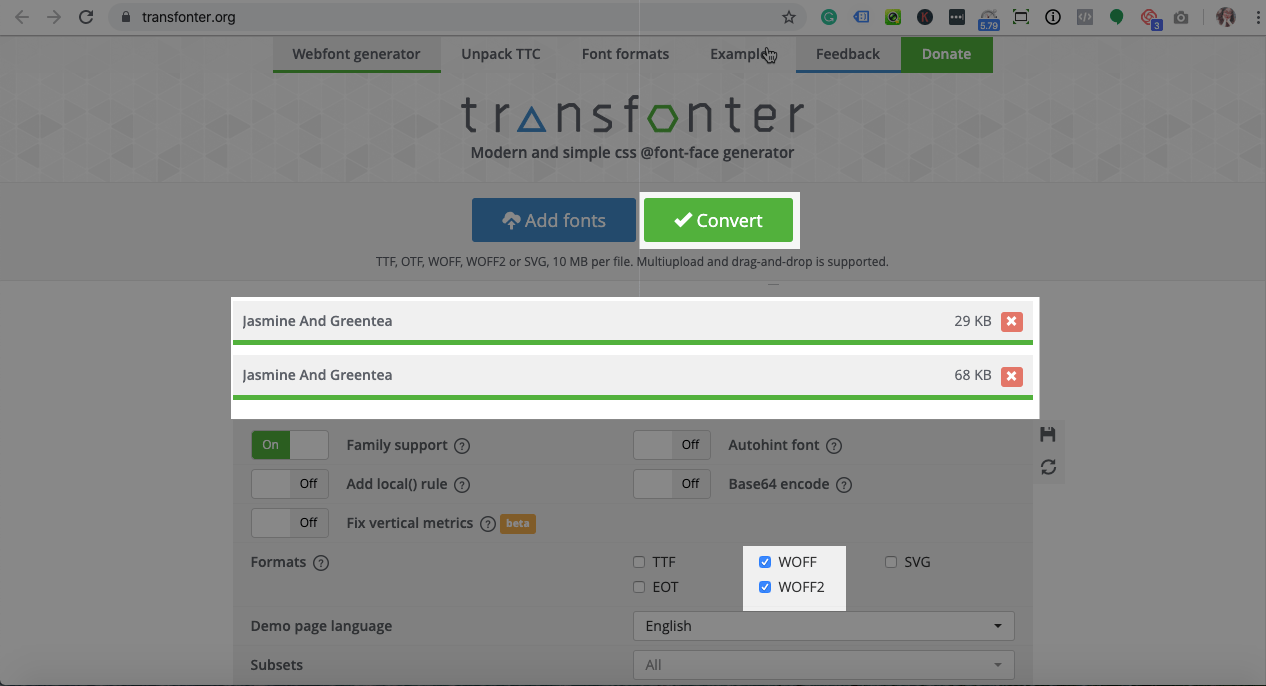
3. Click the Convert button.
4. Wait for the website to convert the font files. Click on the Download text when it is available.
Upload the Custom Fonts to Your Shopify Store
The next thing we have to do is to add the custom font to your Shopify store. From there, we can refer to it through code and use it in the currently active Shopify theme.
- Navigate to the Settings > Files page from the Shopify dashboard.
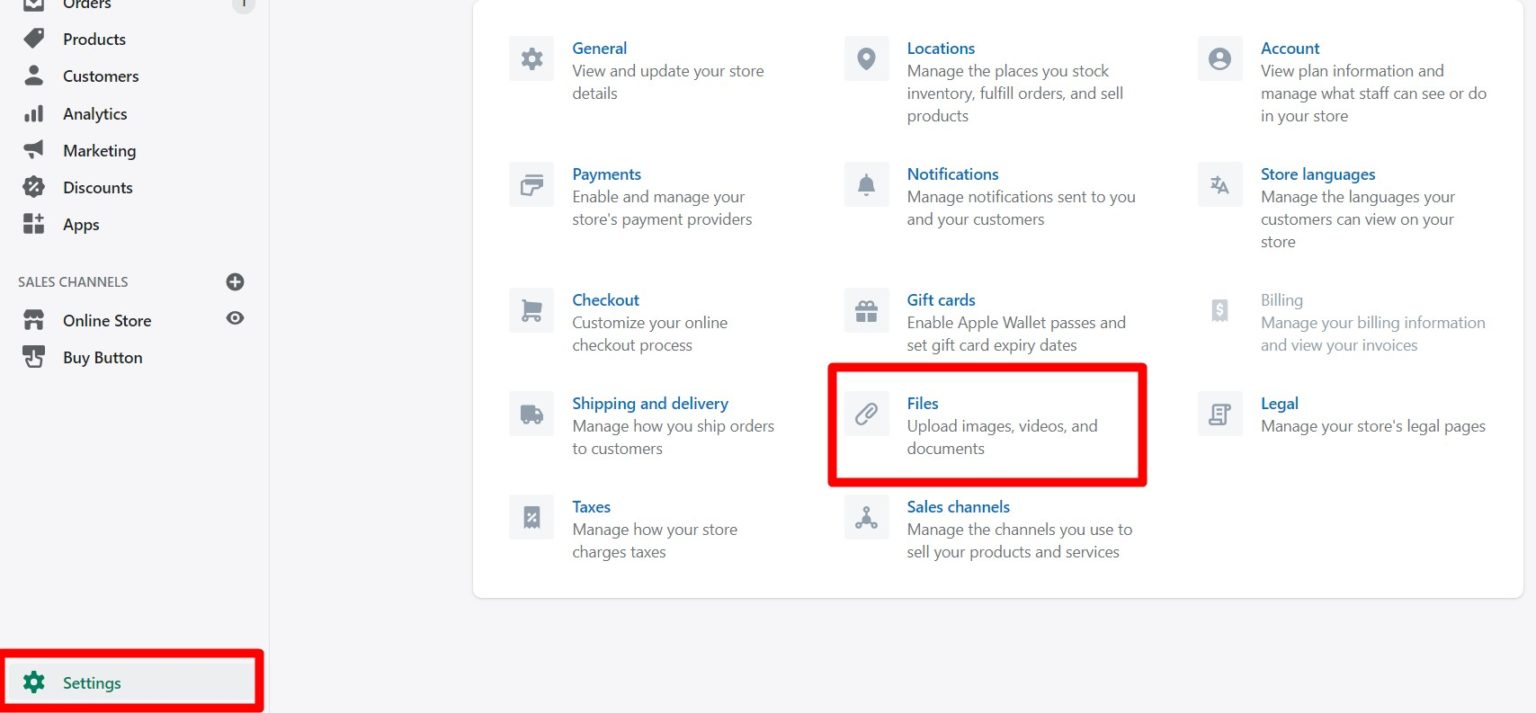
2. Click the Upload files button in the top right corner. Then upload all the custom font files you have to your Shopify store.

That’s it! You have successfully added a custom font to your Shopify store. Now is the time to connect them to the currently active theme. Leave this tab open, though. We will need it in the next step.
Set up the Custom Font on Your Shopify Store
- Go to the Online Store > Themes page from the Shopify dashboard.
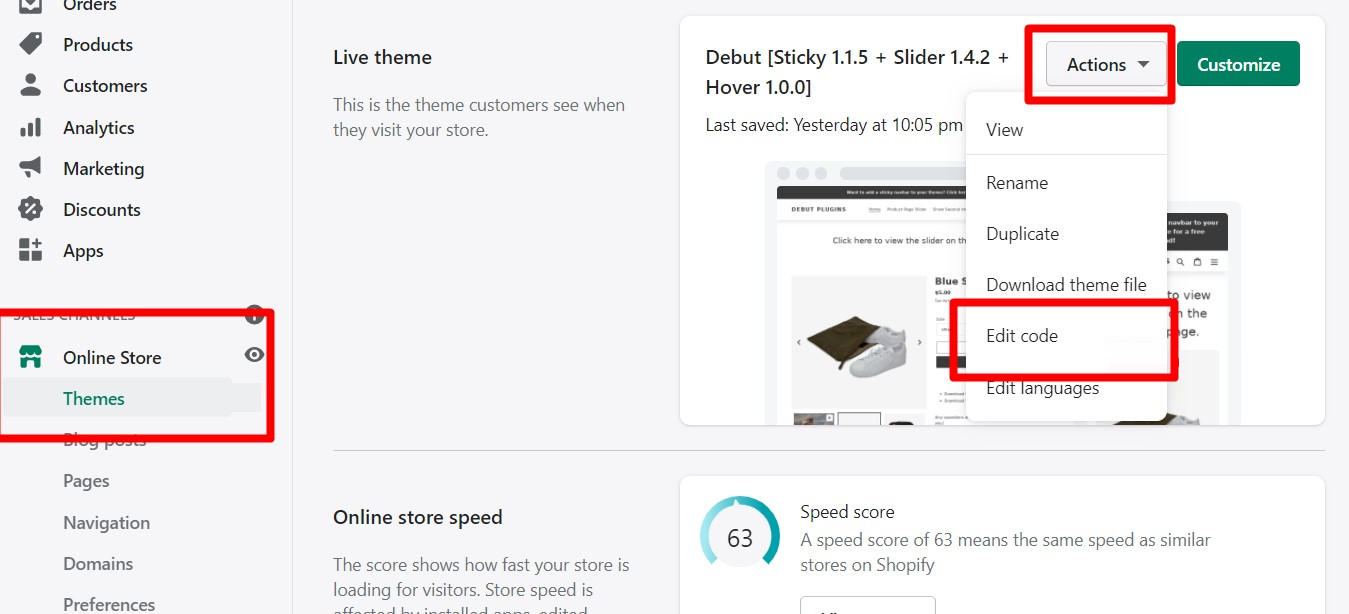
2. Click on the Actions button. Then choose the Edit code option.
3. In the Snippets folder, click the Add a new snippet text.

4. Name the new snippet “custom-fonts”. Then click the Create snippet button.
5. Copy the code below and paste it into the new file.
<style>
  @font-face {
  font-family: "fontname";
  src: url('fonturl-otf') format("opentype"),
       url('fonturl-eot') format("embedded-opentype"),
       url('fonturl-woff') format("woff"),
       url('fonturl-woff2') format("woff2"),
       url('fonturl-ttf') format("truetype"),
       url('fonturl-svg') format("svg");
   }
 </style>
6. You need to modify the code for it to work.
- Replace “fontname” with the name of the font.
- Replace “fonturl-...” with the link to the respective font file.
- Delete any unused code line.
In our case, since we have .woff, .woff2, .otf, and .ttf file types, our code will look something like this:
<style>
  @font-face {
  font-family: "Precious";
  src:  url('https://cdn.shopify.com/s/files/1/0439/1577/2000/files/Precious.otf') format("opentype"),
       url('https://cdn.shopify.com/s/files/1/0439/1577/2000/files/Precious.woff') format("woff"),
       url('https://cdn.shopify.com/s/files/1/0439/1577/2000/files/Precious.woff2') format("woff2"),
       url('https://cdn.shopify.com/s/files/1/0439/1577/2000/files/Precious.ttf') format("truetype");
   }
 </style>
To obtain the link to your font file, click the Copy link button on the page you uploaded the font.

7. Add the following code before the </style> line. Do not forget to replace “fontname” with the name of the font.
h1,h2,h3,h4,h5,h6,html,body,*,[id] *{
  font-family: "fontname" !important;
}
8. Finally, save the changes.
In the end, you should have a new snippet file that has the content somewhat like this:
<style>
  @font-face {
  font-family: "Precious";
  src:  url('https://cdn.shopify.com/s/files/1/0439/1577/2000/files/Precious.otf') format("opentype"),
       url('https://cdn.shopify.com/s/files/1/0439/1577/2000/files/Precious.woff') format("woff"),
       url('https://cdn.shopify.com/s/files/1/0439/1577/2000/files/Precious.woff2') format("woff2"),
       url('https://cdn.shopify.com/s/files/1/0439/1577/2000/files/Precious.ttf') format("truetype");
   }

   h1,h2,h3,h4,h5,h6,html,body,*,[id] *{
     font-family: "Precious" !important;
   }
 </style>
Activate the Custom Font on Your Shopify Store
- Navigate to the “theme.liquid” file.
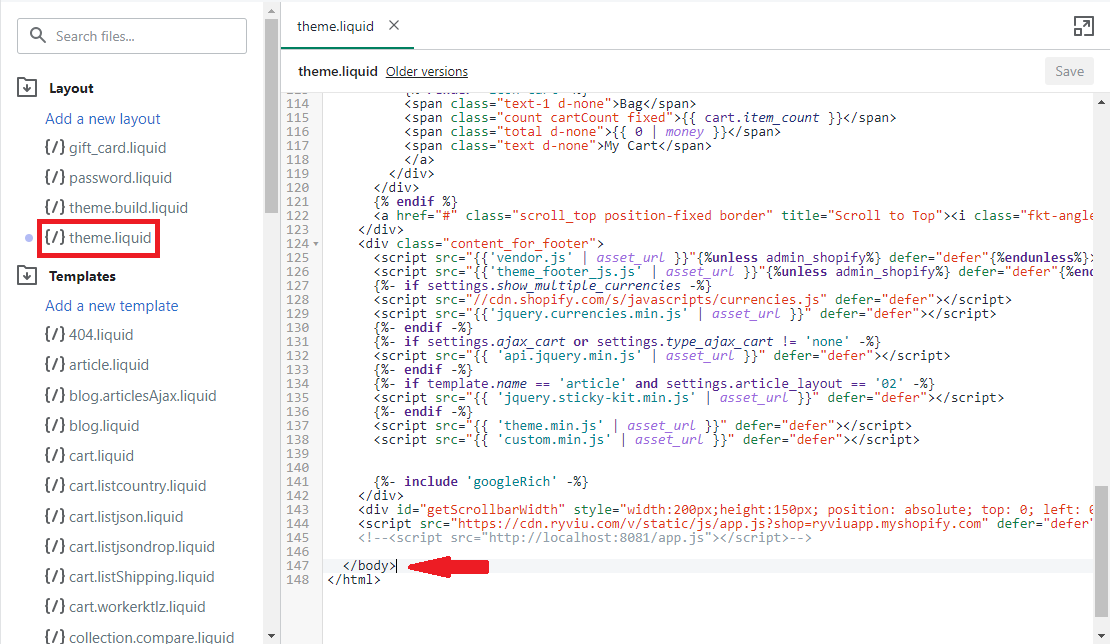
2. Add the following code before the </body> line.
{% include 'custom-fonts' %}3. That’s it! Now, save your changes, refresh your site and see the result.

Final Words
Adding custom fonts to your Shopify store has never been easier. We hope this article has helped you to know how to do it. In the end, you will have a Shopify store that is more unique and eye-catching than ever.
If this article is helpful to you, feel free to share your opinions and suggestions in the comments section below.

![]()
