How to Create an eCommerce Landing Page with Elementor?
Are you desiring to build a landing page in WordPress to introduce your product and convert customers as much as possible, but not sure how and where to start? Don’t worry. The process of creating a landing page in WordPress for an online store is extremely easy and simple by using Elementor because of its friendly interface and ease of use.
In this tutorial, we will present you with a detailed guideline on creating a high converting eCommerce landing page on WordPress using Elementor with no programming skills and no paid plugins. Let’s get started!
What is an eCommerce landing page?
A landing page for an eCommerce store is a standalone web page, separate from other pages on a website like home page, shop page, blog page, etc., typically made for a marketing or advertising campaign with the purpose of converting visitors to leads, or sales. But sometimes, a homepage or a single product page can be considered as a landing page. It’s designed strictly to persuade visitors to act on an offer. Ecommerce landing pages primarily sell goods over services. They’re created by eCommerce businesses with the ultimate goal of selling a tangible, physical product.
With the original idea of removing all distractions and focusing 100% on convincing the visitors to take one action, landing pages are considered the best solution to increasing the conversion rates of your marketing campaigns and lowering your cost of acquiring a lead or a sale.
What makes a good landing page for eCommerce sites?
The best eCommerce landing pages are able to generate more leads, push more conversions, and earn a higher rate of return. To succeed in creating a landing page best for your eCommerce sites, you should follow some core practices of high converting landing pages as below:
• Focus the whole page on only one offer
In an eCommerce landing page, you should include only a single offer that allows
users to create different offers such as buy 2 get another at 50% Off. If you give your visitors too many choices on a landing page, they can be overwhelmed and not know which to choose. It may lead to making no decision at all, ultimately turning to bounce. Instead, giving visitors an only choice will push the visitors to make the decision easier and be good for conversions.
• Keep the objective simple and clear
Don’t try to put too much information on your landing pages. Making the visitors clear what the page is about and what you want them to do. You should limit the amount of text, images, media, and links to only what’s necessary, and organize your content in a proper structure, and put all necessary things in a logical order. It’s especially important that the call-to-action (CTA) is as crystal clear as possible for the visitor.
• Use Multiple Call-to-Action Buttons
Having a single offer doesn’t mean you just need one button. Many visitors tend to scroll down from your original offer above the fold. If you don’t set another button at the bottom of the page and many of them will not want to return back to the top page, it may result in a high bounce rate. Instead, you can think of adding one or two more CTA buttons and use whitespace, color contrast, and directional cues to make your CTA stand out.
• Include social proof and testimonials to boost credibility
To further engage with more audiences, the landing page should offer social proof, and testimonials to prove the huge number of your products sold or how the clients talk about your products. This will help you build trust in visitors and stimulate them to make a purchase or become your lead.
• Remove or Limit extra navigation
Landing pages are most often used in advertisements to get targeted consumers back to a specific conversion. Any single distraction can take them out of your original sales funnel. Leaving the navigation on your elementor landing page might induce the visitors to continue wandering. Therefore, you should omit or limit the links navigating to other pages on your site as least as possible, except for the main CTA.
• Match the Content to a Visitor’s Previous Source
Whether a visitor comes from an ad, email, or call-to-action from another source, ensuring the messaging to match the entire content on the page they are landing is a must. There’s nothing worse for a visitor than clicking on an advertisement or email link only to land on a page that looks absolutely nothing like what they were expecting. If your ad says “Take the Giveaway”, your landing page has to show the exact same thing. If there is a disconnect in your messaging, visitors will feel as if they are in the wrong place and will likely get out of your page.
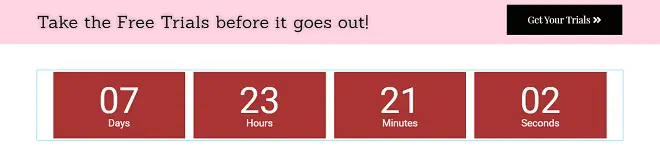
• Create urgency
Urgency and a sense of scarcity are two of the most powerful emotions that retailers can evoke in would-be customers. Including an urgency element on a landing page can lead to more conversions in comparison with those without an urgency element. You can create urgency on your eCommerce landing page by showing countdown timer, creating scarcity, offering temporary deals, etc.
• Use high-quality images
I am sure that no one wants to see low-quality or pixelated images on any website, especially a landing page. If your landing page includes such kinds of images, the visitors will definitely leave your site pretty quickly. High-quality images fulfill a number of functions such as showing professionalism, helping visitors evaluate a product, and boosting engagement.
• A/B Test your eCommerce landing pages elements
If you don’t know which aspects are working perfectly on your landing page, you can boost your sales a little bit each time by testing with various targeted customer segments, various headlines, various CTA buttons, etc. You can do it by applying A/B testing which will allow you to determine which headlines work best, if a menu or no menu will drive more conversions, and if one CTA or multiple does better.
Can you handle it yourself for free?
If you find it difficult to apply the practices above while creating an Elementor landing page, you can hire a developer to handle it for you or pay a monthly subscription service like LeadPages, ClickFunnels, or Instapage, etc., which will allow you to create landing pages without any coding knowledge.
However, I think it’s an expense that’s not required because you can easily build your own landing page with the friendly interface of the Elementor page builder. You can take full control of customization over your landing page and have the design exactly as you want.
If you want inspiration for designing cool landing pages, you may take a look at this collection of the best landing page examples. There you can find out the best Elementor landing page templates to learn and analyze.
How to create the best eCommerce landing page on WordPress with Elementor?
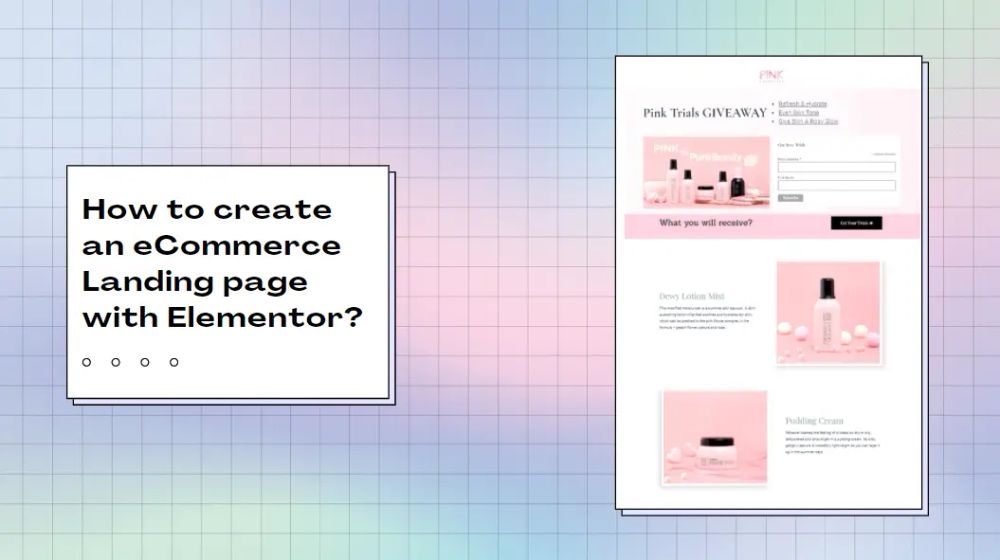
In this article, I will show you how to create a landing page for a giveaway campaign.
Before getting started to build the Elementor product page, you need an active WordPress installation and install Elementor
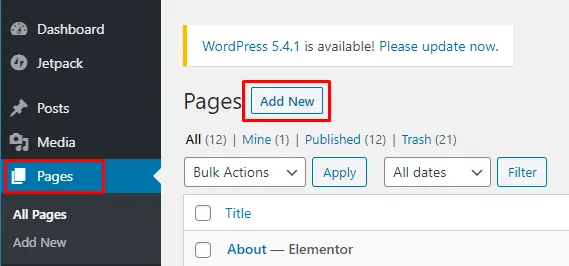
Step 1: Create a new page
First, in the WordPress dashboard, click Pages > Add New
Products are frequently grouped into categories, subcategories, and sub-subcategories in online businesses with hundreds of products. It may take several clicks to return to one of the earlier levels in the hierarchy once a user has gone deep down the hierarchy. Breadcrumb navigation comes to the rescue in this situation.
Name your eCommerce landing page and click Edit With Elementor, then you are navigated to the next step:

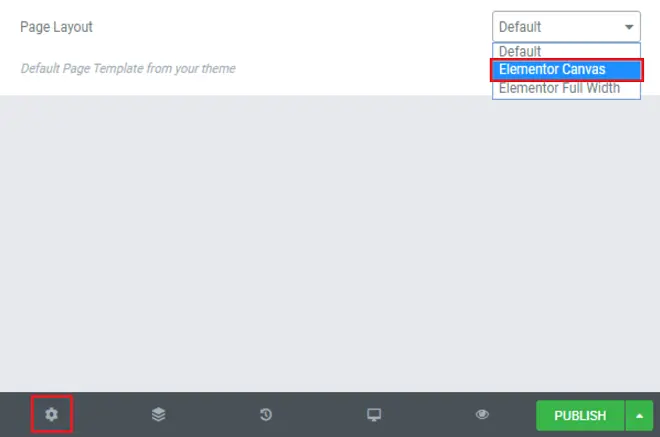
Step 2: Edit with Elementor
Scroll down to the bottom, click on the left gear icon (as shown in the image below), in the Page Layout, choose Elementor Canvas to remove all the navigation menus and links from your page and get a blank page to design a landing page as you want.
Once you’ve done, you will see a blank page below. Now you can start to create an Elementor landing page on WordPress for your eCommerce site by adding some required elements in the following steps.
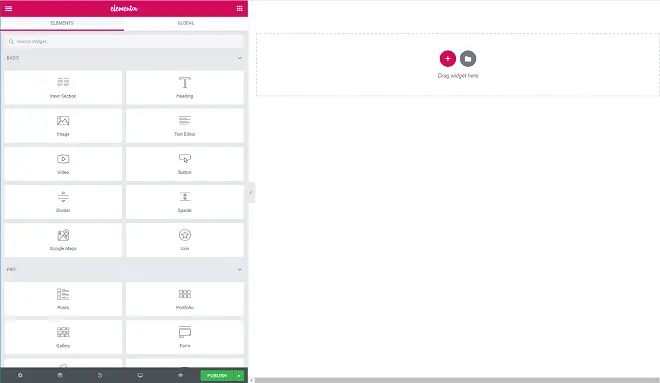
Step 3: Add required elements and customize to make them personal
In this process, you need to add all elements you want to include in your Elementor landing page.
To make a high converting landing page, you should follow and apply the practices I mentioned above.
You can use a pre-built template to instantly set up a landing page and customize it. There are a few great free landing page templates, just clicking the “gray folder” icon, then you will see a lot of free landing page templates. The method is quite easy. All you have to do is choose a template and customize it to your preference.
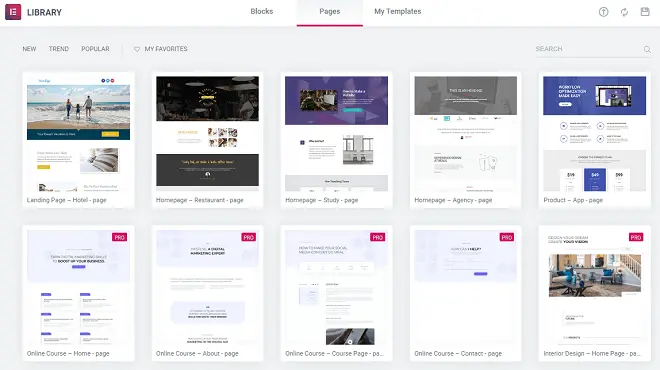
But if you want to create a landing page with your own design, click on the “red plus” icon to add a template and select the structure of the landing page. You can build a page with up to 6 columns.
Usually, a one or two-column design is the ideal structure for a simple landing page for eCommerce sites.

Below are some basic understandings you need to learn before making a landing page for your eCommerce site.
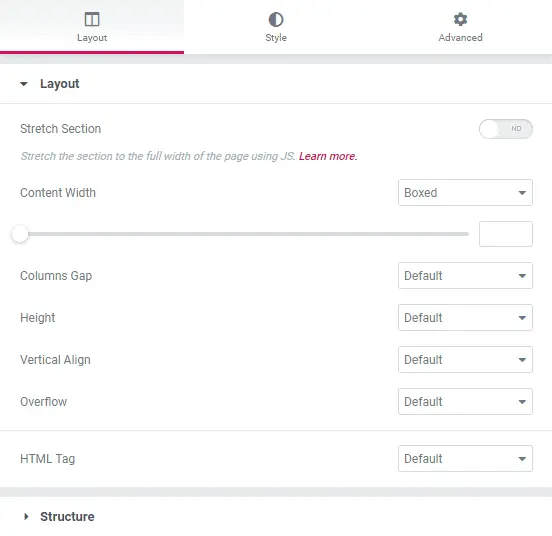
In the Layout section, you are allowed to edit the layout and structure of the section you have created such as Content Width, Columns Gap, Height, and more.
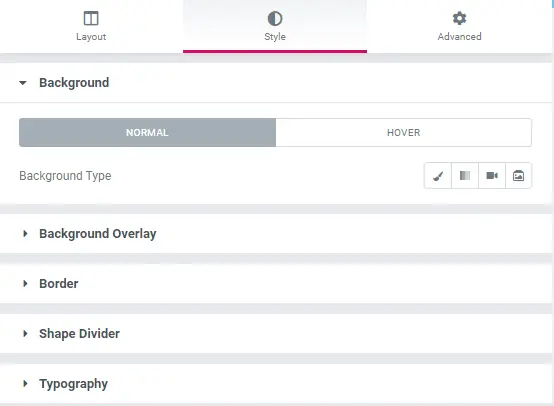
In the Style section, you can make some settings with background, border, typography. You can choose a color, an image, a gradient, or even set a video as the background of your landing page.
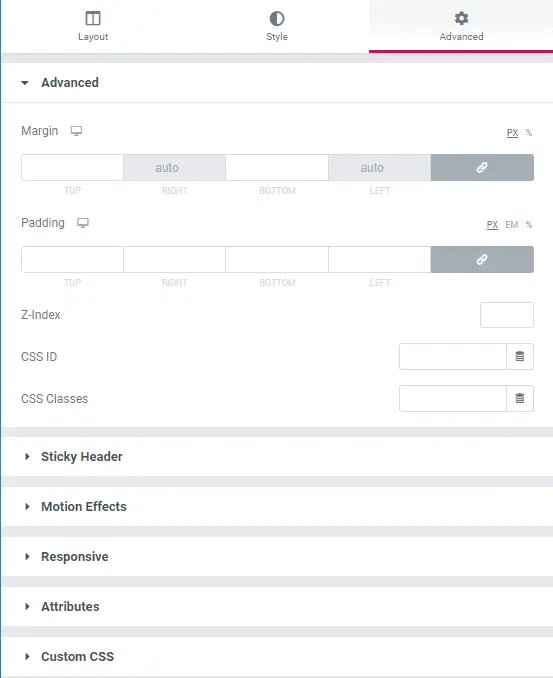
Switch over to the Advanced section to set padding and margins and other aspects to make your design fit the page.
Then, you can start to build an Elementor landing page as you desire.
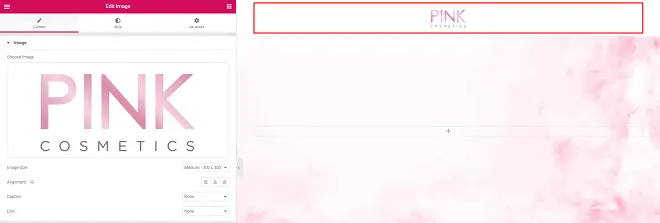
Website header – For an elementor landing page for an eCommerce site, you should minimize the header, limit/ remove all navigation, and just include the site logo centered in the middle. To make a header, you can take a 1-column structure, and select the “image” widget to add your brand logo to it.
Headline- Headline is the first element that flashes at your prospect as soon as he lands on your landing page. This makes it the most powerful part of the whole page. So you should create a short headline, a short sub-headline (optional) designating at least one clear benefit, and meet the expectations of visitors.
In this section, you should select a 2-columns structure. On one side, add a “Title” widget to create the main headline, and “Text” if you want to add a sub-headline. On the other side, you may want to put a signup form or a CTA button to grab visitors’ attention.
Hero shot – Hero shot (also known as a header image), whatever your products are, you should present the best offer as clearly as possible in this section.
You can add or edit the hero shot easily by clicking the “dots” icon, then select to edit section in the customization area.
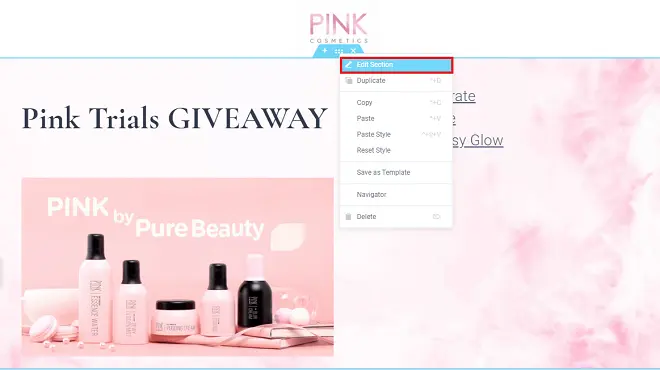
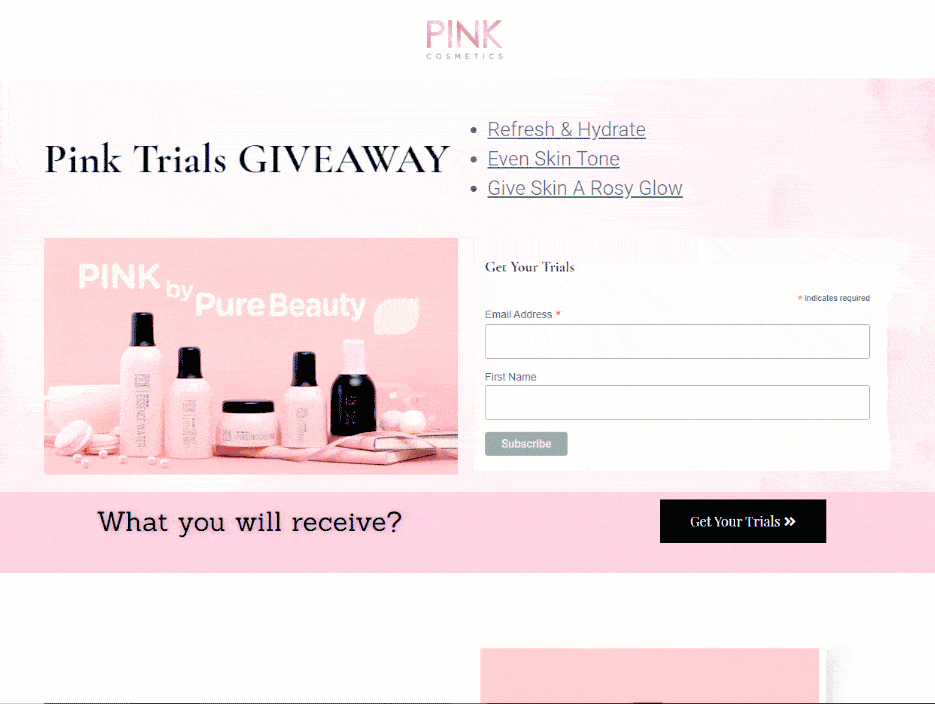
In the example landing page I am creating as below, I select 1 column for the header and include only the logo in it.
In the hero section, I take a 2 column structure to put the headline first, then a high-quality hero shot which is the image of the product trials that the visitors will receive if they leave their email timely in the signup form aside. I also mention 3 outstanding factors to push the visitor to fill in the form.

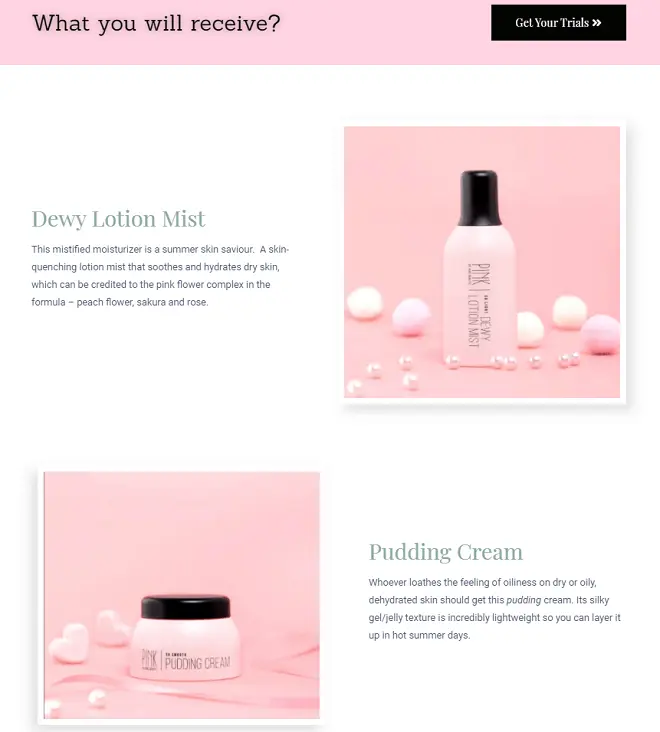
Services – In this section, you need to present the main services or features your business provides. You can also add more reasons why customers choose your products not others, or the great benefits you offer them if they click to the CTA button.
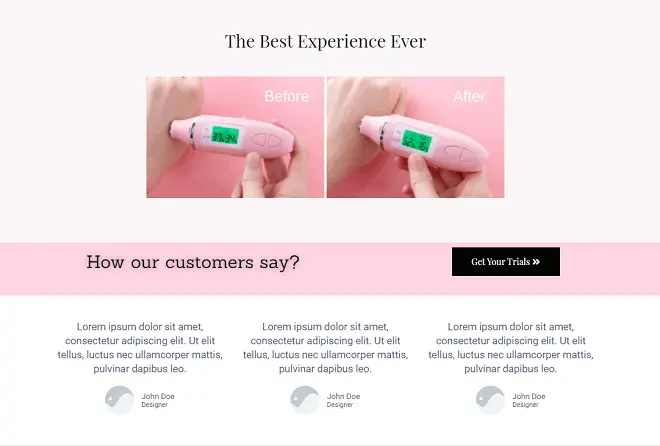
Testimonial – The testimonial section shows social proof that your current clients are satisfied with the service they received from you. You can also include some positive results that your products bring about by using some addons such as image, testimonial, testimonial carousel. If you need more useful product reviews, you can install a review plugin like Ryviu on your site.
Urgency and Scarcity– As mentioned earlier, urgency and scarcity play an important role to push the visitors to decide to click the CTA faster. So you should include a sense of urgency or scarcity on your landing page by adding the countdown timer widget.
Portfolio – Show the visitor examples of your work, so they know if you match what they are looking for. In this area, you can also mention your partners, or how you are more popular and famous in comparison with other competitors. You just include this part if you think what you perform is outstanding and surprise the visitors.
Footer – Because your visitors have already scrolled down the page, you want to offer them another call to action, to encourage them to do what you want them to do, or include your Privacy Policy and Terms of Service, or something related to it. Normally, there will be 3 or 4 columns in the footer. You may need some widgets like icon, title, text, social share, any copyright, etc.

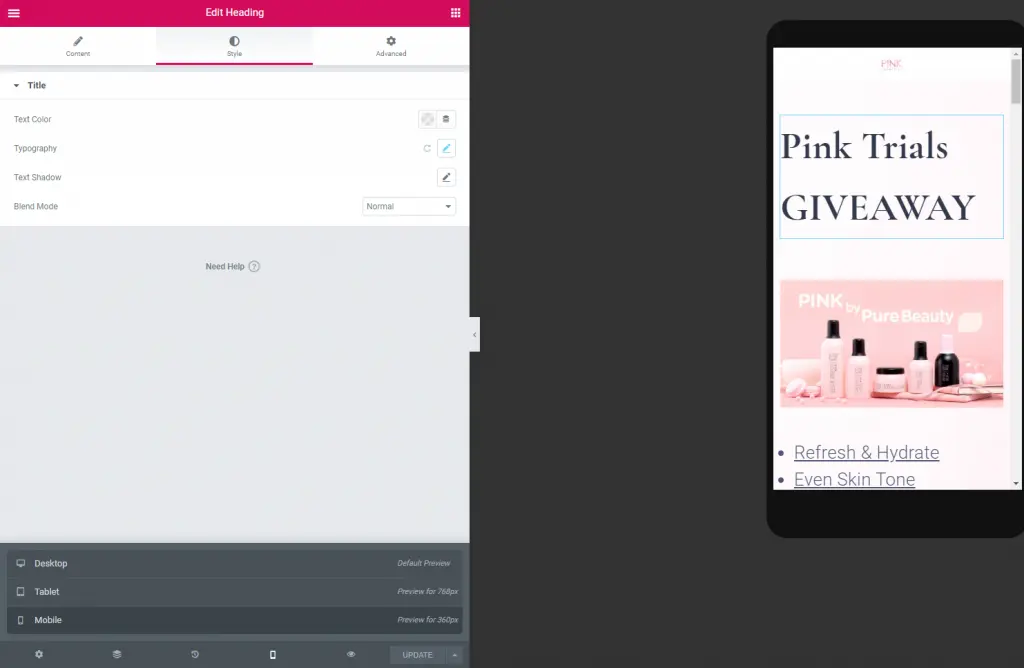
Step 4: Customize your landing page for mobile
People often spend most of their free time on their smartphones. Hence, optimizing your landing page for mobile is necessary. To make a good mobile landing page, you should keep the headline short, customize the page organization to make it fit in mobile devices, and make the CTA and mobile phone (if there is) clickable.
This process is prettily easy because, in Elementor, all blocks come with 100% mobile responsive designs. You can switch to mobile view and start customizing margins, padding, and other settings for mobile and tablet devices.
Step 5: Add an email subscription form and Embed it on the landing page
The next step is to create an email opt-in form to embed on your eCommerce landing page. There are many plugins supporting you to create an email subscription form such as MailChimp, Constant Contact, etc.
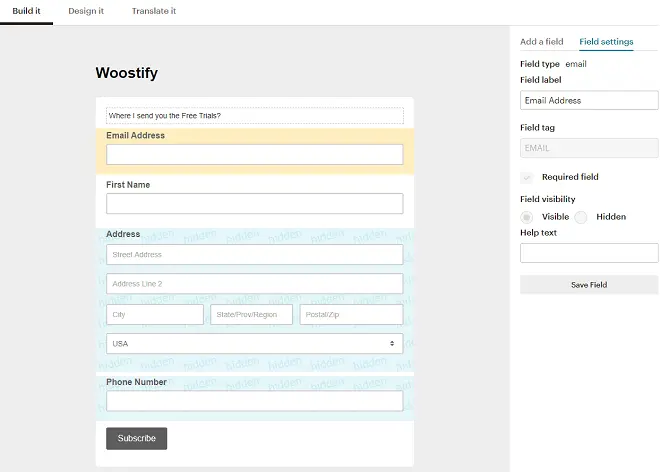
To do this, first login to your email marketing service. Select your email group and create an embed Signup form. Below is an example I made in the Mailchimp free version.
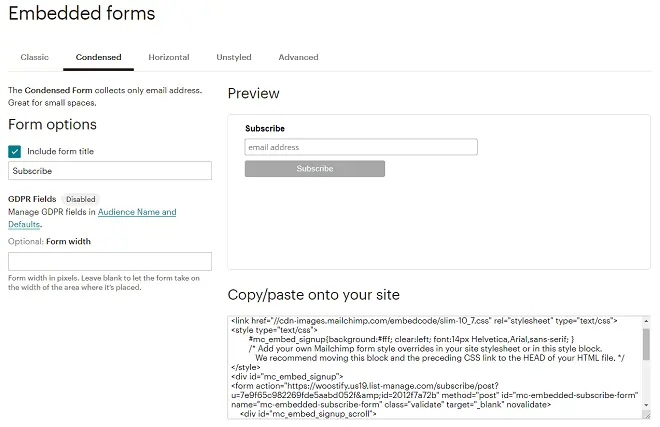
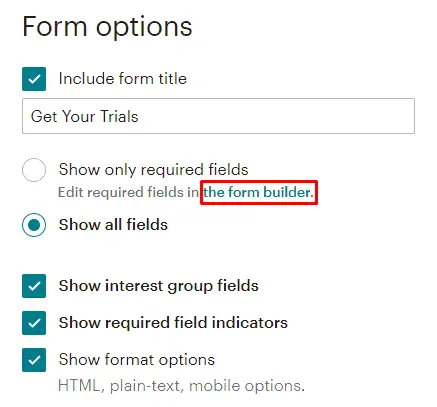
You can edit the form, add or remove any information if you want by clicking in “the form builder”
With any plugin, you can customize the template as you desire and then copy its code.
In Elementor, you find the “HTML code” section, drag & drop it on your landing page design. Once you created the signup form successfully, copy the code of the form and paste it in the HTML element in Elementor. You can see how it looks to the visitors.
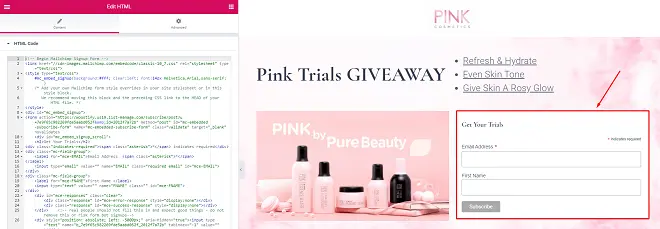
Make sure to remove the background color code to make the signup form transparent. If you’re familiar with HTML and CSS, you can further customize the signup form buttons and layout to match your landing page design.
Step 6: Previewing Result & Publish your eCommerce landing page
When you’re done customizing the design, hit the Publish button to publish your landing page and see how it looks in the frontend.
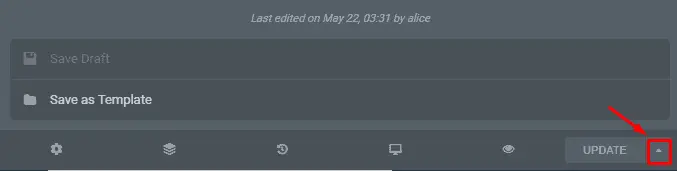
You can also save it as a template to use it later. Or you can use its structure, replace the inner content to make other landing pages for other campaigns.
Conclusion
That’s what you need to learn how to create a high converting landing page for your eCommerce site with Elementor in WordPress. You can totally create a landing page with Shopify if you are using Shopify for your eCommerce store.
Generally, eCommerce landing pages require some core factors like a short and clear headline, high-quality images, social proof, urgency element, and others, to compel visitors to click a CTA button. Hopefully, this tutorial can help you easily build an eCommerce landing page for your campaigns without any developer or any paid service.

![]()
