How to customize Shopify checkout page to increase conversion rate?
Shopify is a solution for Saas which is Software as Service. It allows people to set up their online shop. Unlike the regular eCommerce online platforms.
Shopify provides several functions to support the business of customers. But the scarcity of opportunities and sellers' surplus makes the market more competitive. Therefore, today I will show you some solutions to Shopify customize checkout page. It is exactly what you need to increase your revenue from that platform.
What is Shopify checkout page?
The checkout page is where customers see the summary of the order and provide their payment information. They might know about the product on the previous page. But in the checkout step, customers might accept the order or not and choose the way to pay for the order.
As a result, that page is the pivotal factor to push sales and is one of the most considerable problems for many people who sell their products on Shopify.
How to edit Shopify checkout page
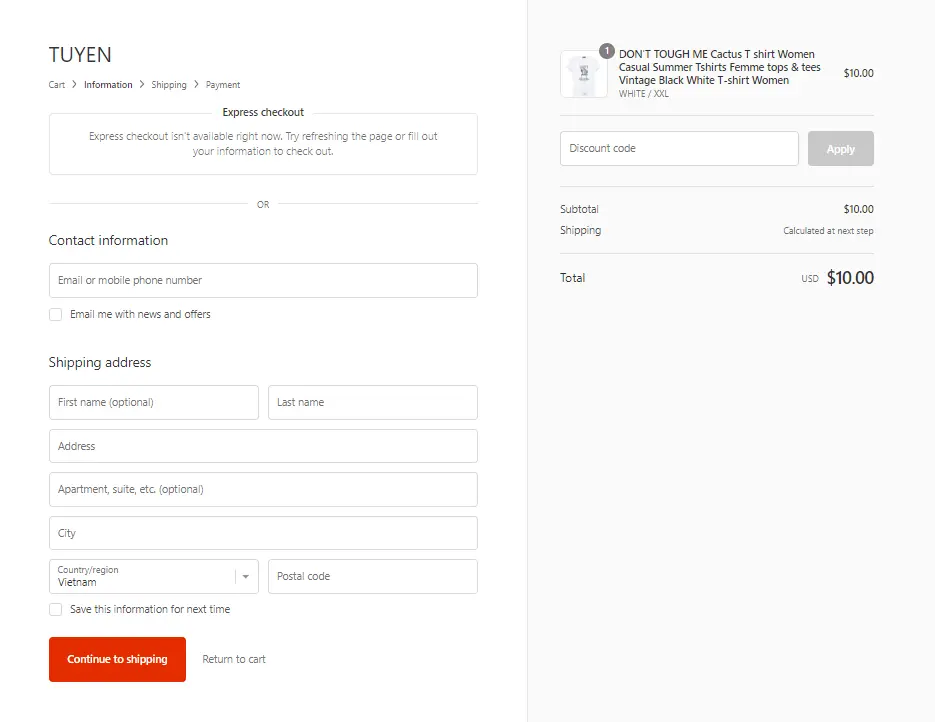
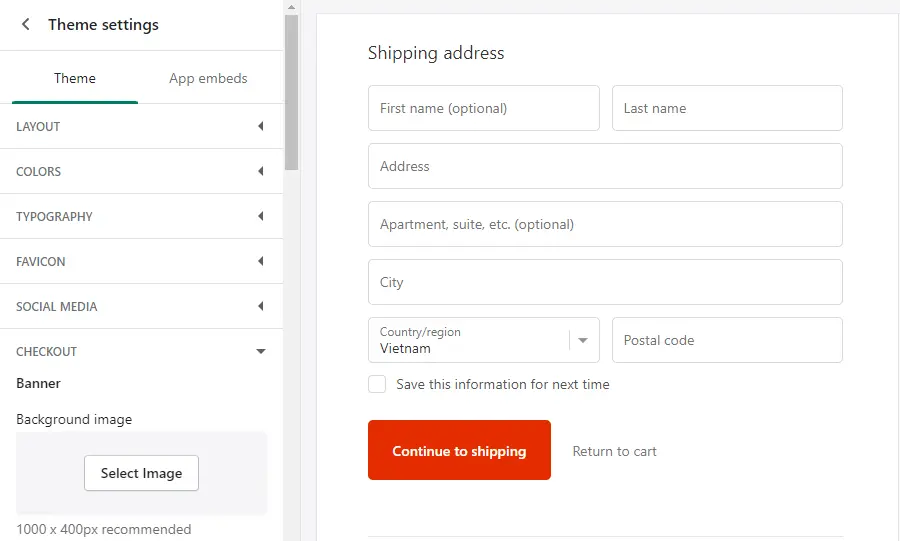
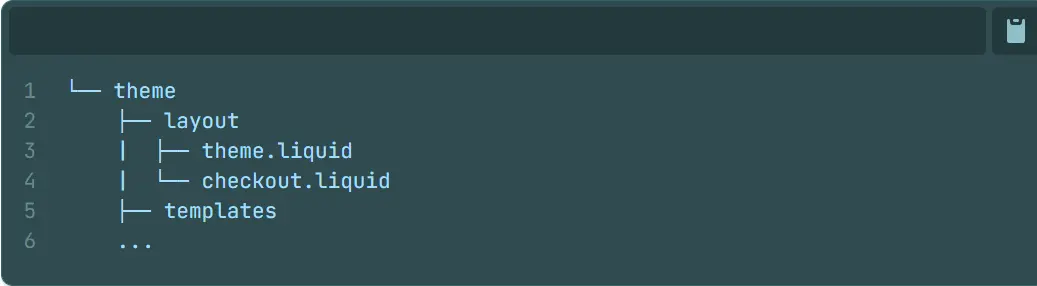
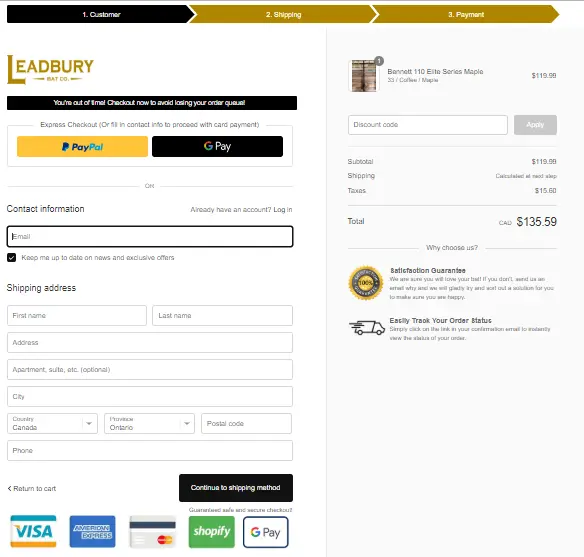
The picture below is the simplest layout of the checkout page. You can't change the fixed structure of the page, but Shopify allows sellers to have some control over the interface of the page.
1/ Manually edit Shopify checkout page
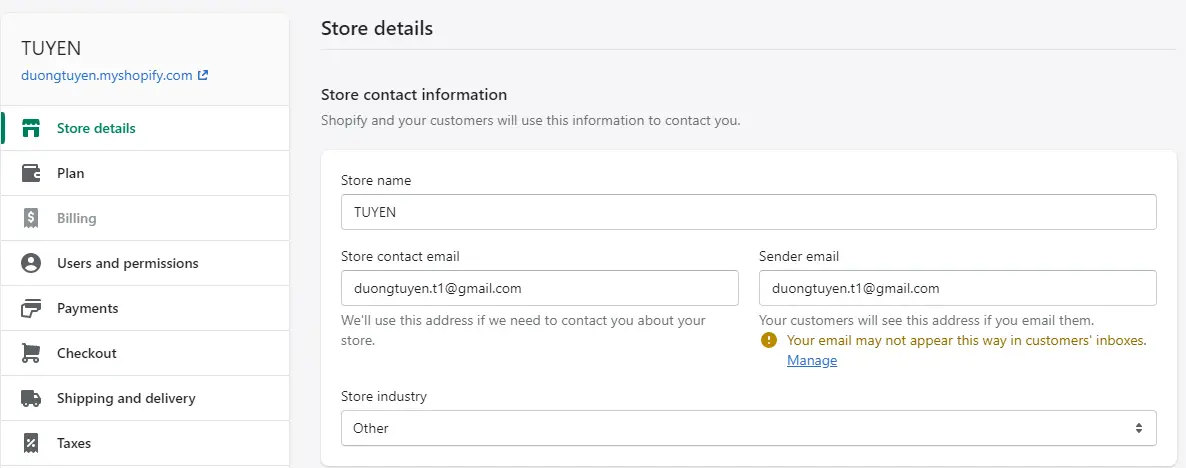
Step 1: In the Dashboard, select Setting > Checkout
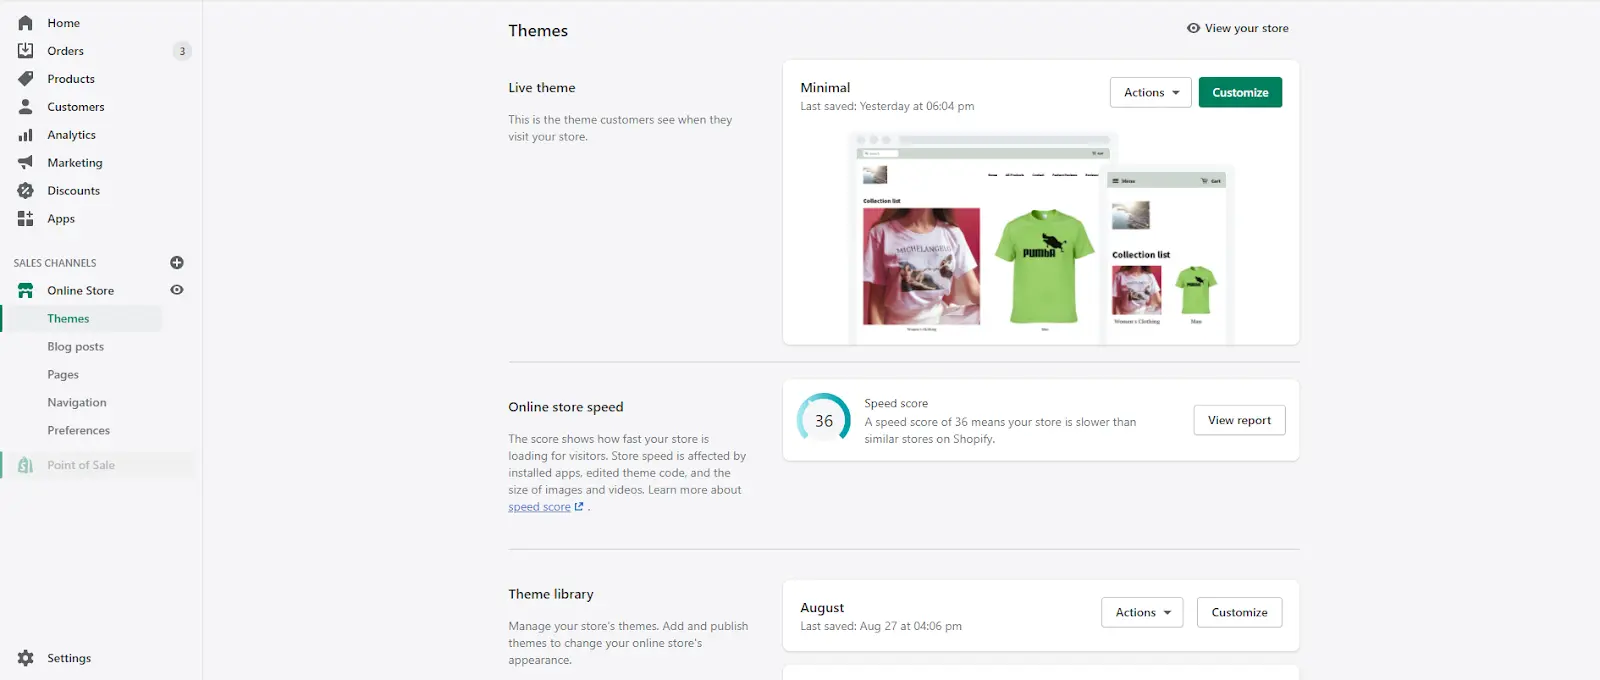
After selecting Setting. Click Checkout to edit Checkout page
Step 2: In the Style section, click on the Customize checkout button
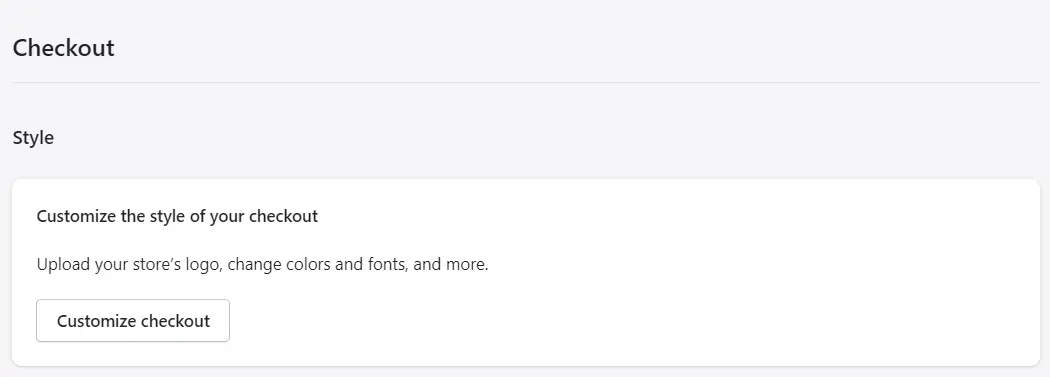
Step 3: You can choose to edit Banner image; Color; Main Content Area... in the Theme setting. To update more features to edit, you have to be a customer of Shopify plus.
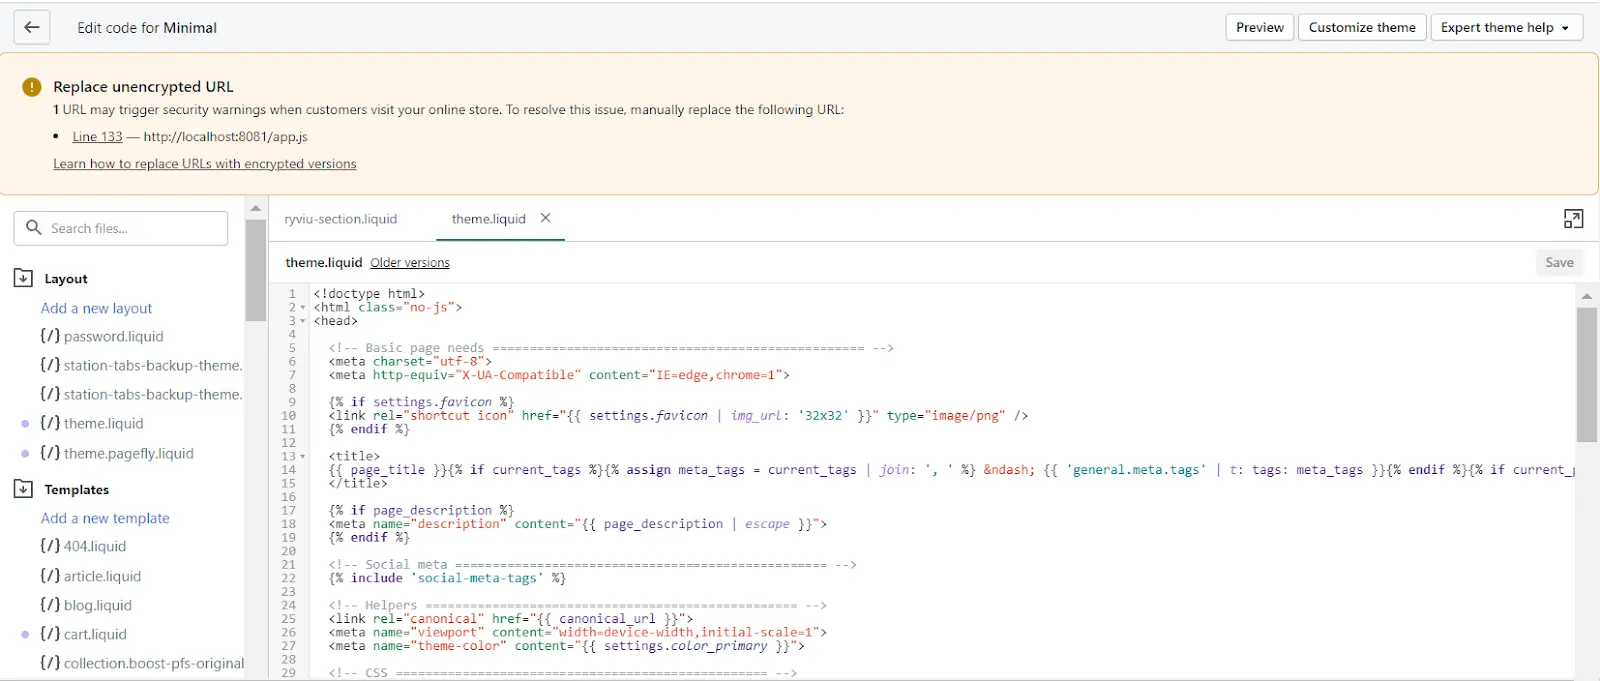
2/ Using code in Shopify plus
Step 1: In the admin panel, navigate to Online store > Theme section
Step 2: Choose Edit code under the Action dropdown
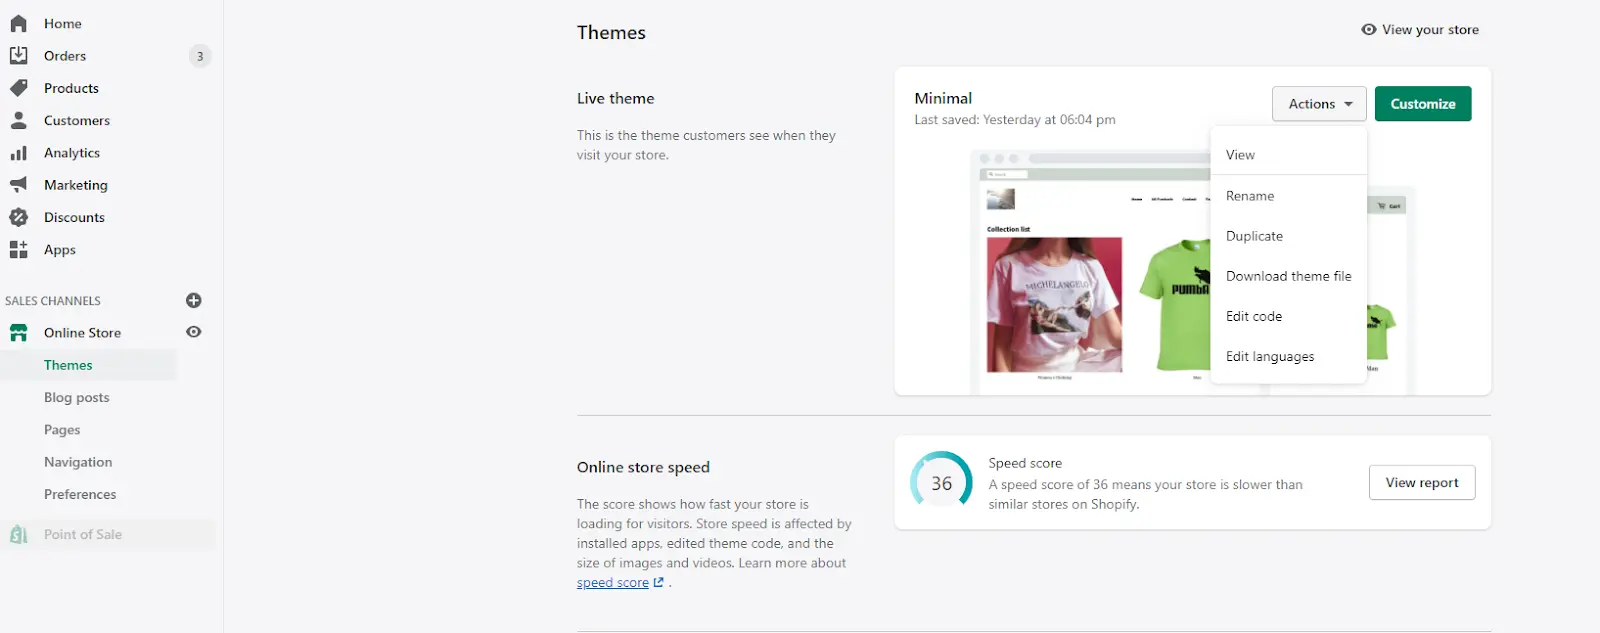
Step 3: Pick checkout.liquid file to edit your change
Step 4: Click Preview to view the change and click Save if you are happy with it.
How to make a Brilliant Shopify customized checkout page to upsell?
As a seller, you must know exactly the factors that influence the buying decision of the buyers. There are several elements such as the trend; Price; Promotion;... But, in this article, I would mention some pivotal factors in the Checkout page that you could need to change to increase the conversion rate.
Here are the keys when people decide whether make a purchase or not:
- Trust
- Information
- Motivation
- Visualization
1. Build trust from customers
The biggest obstacle preventing people from purchasing your products is TRUST. People sell-buying based on their trust with their partners. You sell your product at an obvious higher price compared to your competitors. IT'S OK if you have the trust of customers.
There is some point to increase the trustworthiness by Shopify optimize checkout page:
Add more information about your store
It is a must for your Shopify shop. You could easily add your logo to the Checkout page but it makes your page so far more trustworthy and legitimate. If you are a beginner and have just started your business in Shopify, don't forget to make a logo for your store and update it on your checkout page.
You can add your brand logo as the following steps:
- In the admin, go to Dashboard > Setting > Checkout > Customize > Theme Setting > Logo (position: Left, right or middle and size: Small, medium or big)
- After editing the Shopify checkout page, you choose the Logo section to edit your shop logo.
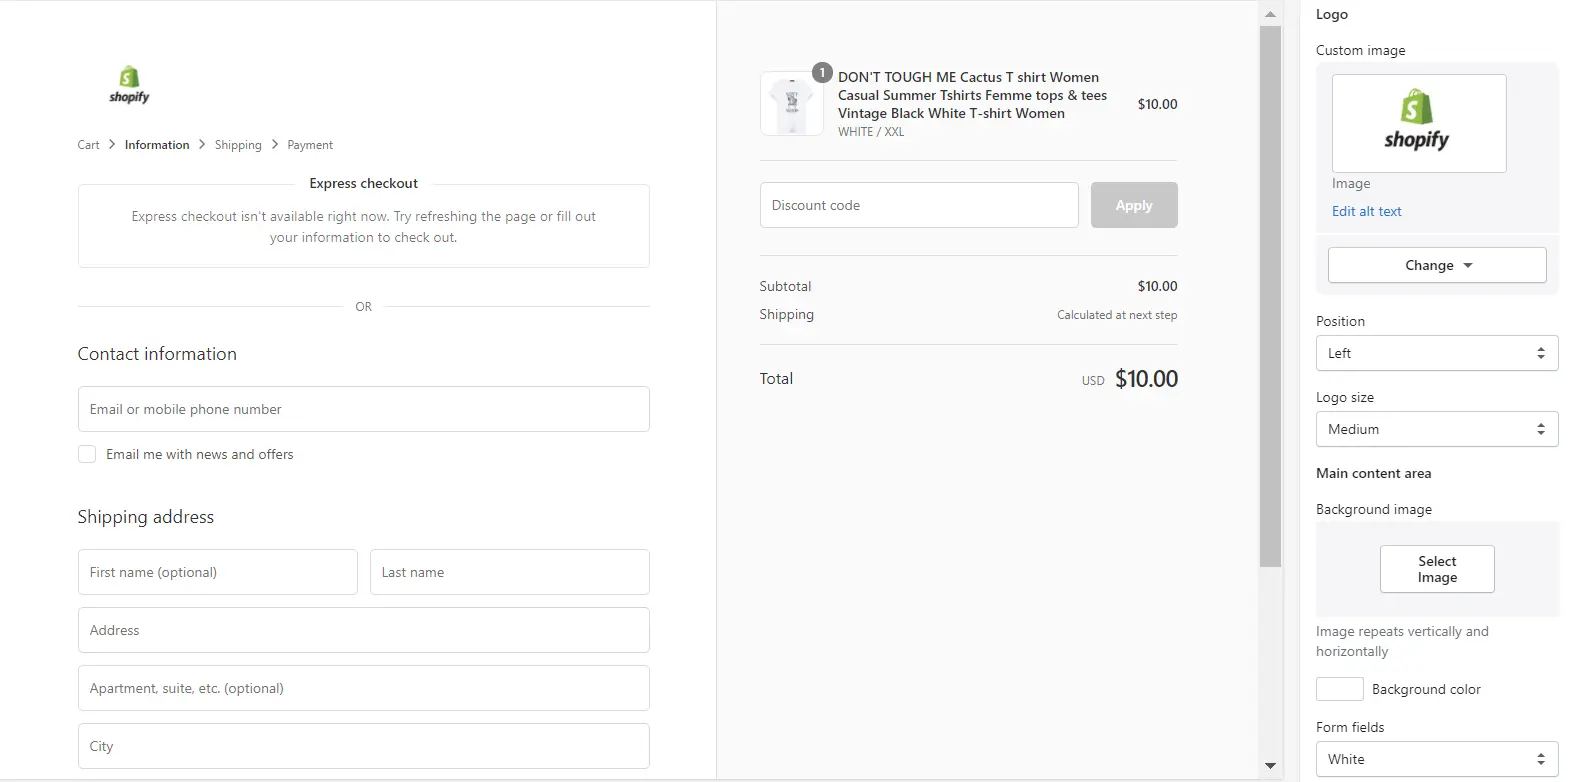
Needless to say, you also have to fulfill other basic elements such as banner; background colors;...
Provide more methods of payments
Customers have a sense of trust when they see that store owner can offer a wide range of payment methods. The Card Badges which were added as a method of payment are social proof that makes your store have legitimacy in customers’ minds.
Moreover, the method of payment is an undeniable factor in the buying decision. Since you provide more methods of payment, they could choose their favorite card to cover their bills. It is a plus point if you allow them to make purchases with the method that they hoped.
You could follow step-by-step as below:
In Shopify admin, click Payment. In the Payment provider, add the payment methods.
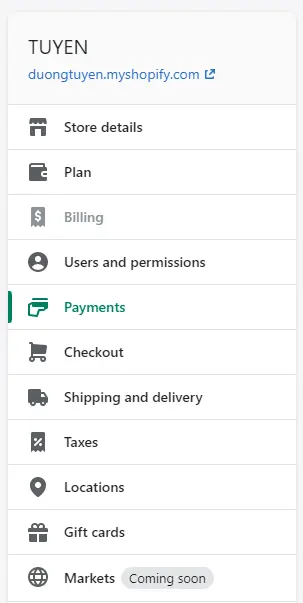
You could add more information in Additional details, as well as enter payment instructions for customers in the Payment instructions section.
Add Trust badge
So there are not many opportunities to show off the reliability of your store on this page. However, you can easily add Trust badge without an app under the total money of the order on the checkout page.
Or you can easily find and add trust badge by using Free Trust Badge by ShopClimb app.
2/ Information
Another crucial element is the information about the store which was shown on the checkout page. Your information on your page may display as images or text. However, all that information should be logical and consistent with all other parts of your store.
Here are some notes to make the information about your store on the checkout page better.
The information consistency system
As you already know that your logo is merely a graphic element identified as a business. The color of the store is crucial. Each brand chooses a few colors to perform its brand characteristics. Both the logo and the brand color are a part of the brand guideline. Brand logo and color in the checkout page should be fixed and consistent on all the pages.
Owning to the high consistency between the brand logo and the color on the checkout page, your store completely looks professional and trustworthy!
Customize logical layout
Owning to the development team of Shopify, the Checkout page already has a simple and well-organized layout. All elements and positions are arranged in the flow of their relative importance or the payment‘s progress.
However, you could edit the position of some elements or even add more sections to the Checkout page and it entails a different structure for the page. Thus, you should consider the structure of the page if you want to change your checkout page.
3/ Visualization
Visualization has a great impact on the awareness of the customer about the store. To achieve a high conversion rate, sellers need a brilliant performance on their checkout page.
Create “Why choose us section” to well-balanced
I recommend that you could create the “Why choose us” section on the right-hand side of the checkout page to balance the 2 parts and optimal visualization. As you can see below.
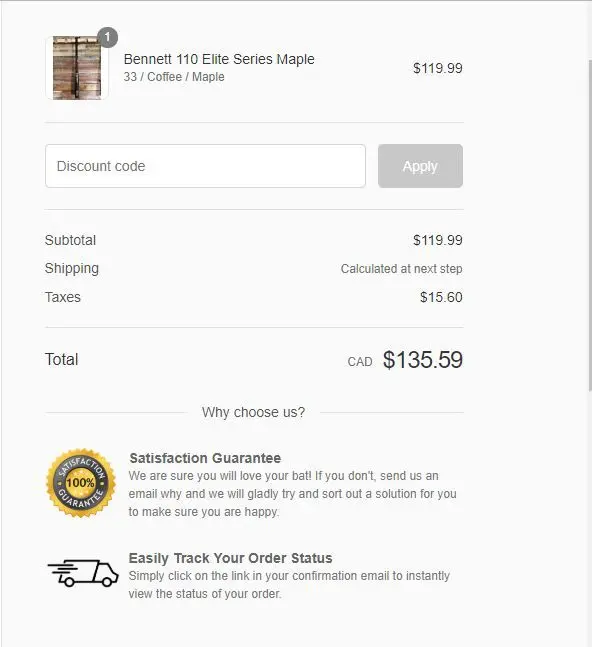
In this “Why choose us” section, you could give whatever you want. However, presenting some significant points about merchandise would attract the attention of shoppers. I assert that such areas could be a great way to show the core of your business such as great policies for shipping products; The promotion for the next buying; tracking the order status..., and making customers aware of anything that you want to emphasize.
In another aspect, by adding this badge to the page, sellers also increase the trustworthiness of their store. As a result, it increases the conversion rate and brings revenue to your store.
To add this section to your page, you can use javascript with checkout.liquid. The advantage of this way is that you could choose to put any section of the page but just only Shopify plus members could use this function.
The below code to identify the section where you have to add “Why choose us”. In this example, I will add it below the Order Summary section. Then you add “CTA”
(function($) {
// if customer is in the contact information section of checkout process
if (Shopify.Checkout.step === 'contact_information') {
$(document).on('page:load page:change', function() {
$('.order-summary__sections').append(cta);
})
}
});
Then copy this code into your program. After editing the program, you will see the “Why choose us” title below the Summary order.
var cta = `
<section class="wcu">
<span class="wcu-title">Why choose us?</span>
<div class="icon">
</div>
</section>
`;
Another way to add the “Why choose us” section is that using assistant features such as Why choose us; Social proof popup; Product detail counter;... on Fera.ai

4/ Emotion
The fMRI research shows that emotions are the primary reason which pushes shoppers to make a purchase rather than information. But there is limited information on the checkout page, so how can store owners raise the emotions of shoppers and lead them to buy goods?
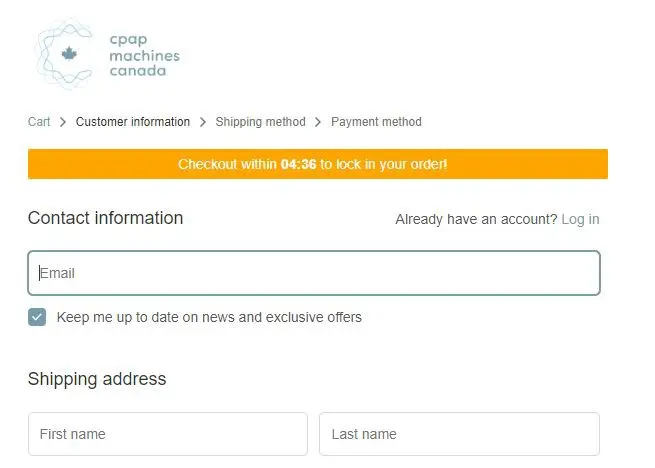
Countdown timer to push sales
A countdown timer increases urgency and pushes customers to make the order. It is an all-the-range tip for the seller and a win-win solution for both customers and sellers. Unfortunately, Shopify doesn’t provide that sort of feature in their software. However, sellers could use another assistant app like fera.ai to add in a small countdown check out on their own.
The countdown clock is small and designed as a banner on the Shopify checkout page. You also could change the wording on the clock to suit your promotion and your store. It is not a must, but it is the solution to increase your conversion rate. You should give it a look before deciding to add it to the page.
Shopify Customize Checkout Page: FAQs
How do I customize my checkout page on Shopify?
To customize your checkout page on Shopify, you will need to
- Navigate to the "Online Store" section of your Shopify admin panel and select "Themes."
- From there, click on "Actions" and then "Edit code."
- Look for the "Sections" folder and open "cart-template.liquid." This file controls the layout of the checkout page. You can make changes to the code in this file to customize the appearance and layout of your checkout page.
Can we customize cart page in Shopify?
Yes, you can customize the cart page in Shopify.
To do this, from your Shopify dashboard, navigate to Online Store > Themes > Actions > Edit code."
Look for the "Sections" folder and open "cart-template.liquid." This file controls the layout of the cart page. You can make changes to the code in this file to customize your cart page layout.
Can you add custom fields to Shopify checkout?
Yes, you can add custom fields to Shopify checkout by using the Shopify "checkout.liquid" file.
To access this file, navigate to Online Store > Themes > Actions > Edit code.
Look for the "Templates" folder and open "checkout.liquid." You can add custom fields to the checkout page by adding code to this file.
How do I add content to my Shopify checkout page?
To add content to your Shopify checkout page, you can use the "Additional content and scripts" section of the checkout settings. This section allows you to add custom HTML, CSS, and JavaScript code to the checkout page. You can use this feature to add images, text, or other content to your checkout page.
To access this feature, navigate to the "Settings" section of your Shopify admin panel and select "Checkout." Scroll down to the "Additional content and scripts" section and add your custom code.
Conclusion
The checkout page is an extremely essential part of your business. Following the aforementioned tips and notes is the best way to up your sale. Nevertheless, sellers need to use it smartly and well-adapt to the store as well as circumstances.
Only customizing Shopify checkout page can't increase the conversion rate rapidly. You need to optimize all pages from the beginning to the end. Applying 4 great factors: Emotion; Visualization; Information and Trust on every page and ask yourself: What you can do to build trust on this page. However, again, take an overview and customize the logical layout of each page before editing anything.

![]()