5 Ways to Set up a Shopify Menu with Images
You may have picked a dish on a menu at a restaurant simply because the picture was right next to it. You could imagine the food, and it looked good enough to order.
Similarly, your conversion rate can increase by adding images next to your Shopify menu items.
If the visitors can see what your products look like before going to product pages, they can choose the right one quickly. This reduces the likelihood of customers leaving your store because it is too hard to find what they want.
Fortunately, creating a Shopify menu with images is a straightforward process. Here are five ways to do so.
Option #1: Add Collection Images

This is one of the most basic ways to set up a Shopify menu with images on your online store.
Shopify already makes this easy for you with the Navigation menu. And it applies to any Shopify theme.
Remember to use clear, well-lit, and authentic images. So your customers can have a good feel for the size, color, etc., of your products.
And since they are placed next to each other, it is essential to ensure all the images have the same size.
Create Image Associations
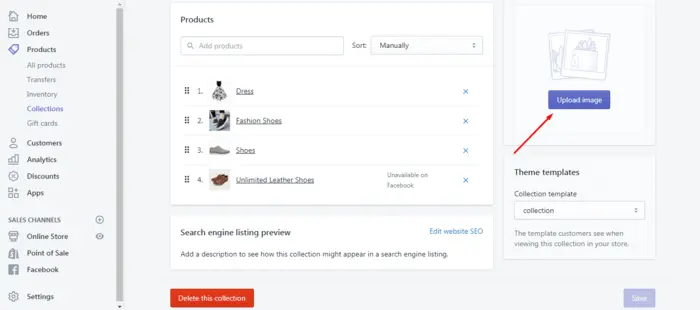
To associate an image with a collection, follow these steps.
- From the Shopify dashboard, go to Products > Collections.
- Click on the name of a collection.
- Click on the Upload image button.
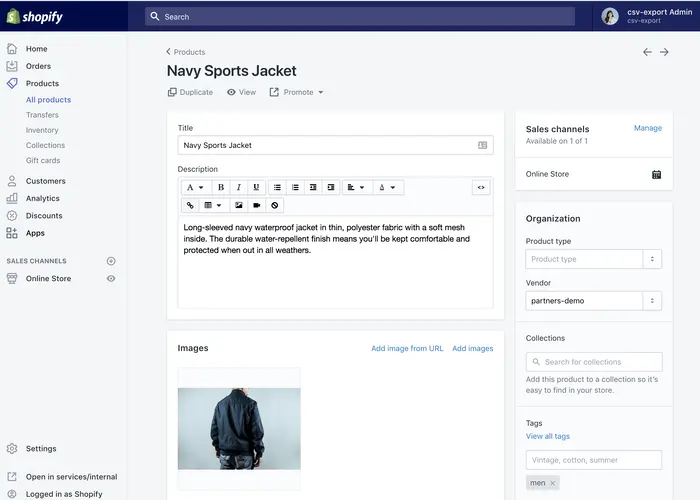
To associate an image with a product, follow these steps.
- From the Shopify dashboard, go to Products > All Products.
- Select a product.
- Click Add Image.
Add Your Collections/Products to the Shopify Navigation menu
- From the Shopify dashboard, go to Online Store > Navigation.
- Select a menu.
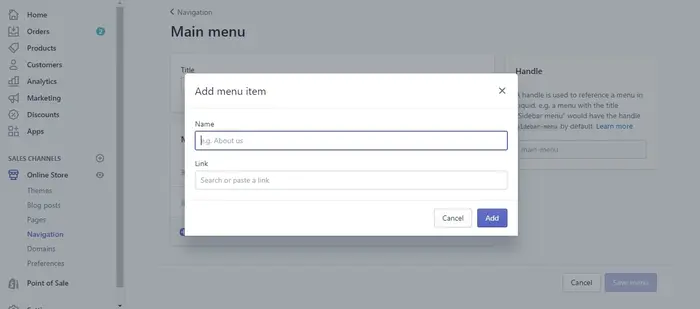
- Select 'Add menu item (to ...)'.

4. Enter the name of the new Shopify menu item. Then click on the 'Link field' to link to a collection or product.

5. Click on the Save menu button.
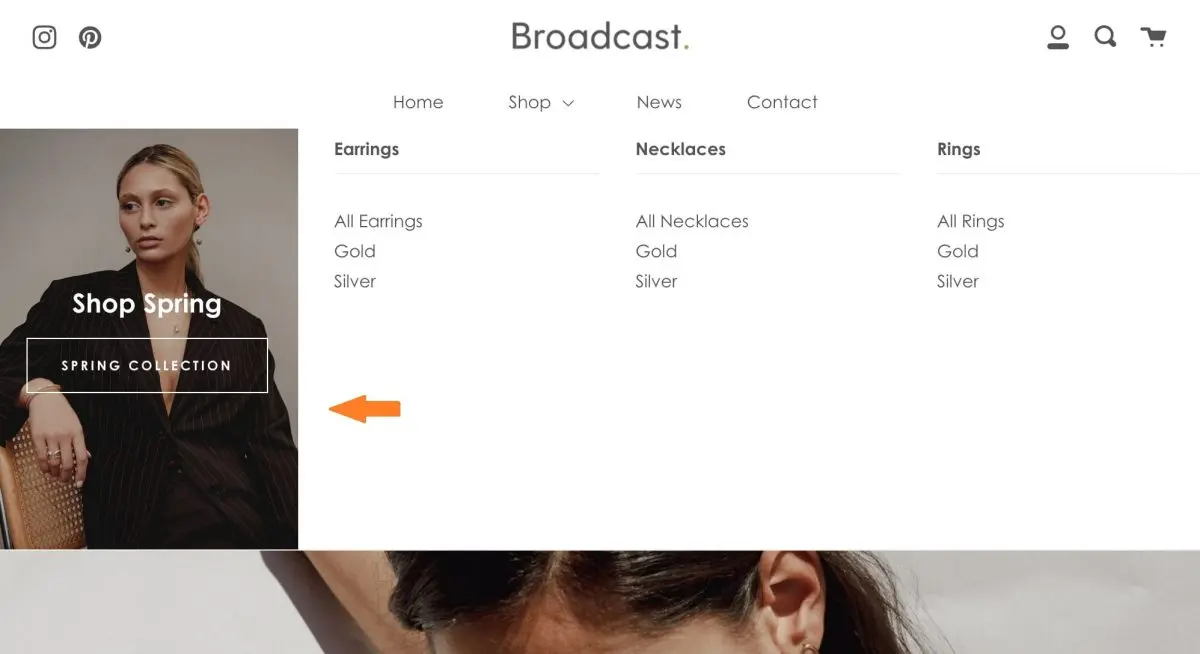
Now, the images should show up as part of your Shopify mega menu.
Option #2: Use code
The second way you can try to add images to Shopify menu is by using code. Shopify is built on the Liquid template language. Therefore, you can customize anything on your online store using this language.
So, if you or someone you know is IT savvy, you can try using the Shopify navigation menu code below to add images to your Shopify menu.
This solution is entirely free and not too complicated if you know some coding basics.
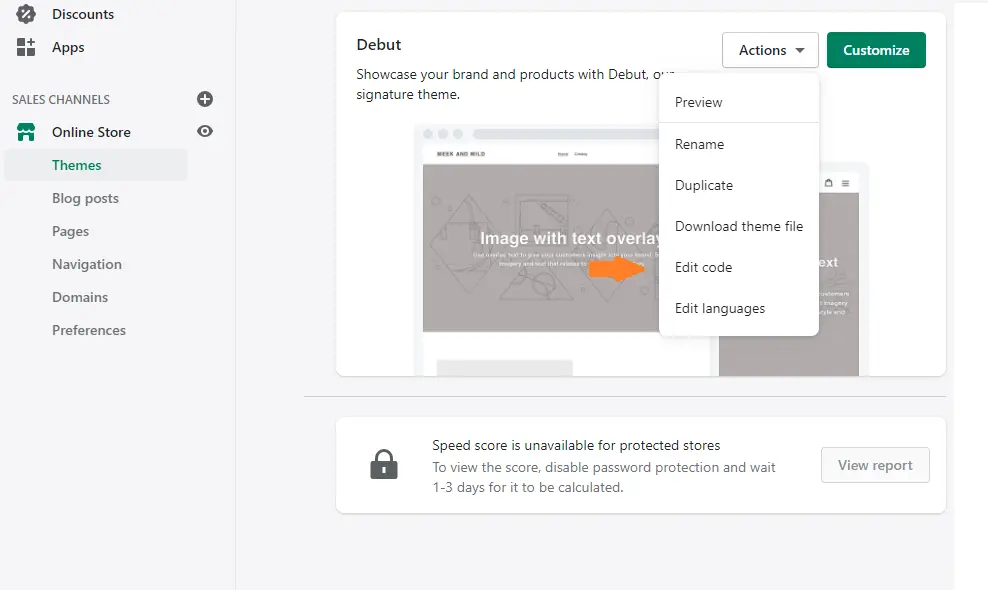
Note: If you make changes to the code, you cannot revert. Therefore, we recommend that you clone your theme first and work on the copy. That way, you can go back to the previous version if something is not functioning properly. To do so, go to Online Store > Themes > Actions > Duplicate / Clone.

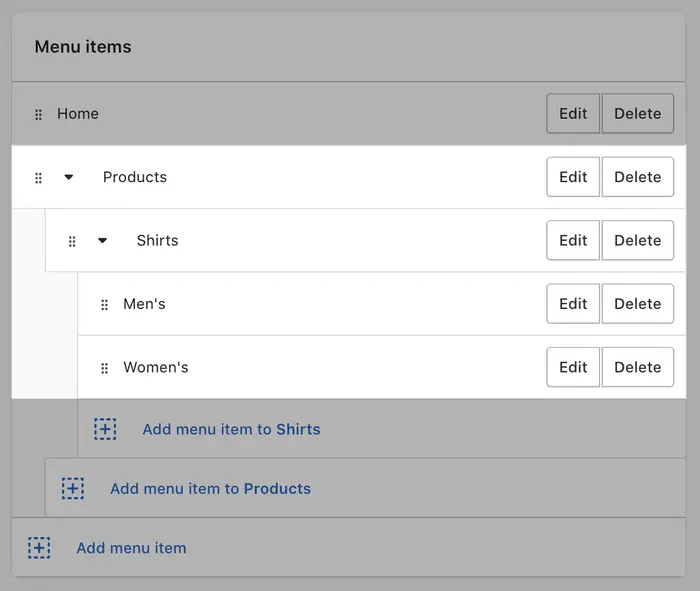
Define Shopify Mega Menu Structure
To create a Shopify mega menu with images, you first need to define your store menu structure. To do this, create a drop-down list from the main menu.
You need to set up a three-level structure to use the mega menu in Shopify properly. The following instructions will show you how:
- From the Shopify dashboard, go to Online Store > Navigation.
- Select a menu.
- Select Add menu item (to ...).
4. Enter the name of the new Shopify menu item. Then click on the 'Link field' to link to a collection or product.
5. Click on the 'Save menu' button.
Edit the 'header.liquid' File
- From the Shopify dashboard, go to Online Store > Themes > Actions > Edit Code.
2. Then, in the 'Section' directory, open the header.liquid file.
3. Next, scroll to the bottom, copy this code next to ']' and click 'Save'.
,
'blocks': [
{
'type': 'logo_image',
'name': 'Mega logo',
'settings': [
{
'type': 'checkbox',
'id': 'menu_enable',
'label': 'Enable this section',
'default': true
},
{
'type': 'image_picker',
'id': 'image',
'label': 'Image'
},
{
'type': 'text',
'id': 'mega_link',
'label': 'Select menu',
'default': '1'
},
{
'type': 'url',
'id': 'link',
'label': 'Main Link'
},
{
'type': 'text',
'id': 'title',
'label': 'Title'
},
{
'type': 'text',
'id': 'subtitle',
'label': 'Sub title'
}
]
}
]
Edit the 'site-nav.liquid' File
- First, in the Snippets directory, open the 'site-nav.liquid' file.
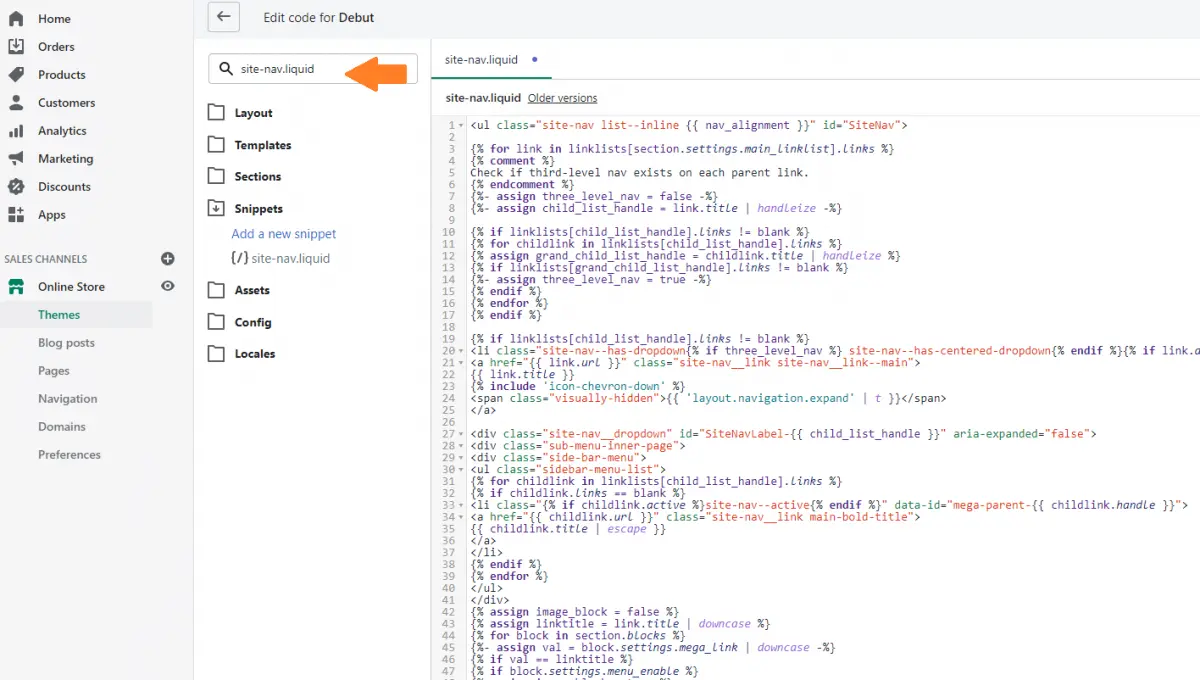
2. Then replace all the old code with this one and click 'Save'.
<ul class='site-nav list--inline {{ nav_alignment }}' id='SiteNav'>
{% for link in linklists[section.settings.main_linklist].links %}
{% comment %}
Check if third-level nav exists on each parent link.
{% endcomment %}
{%- assign three_level_nav = false -%}
{%- assign child_list_handle = link.title | handleize -%}
{% if linklists[child_list_handle].links != blank %}
{% for childlink in linklists[child_list_handle].links %}
{% assign grand_child_list_handle = childlink.title | handleize %}
{% if linklists[grand_child_list_handle].links != blank %}
{%- assign three_level_nav = true -%}
{% endif %}
{% endfor %}
{% endif %}
{% if linklists[child_list_handle].links != blank %}
<li class='site-nav--has-dropdown{% if three_level_nav %} site-nav--has-centered-dropdown{% endif %}{% if link.active %} site-nav--active{% endif %}' aria-has-popup='true' aria-controls='SiteNavLabel-{{ child_list_handle }}'>
<a href='{{ link.url }}' class='site-nav__link site-nav__link--main'>
{{ link.title }}
{% include 'icon-chevron-down' %}
<span class='visually-hidden'>{{ 'layout.navigation.expand' | t }}</span>
</a>
<div class='site-nav__dropdown' id='SiteNavLabel-{{ child_list_handle }}' aria-expanded='false'>
<div class='sub-menu-inner-page'>
<div class='side-bar-menu'>
<ul class='sidebar-menu-list'>
{% for childlink in linklists[child_list_handle].links %}
{% if childlink.links == blank %}
<li class='{% if childlink.active %}site-nav--active{% endif %}' data-id='mega-parent-{{ childlink.handle }}'>
<a href='{{ childlink.url }}' class='site-nav__link main-bold-title'>
{{ childlink.title | escape }}
</a>
</li>
{% endif %}
{% endfor %}
</ul>
</div>
{% assign image_block = false %}
{% assign linktitle = link.title | downcase %}
{% for block in section.blocks %}
{%- assign val = block.settings.mega_link | downcase -%}
{% if val == linktitle %}
{% if block.settings.menu_enable %}
{% assign image_block = true %}
{% endif %}
{% endif %}
{% endfor %}
<div class='middle-menu {% if image_block == false %}middle-menu-full{% endif %}'>
{% for childlink in linklists[child_list_handle].links %}
{% if childlink.links != blank %}
{% for grandlink in childlink.links %}
{% assign valitem = forloop.length %}
{% endfor %}
<ul class='middle-menu-list {% if valitem >= 15 %}col-2{%endif%}'>
<p class='' data-id='mega-parent-{{ childlink.handle }}'>
<span class='site-nav__link main-bold-title'>
{{ childlink.title | escape }}
</span>
</p>
{% assign item_count = 1 %}
{% for grandlink in childlink.links %}
<li class='site-nav__childlist-item'>
<a href='{{ grandlink.url }}' class='site-nav__child-link' >
{{ grandlink.title }}
</a>
</li>
{% endfor %}
</ul>
{% endif %}
{% endfor %}
</div>
{% if image_block == true %}
<div class='image-section mega-list mega-list-logo'>
{% for block in section.blocks %}
{%- assign val = block.settings.mega_link | handleize -%}
{% if val == child_list_handle %}
{% if block.settings.menu_enable %}
{% unless block.settings.link == blank %}<a href='{{ block.settings.link }}'>{% endunless %}
<div class='img-box'>
<img src='{{ block.settings.image | img_url: '500x500' }}'>
<div class='text__section'>
{% unless block.settings.title == blank %}<h3>{{ block.settings.title }}</h3>{% endunless %}
{% unless block.settings.subtitle == blank %}<p>{{ block.settings.subtitle }}</p>{% endunless %}
</div>
</div>
{% unless block.settings.link == blank %}</a>{% endunless %}
{% endif %}
{% endif %}
{% endfor %}
</div>
{% endif %}
</div>
</div>
</li>
{% else %}
<li {% if link.active %}class='site-nav--active'{% endif %}>
<a href='{{ link.url }}' class='site-nav__link site-nav__link--main'>{{ link.title }}</a>
</li>
{% endif %}
{% endfor %}
</ul>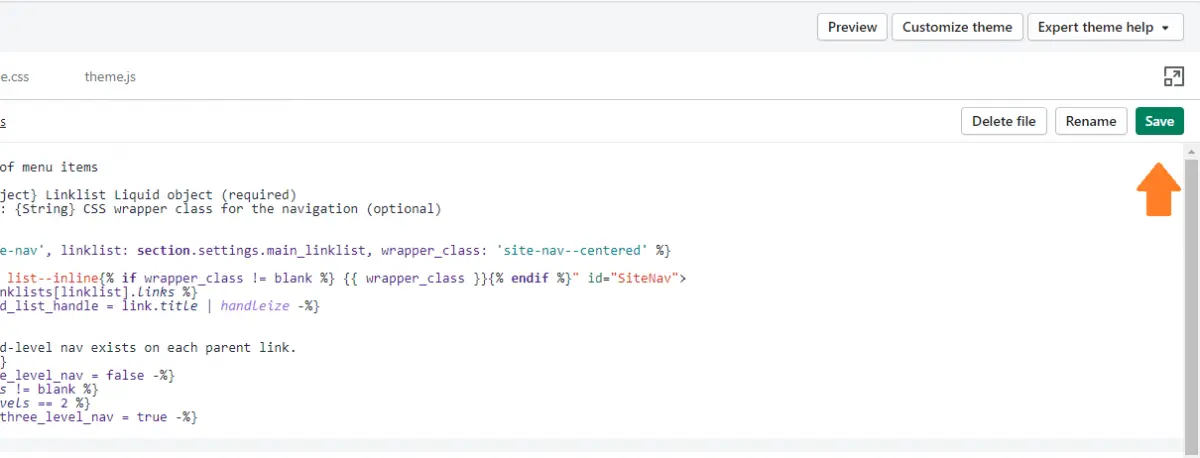
Add CSS and JavaScript Code
- In the 'Assets' directory, open the 'theme.scss.liquid' file. Afther that, copy the following code at the end of the file:
.site-nav, .site-nav--has-dropdown, .site-header {
position: unset;
}
.site-nav__dropdown {
width: 100%;
left: 0;
right: 0;
background-color: #fff;
}
.site-nav__childlist {
display: block;
}
.site-nav__dropdown .side-bar-menu{
float: left;
text-align: left;
padding-top: 25px;
padding-right: 30px;
padding-bottom: 25px;
width: 150px;
padding-right: 10px;
}
.site-nav__dropdown .side-bar-menu .sidebar-menu-list li a{
text-transform: uppercase;
font-weight: bold;
padding: 0 20px 10px 0;
font-size: 13px;
}
.site-nav__dropdown .middle-menu{
float: left;
padding-top: 25px;
padding-bottom: 25px;
padding-left: 10px;
padding-right: 10px;
width: calc(100% - 370px);
position: relative;
display: flex;
}
.site-nav__dropdown .middle-menu .middle-menu-list{
width: 20%;
float: left;
text-align: left;
position: relative;
padding-top: 27px;
}
.site-nav__dropdown .middle-menu .middle-menu-list p{
position: absolute;
top: 0;
margin-bottom: 0;
width: 100%;
}
.site-nav__dropdown .middle-menu .middle-menu-list span.main-bold-title{
font-size: 13px;
font-weight: bold;
padding: 0 20px 10px 0px;
text-transform: uppercase;
display: block;
color: #000;
}
.site-nav__dropdown .middle-menu .middle-menu-list a.site-nav__child-link{
text-transform: capitalize;
padding: 0 20px 10px 0px;
font-size: 13px;
font-weight: 300;
}
.site-nav__dropdown .image-section{
float: left;
padding-top: 25px;
padding-bottom: 25px;
position: relative;
width: 220px;
height: 100%;
}
.site-nav__dropdown .image-section .img-box{
position: relative;
}
.site-nav__dropdown .image-section .text__section{
position: absolute;
top: 50%;
left: 50%;
width: 90%;
transform: translate(-50%,-50%);
color: white;
}
.site-nav__dropdown .image-section .text__section h3{
font-size: 14px;
text-transform: uppercase;
color: white;
margin-bottom: 5px;
}
.site-nav__dropdown .image-section .text__section p{
font-size: 13px;
text-transform: inherit;
color: white;
font-weight: normal;
}
.site-nav__dropdown .sub-menu-inner-page{
max-width: $width-site;
display: block;
margin: 0 auto;
padding: 0 55px;
overflow: auto;
}
.site-header .grid--table>.grid__item {
vertical-align: bottom;
}
.site-nav {
margin: 0;
}
.site-nav > li {
padding: 20px 0;
}
.site-nav--active-dropdown .site-nav__dropdown {
display: block !important;
}
.img-box .text__section h3,
.img-box .text__section p {
text-align: center;
}
.mega-list-logo a {
padding: 0;
}
.site-nav--has-dropdown:hover .site-nav__dropdown{ display: block !important; }
2. Then, open the 'theme.js' file from the 'Assets' directory.
3. Next, find 'theme.Header' in the code.
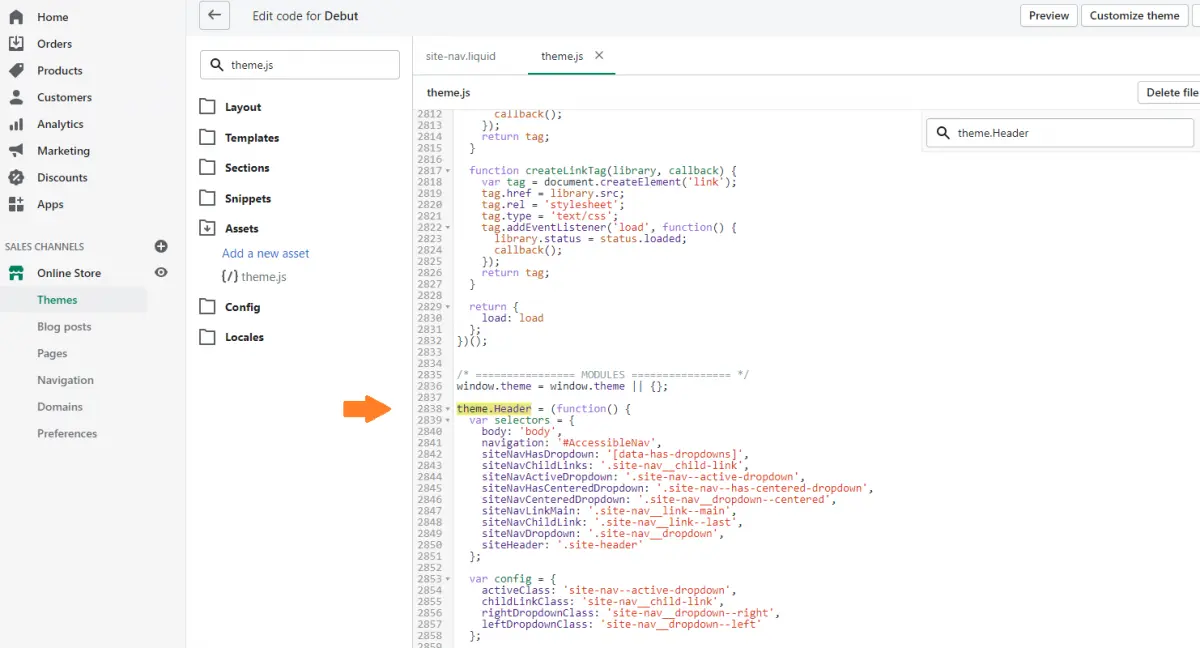
4. Finally, replace 'function init()' with the following code, then press 'Save'.
function init() {
cacheSelectors();
$(selectors.siteNavHasDropdown).on('mouseenter', function() {
var $el = $(this);
showDropdown($el);
});
$('.site-nav__dropdown').on('mouseenter', function() {
$(this).show();
$(this).parent().addClass(config.activeClass);
});
$(selectors.siteNavHasDropdown).on('mouseleave', function() {
hideDropdown(cache.$activeDropdown);
});
$('.site-nav__dropdown').on('mouseleave', function() {
hideDropdown(cache.$activeDropdown);
$(this).hide();
});
cache.$subMenuLinks.on('click.siteNav', function(evt) {
// Prevent click on body from firing instead of link
evt.stopImmediatePropagation();
});
}
function showDropdown($el) {
$el.addClass(config.activeClass);
var headerHeight = $('#shopify-section-header').outerHeight(),
headerNav = $el.find('.site-nav__dropdown').outerHeight();
$el.find('.site-nav__dropdown').css({top: +headerHeight+ 'px'});
cache.$activeDropdown = $el;
}
function hideDropdown($el) {
// remove aria on open dropdown
$el.removeClass(config.activeClass);
// reset active dropdown
cache.$activeDropdown = $(selectors.siteNavActiveDropdown);
$(selectors.body).off('click.siteNav');
$(window).off('keyup.siteNav');
}
Add Images for Your Shopify Mega Menu
- From the Shopify dashboard, go to Online Store > Themes > Customize.
- Click 'Header' on the left side of the screen. After that, scroll down to the bottom and click on 'Add mega logo'.
- Create a Shopify drop-down menu with images by selecting one in the 'Featured Image' setting. In addition, you can associate the image with a collection, product, etc., by selecting a link in the 'Slides link' setting.
- Finally, save your changes to make sure you do not lose all of your progress.
Option #3: Use a Shopify Mega-menu App
In the third way, you can use any Shopify mega-menu app to set up a Shopify menu with images easily. There are many options on the Shopify app store.
Among them, we will recommend some of the best menu apps for Shopify to help you make decisions faster.
Buddha Mega Menu Navigation
- Pricing: $9.95/month (free plan available)
- Rating: 4.8/5 (1003 reviews)
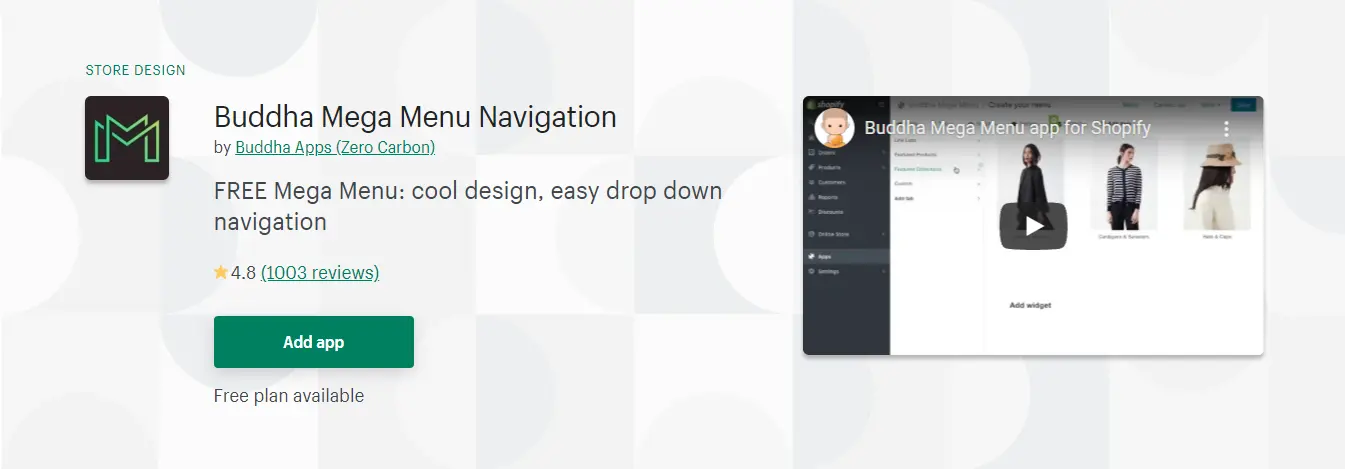
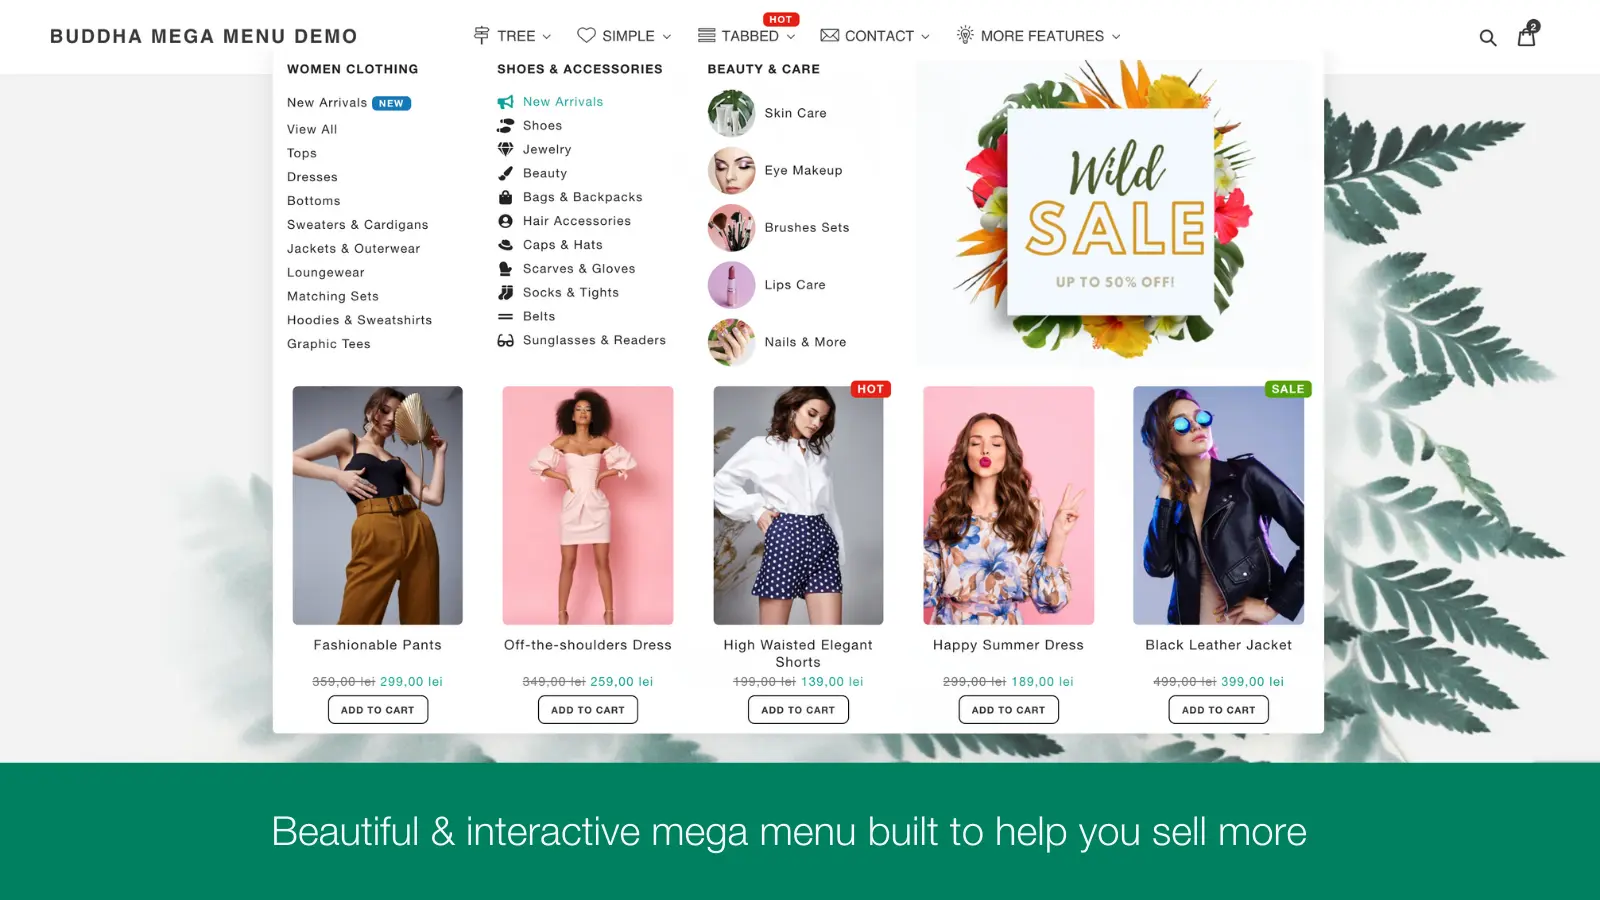
Buddha Mega Menu makes it easy to design the menu in seconds.
This is one of those rare apps that does not require menu creation in the Shopify Navigation menu and coding experience. It is also one of the simplest Shopify mega-menu apps and is compatible with almost all Shopify themes.
With this app, you can display your products not only with images but some eye-catching things like countdown sales, too.
Their support system is pretty impressive, but sometimes they might not be as responsive as you would like.
Buddha Mega Menu has two plans, including a free one. The other one costs $9.95/month.
Mega Menu
- Pricing: from $7.90/month (free plan available)
- Rating: 4.8/5 (354 reviews)

Mega Menu is a highly customizable, fully responsive app for your Shopify store.
With its intelligent installation method and user-friendly interface, this app can help you create your first Shopify mega menu with images within minutes.
It has some pre-customizable styles for some popular themes. It is also compatible with almost all Shopify themes and supports both horizontal and vertical menus.
Besides adding images to the menu, you can also add icons or badges and highlight specific items. And you can contact their excellent support system if you have any questions.
Mega Menu has three plans, including a free one. The other two cost $7.90 and $14.90 per month.
Meteor Mega Menu
- Pricing: from $8/month (free plan available)
- Rating: 4.6/5 (210 reviews)
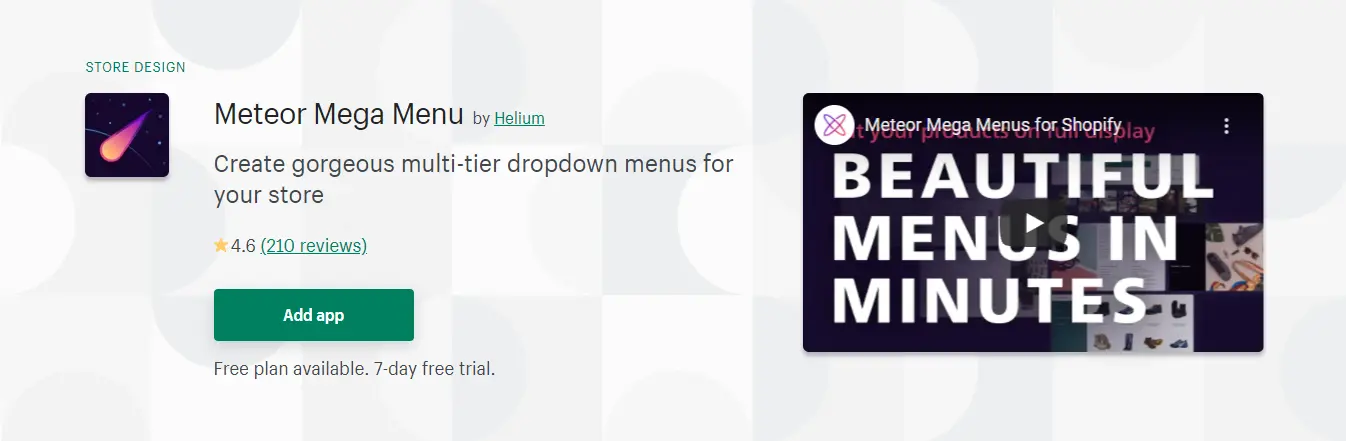
Meteor Mega Menu has several thoughtfully pre-designed templates to organize your products, collections, and pages on the menu.
You can use these templates to quickly create a Shopify menu with a professional appearance within minutes.
It allows you to customize the menu with photos, product information, etc. You can also add images for every product on your menu.
The app is also effortless to use. You just need to install it and choose a theme. And it will do the rest.
Their support system operates 24/7 via chat or email, so you can reach them immediately whenever you get stuck.
The app has three plans, including a free one. The other two are priced at $8 and $14 per month.
Option #4: Buy a Designed Premium Theme
If you want your Shopify store to be unique, not just with some images on the menu, you can consider purchasing an exclusive theme design.
With premium themes from any agency, you can easily set up a Shopify menu with images by using the Shopify Navigation menu.
We present one of the best agencies out there. They are Maestrooo. For more detailed information, it is best to contact them directly. Their support system is astounding. You will get a response back within an hour.
Option #5: Hire a Professional to Set up Shopify Menu with Images for You
Last but not least, if you want something extra special on your Shopify menu and all the solutions above seem not to make it happen, you can hire an expert to help.
There will always be one professional ready to help you achieve your dream store.
The best thing is that this is the simplest thing to do. All you need to do is to contact an expert and let them help you.
Now, you may be wondering how to find an expert to solve this? No need to worry! Shopify offers excellent support, including its own trusted expert service. From marketing to setting up an online shop, whatever you need, someone is there to help.
As a result, you can easily hire an expert and get the job done in two ways:
- Search through all the services offered by experts on the web and request a live quote.
- Create a job yourself, describe what you need precisely, and get recommendations from referred experts.
You can visit experts.shopify.com for more information.
Shopify Menu With Images: FAQs
How do I add an image menu in Shopify?
To add an image menu in Shopify, follow these steps:
- From your Shopify admin dashboard, go to Online store > Navigation.
- Click on the "Add menu" button or select an existing menu to edit.
- In the "Menu items" section, click on "Add menu item."
- Enter a name for the menu item and then click on the "Add link" button.
- In the "Link" field, enter the URL for the page that you want the menu item to link to.
- Click on the "Select image" button and upload the image you want to use.
- Adjust the position and size of the image as needed using the options provided.
- Click on "Save menu" to add the image menu to your Shopify store.
How do I add icons to my menu items in Shopify?
To add icons to your menu items in Shopify, you can use a third-party app like Iconify or Font Awesome. Here are the steps to follow:
- Install the app from the Shopify App Store and follow the setup instructions.
- Go to your Shopify admin dashboard and navigate to the menu you want to add icons to.
- Edit the menu item you want to add an icon to.
- In the "Link" field, add the class name for the icon you want to use.
- Save your changes and repeat the process for other menu items as needed.
How do I customize my Shopify menu?
To customize your Shopify menu, follow these steps:
- From your Shopify admin dashboard, go to Online store > Navigation.
- Select the menu you want to customize or create a new menu.
- Drag and drop menu items to reorder them.
- Edit menu items by clicking on them and changing the name, link, or other details.
- Create submenus by dragging menu items to the right to create a nested menu.
- Add images or icons to menu items as described above.
- Customize the appearance of your menu using the options provided, such as font style, color, and background color.
- Save your changes and preview your menu to see how it looks on your store.
Final Words
Just remember that the first impression of your online store is decisive. If your customers see nothing interesting at a glance, they will not take any further action.
In this article, we showed you 5 different ways to set up a Shopify menu with images. But remember, an unusual menu is not a guaranteed way to promote your business.
What you are selling is more important. This is why we recommend you do product research before anything else.
Hopefully, this article is valuable to you and will help your business grow. Good luck!

![]()