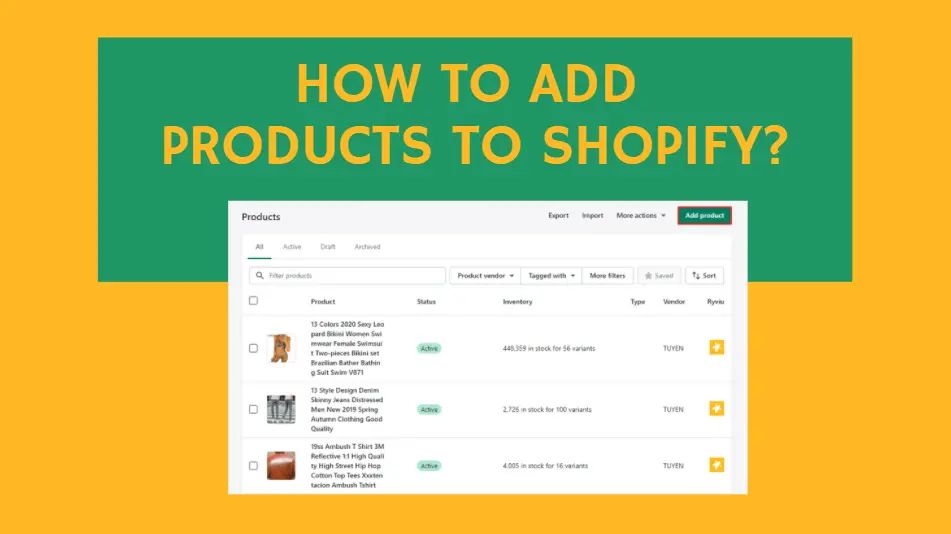
How To Add Products To Shopify?
Shopify is an eCommerce platform that allows you to easily get success with an online business. Today, in order to make business more efficient and convenient, many store owners choose Shopify to sell goods. The most asked question when people use Shopify for the first time is how to add products to Shopify. Let's find out through the following step-by-step instructions!
Step 1: Log in to Shopify
If you don't have a Shopify account before, create a new one. Registration is very simple, you just need to fill in basic personal information about yourself and your store.

Limited offer: You now can register Shopify with only $1 each month for the first 3 months.
Step 2: Adding products to Shopify
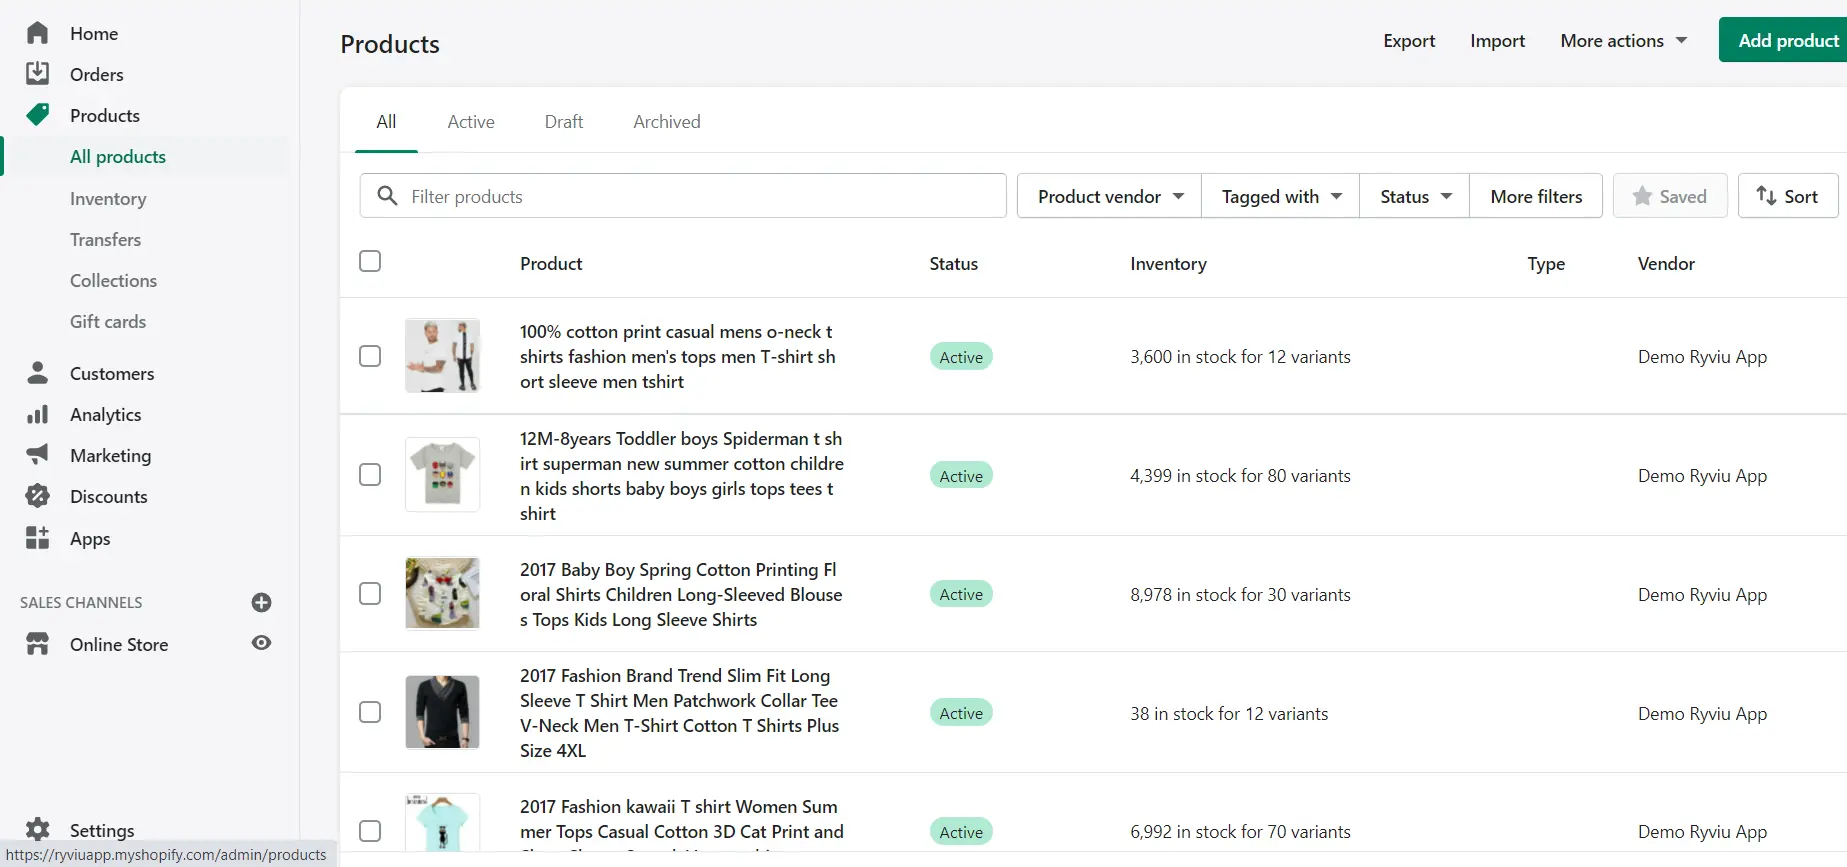
1. Opening the ADD PRODUCTS section
After entering the main interface: Home, select the Products in the left column of the screen, then select All products.
Click on the green Add product button at the top right of the screen. Now you are ready to start adding product to Shopify.
2. Adding the basic information for the product: title and description
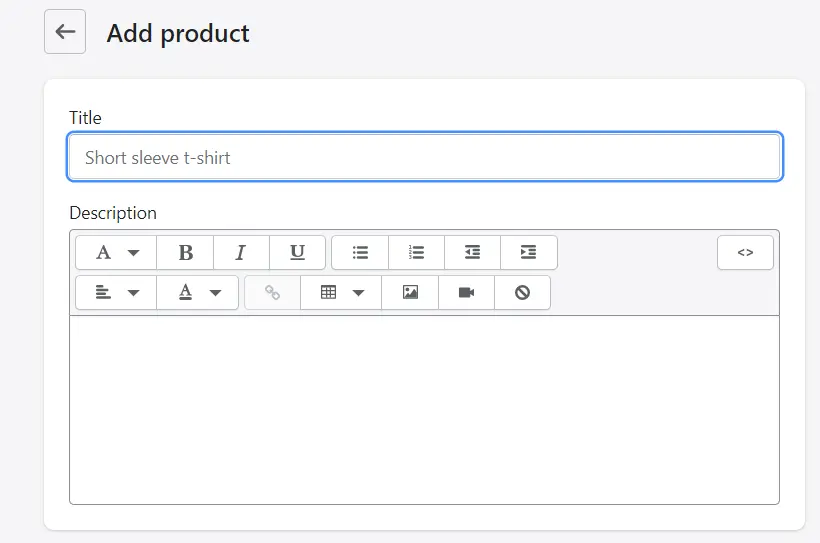
The title is very important because it is the first thing that shows about your product. Remember to choose a short, easy-to-understand title so that customers can have the most comprehensive understanding of the product.
In the description, you should include details about the product because it will convince customers to buy your product. It also supports SEO, making your products more accessible to target customers.
3. Uploading images and videos of the product
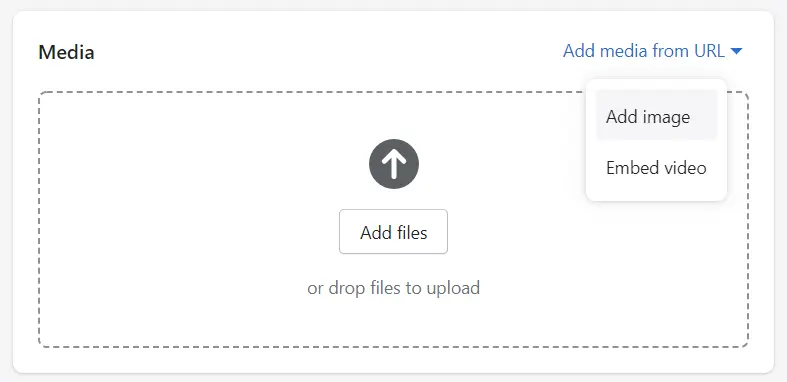
For easier product identification, images are definitely indispensable. You can import images, videos, or even product URL links to help customers better understand the product. Note that high-quality, clear product images attract customers much more than low-quality images.
4. Entering the price
- Enter the price you want to sell in the Price box. If the product you want to sell is on sale, Price will be the selling price, and Compare at price will be the original selling price (undiscounted).
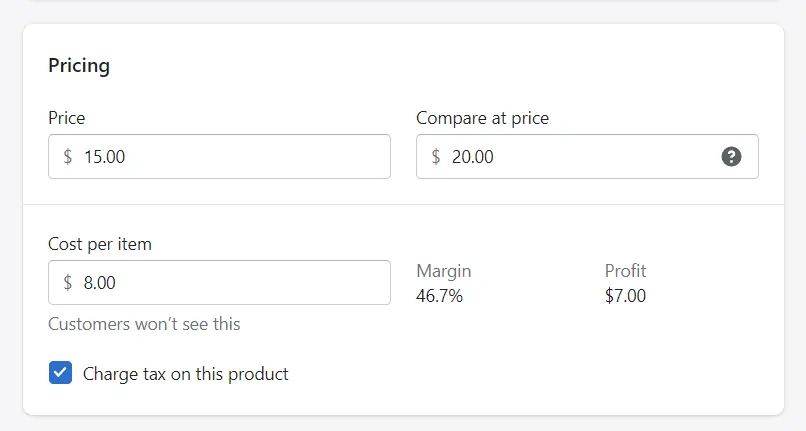
Example: Your shirt price is $15, compare at price is $20, so on the web will display that product on sale for 5 dollars, from 20 dollars to 15 dollars
- Cost per item is a separate display for the seller to enter the cost price of the product (customers will not see this part) if you want to calculate profit, collect data, and sale revenue.
- Choose charge tax if your product is taxable.
5. Adjusting the inventory
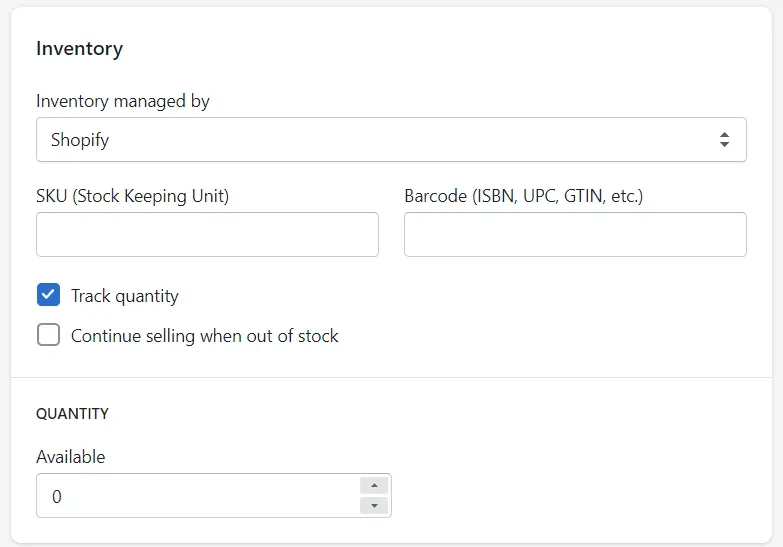
- In the inventory by section, you have 2 options: Shopify and Oberlo. Choose Shopify if you manage inventory, Oberlo if you have the third party inventory app. However, Oberlo has migrated to DSers, so maybe there is some difference in this step.
- Fill in the SKU (Stock keeping unit) box if you use it. You can attach items with different item codes for easy product inventory. This code can be found on the manufacturer's site or from the supplier.
- How to add barcodes to products?
In the Barcode box next to the SKU box is an optional item. On some websites like Amazon or Google, barcodes are a required item to be able to trade products.
You can use the available Shopify barcode generator from the supplier/manufacturer or create a new barcode if the product is created by yours. The instruction below is how to create your own barcode:
First, you can use 2 types of printers supported by Shopify: Dymo Labelwriter 450 or Dymo Labelwriter Wireless Printer (or purchase Avery standard labels to use with a regular computer printer).
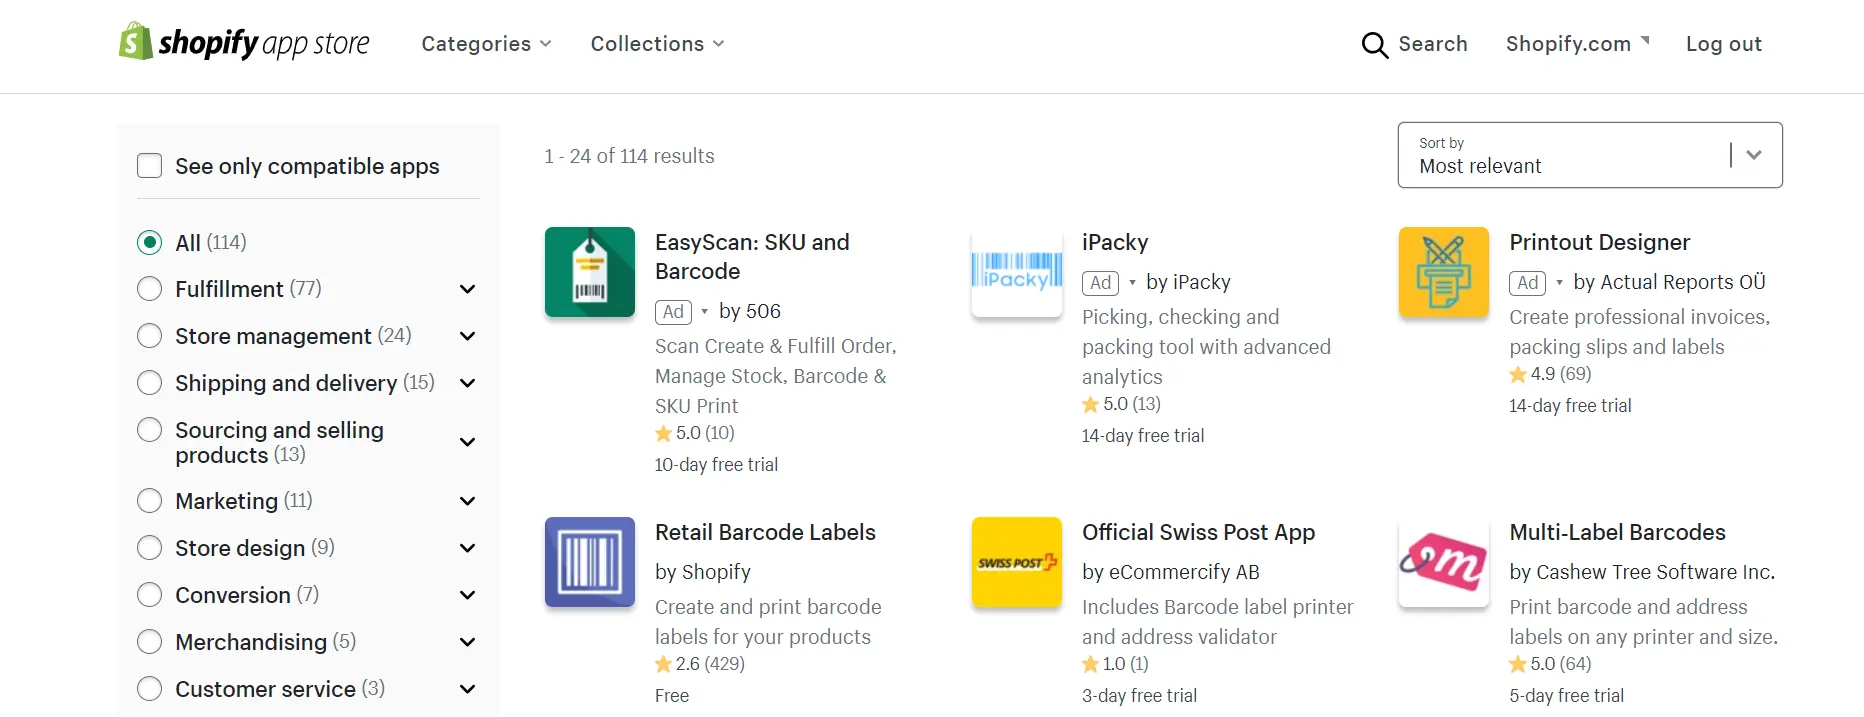
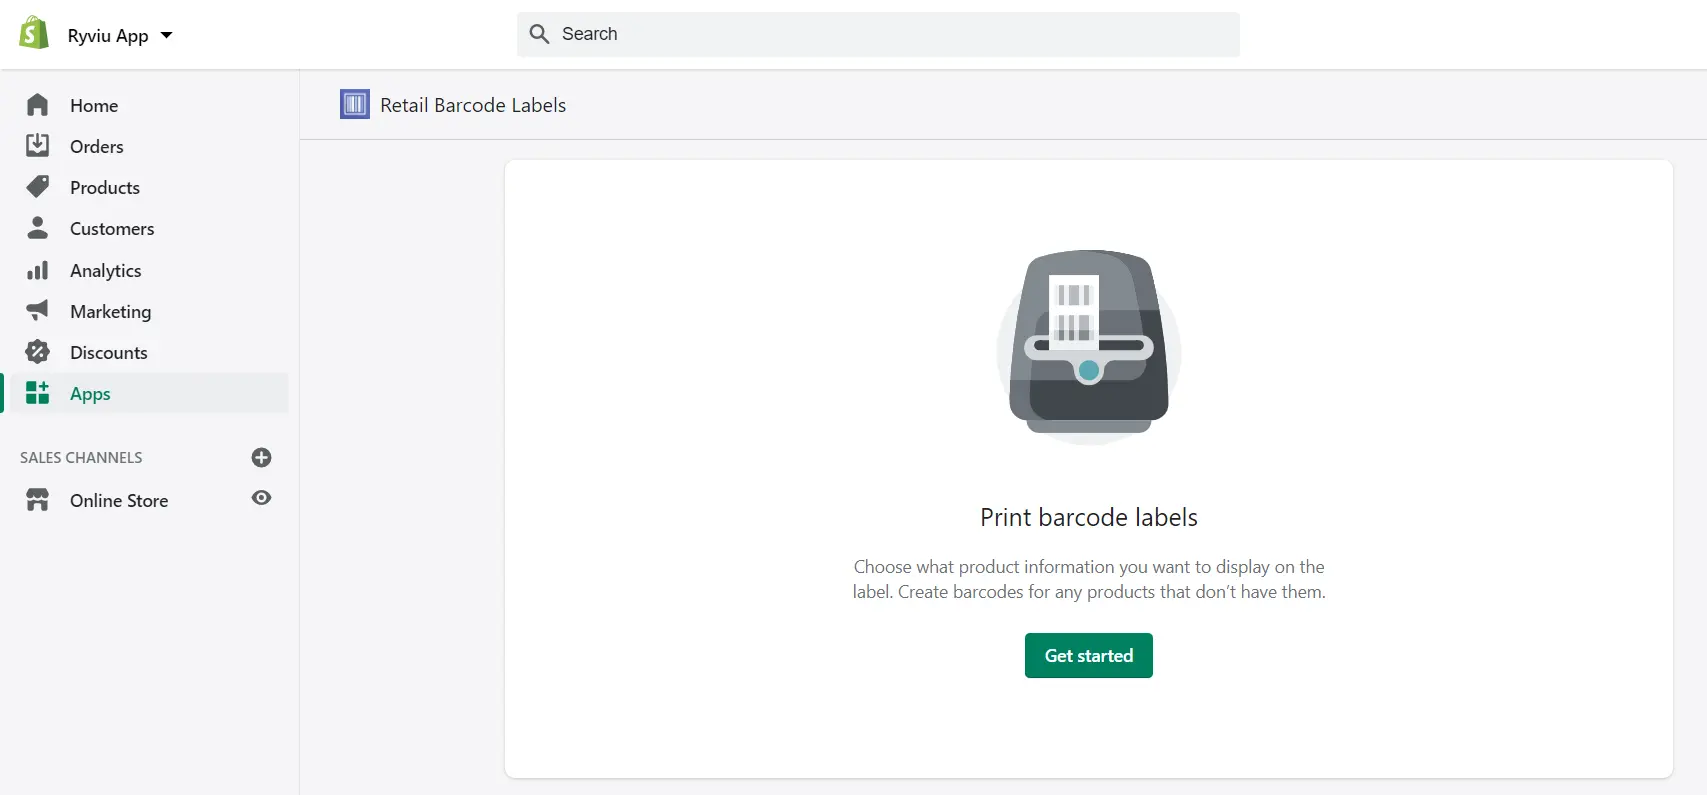
Second, download the Retail Barcode Labels on the Shopify app store. Now, it's showing up in the apps section on the home page.
Third, select Get started, enter the necessary information to create a separate barcode for the product. Enter the barcode at the Barcode (ISBN, UPC, GTIN, etc.) box to move to the next step of how to add product to Shopify.
- Select track quantity if your product is limited in stock. Besides, if you want to continue selling when out of stock while waiting for the goods to arrive, please select the box to continue selling when out of stock right below.
Enter the quantity of your item in the Quantity section. You can also add multiple outlets and enter a certain number of products in each.
6. Delivery
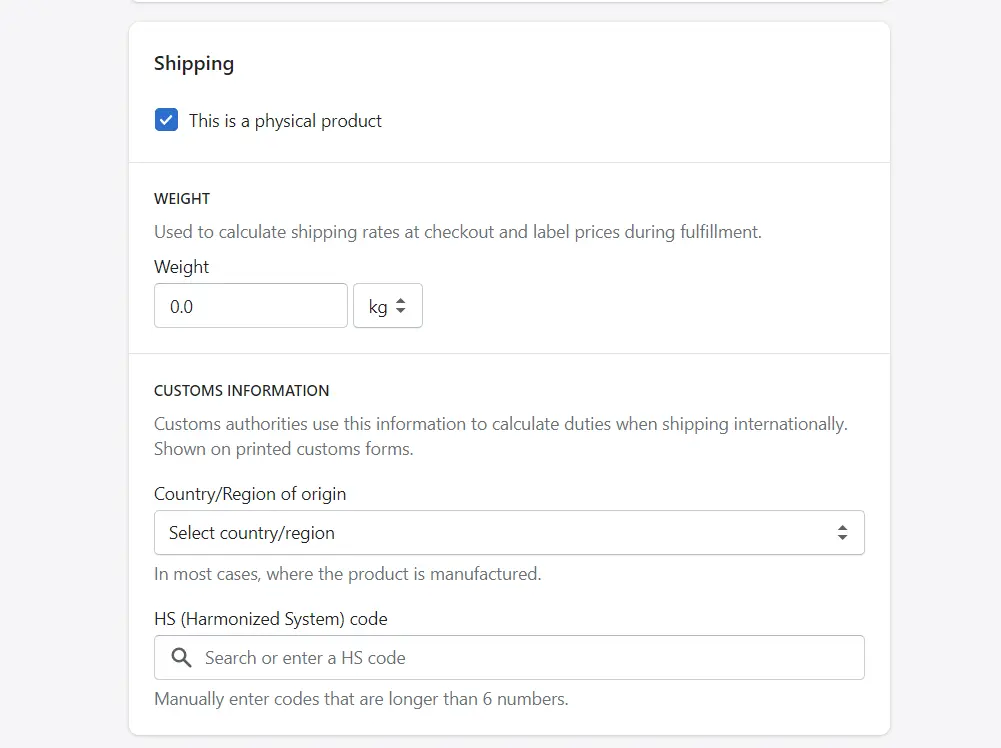
If your product is a service or a digital product, uncheck this box. If it is a physical product, check this box and enter some necessary information.
Enter the correct weight of the product to calculate the shipping price. Choose the region of origin to be able to charge specific fees for international shipping. In the HS (Harmonized System) code section, if you do not know the product code, you can instead enter the product name to find the code.
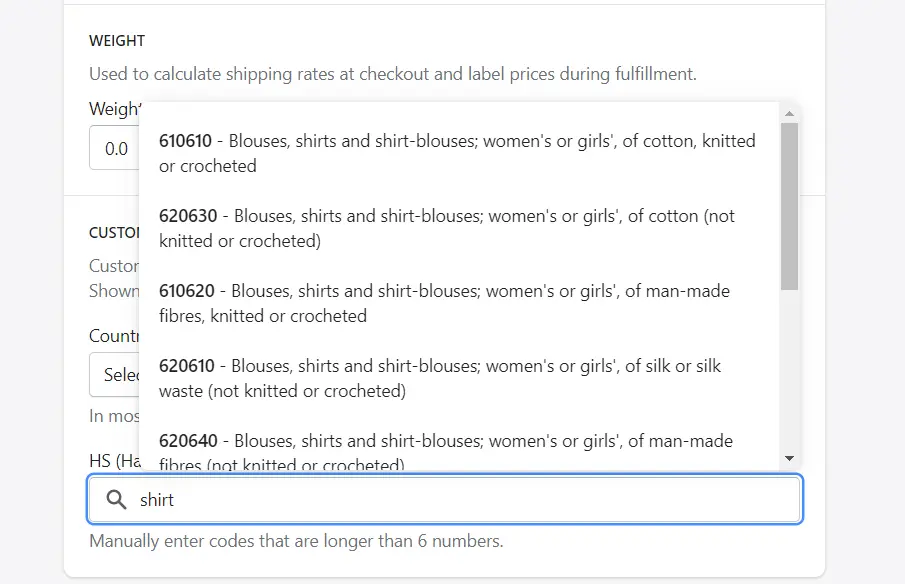
For example, the product you sell is a women's shirt, enter "Shirt" in the box then select the appropriate code (610610: Blouses, shirts, and shirt-blouses; women’s or girls', of cotton, knitted or crocheted).
7. Choosing product categories
Select this if your product has multiple options. If there is only 1 sample, please ignore the checkbox.
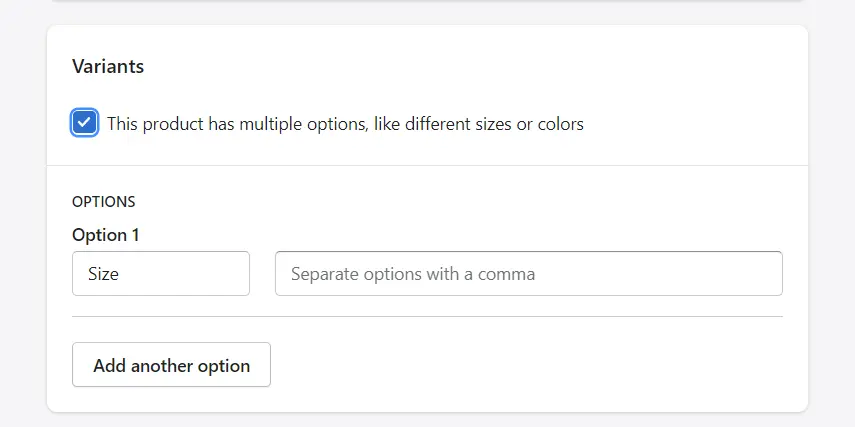
The options you can adjust include: size, color, material, style, title. For each item, please enter the product attributes. Select Add another option to split into more categories.
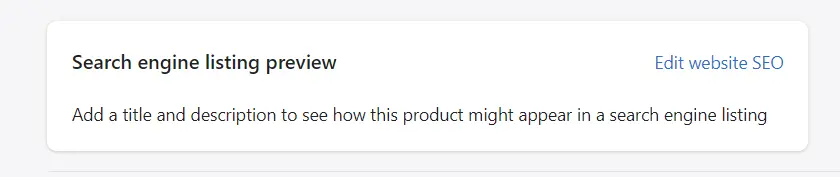
8. Search engine listing preview
This will show a preview of your product in search. Please check again because this will be what customers see and decide to choose your product or not. If there are any mistakes, go back to the top and correct them.
9. Organization
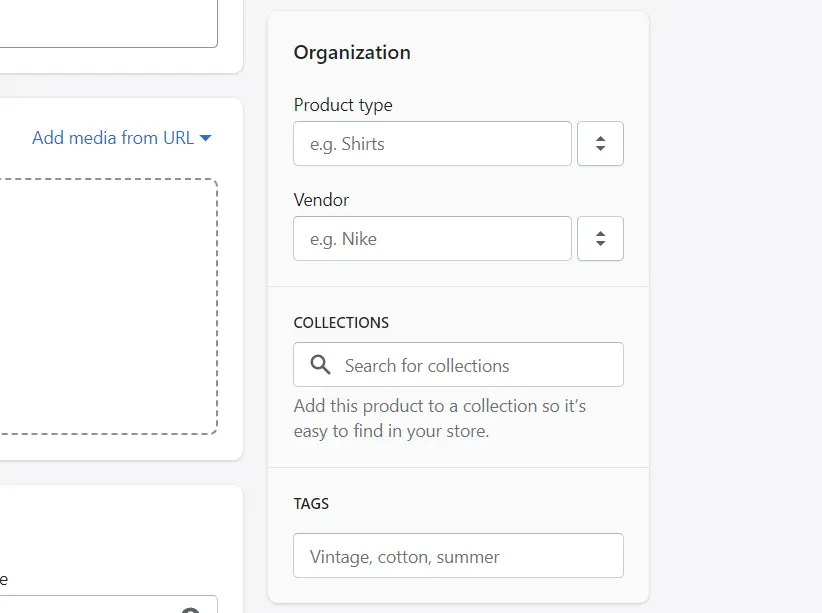
- Scroll to the top of the page, on the far right, continue to adjust the organization (for now ignoring product status).
- Each product can only belong to 1 product type. It will automatically be grouped into categories, can create new or select existing product types.
- In the Vendor section, enter the brand or company distributing the products (optional).
- You can add products to collections if needed.
- In the Tags section, choose the shortest, most relevant keywords to your product to help customers find your product easier.
10. Product Status
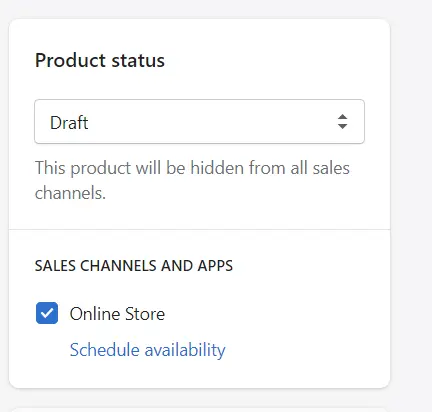
This is almost the last step to complete the tutorial How to add product to Shopify.
If you have completed all the information, select Active, your product is ready to be displayed on the website. If you want to hide something, select the Draft again. You can also adjust the online sales schedule for products (shown for a certain period of time) under Schedule availability.
11. Click Save

Your product has been displayed on the sales page!
FAQs on How To Add Products To Shopify
How do I add a product to my Shopify collection?
Go to Products > Collections in your Shopify admin. Select the collection to which you wish to add products by clicking its name. Search for products in the Products area or click Browse, and then add the products to the collection.
Can you add custom Products to Shopify?
Yes. You can create customizable products by inserting a line of code into your store's backend or using an app. You should refer to our tutorial on set up custom products on Shopify store.
How do I add Products and images to Shopify?
To add products to Shopify, you can follow the steps I mentioned above.
To add product images to Shopify, follow the steps below:
- Go to Products in your Shopify administration.
- Click to the product you want to add images to see product's details page.
- Add an image, a 3D model, or a video using one of the methods listed in the step 3 above.
Conclusion
Above is a detailed guide on how to add products to your Shopify store. Take the steps one by one, it will not be too difficult at first glance. Start building your own business website and achieve success on Shopify!

![]()